|
This is a slight twist on your traditional Ceviche that's usually just lemon juice, fish, and tomatoes. Incorporating the tropical flavors from lime and coconut, this is basically seafood "cooked" by the acid in lime juice. Not only does that leave delicious seafood, but the juice left over afterwards is also full of flavor. No stove or oven required, so this is perfect for a hot summer day! 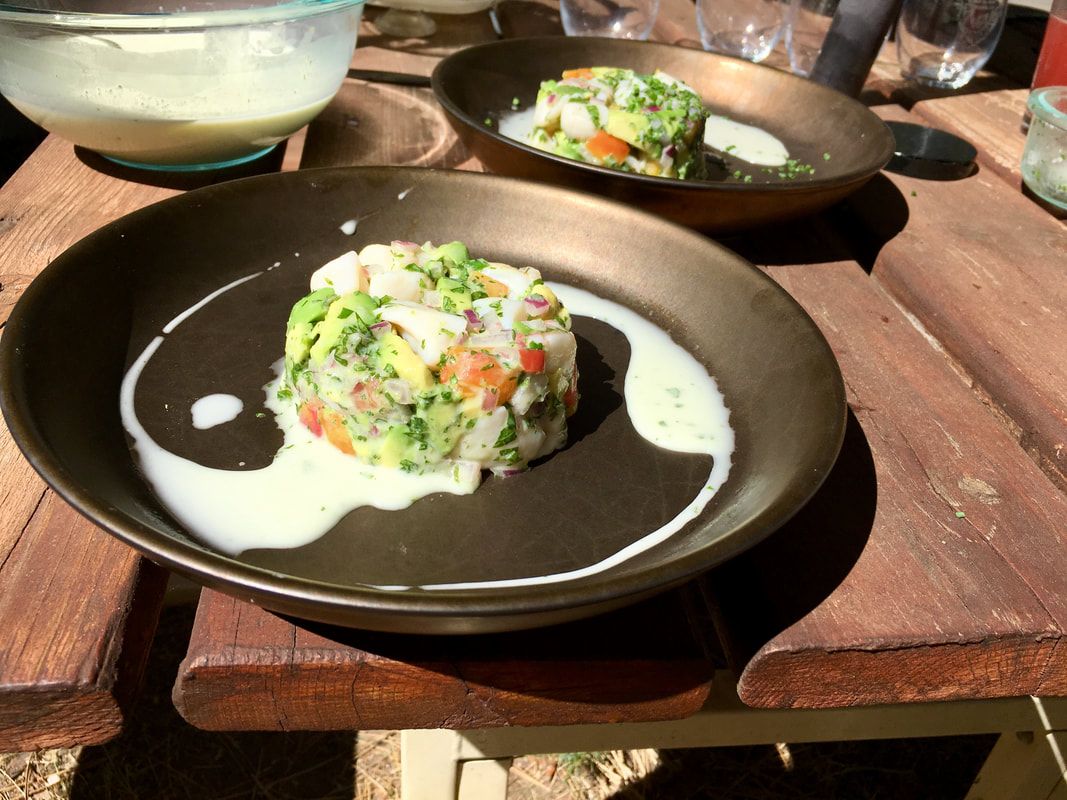 Ingredients:
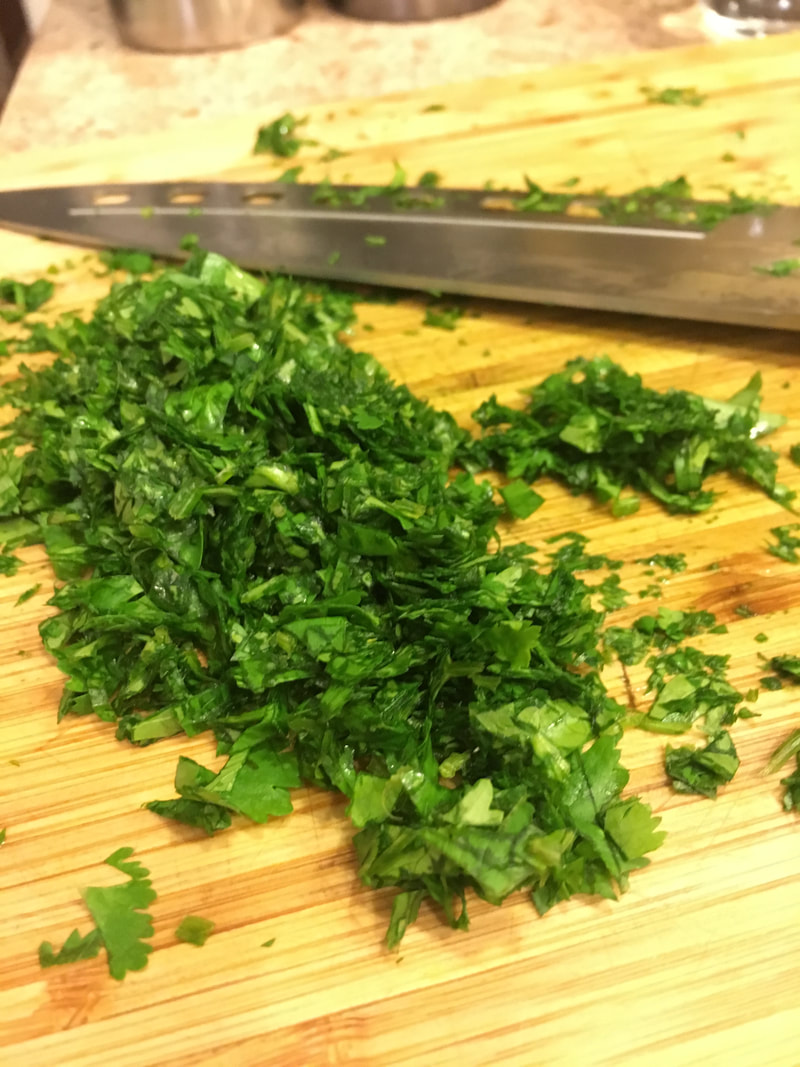
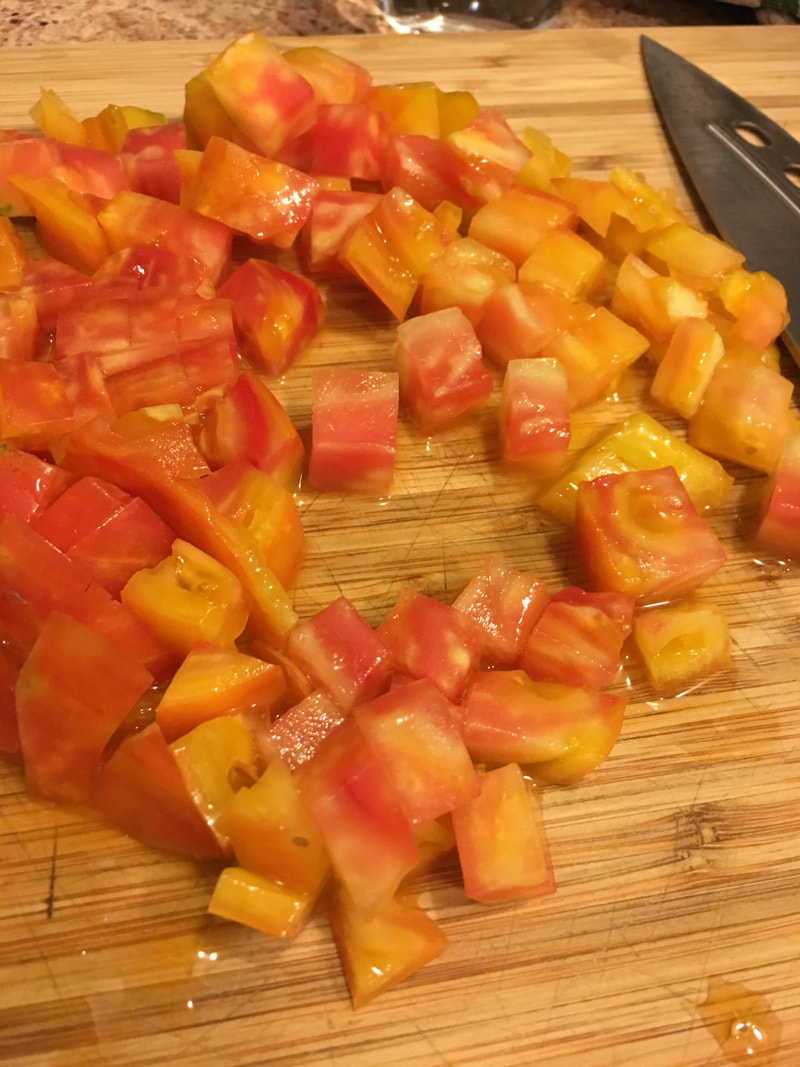
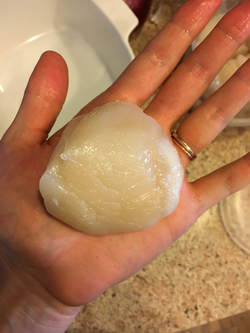
 CHEF TIP: For any high-quality seafood, storing it in the fridge isn't good enough. If you really want to keep it in good shape between when you buy it and when you make this recipe, keep it on ice in the fridge. This keeps it colder than the fridge, but not too cold to where it freezes. 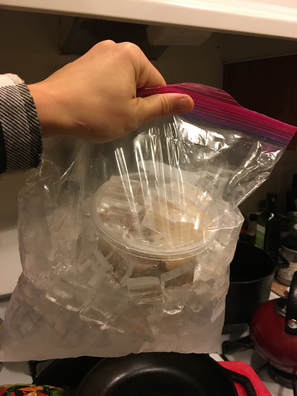 My shrimp and scallops in containers, inside a bag with ice. Start by juicing 8 limes. Sure, you can buy lime juice in one of those lime-shaped squeezy bottles, but trust me, the flavor is completely different and much better from fresh limes. Plus, it only takes a few minutes and costs almost the same. 8 limes should yield about 1 cup of juice. 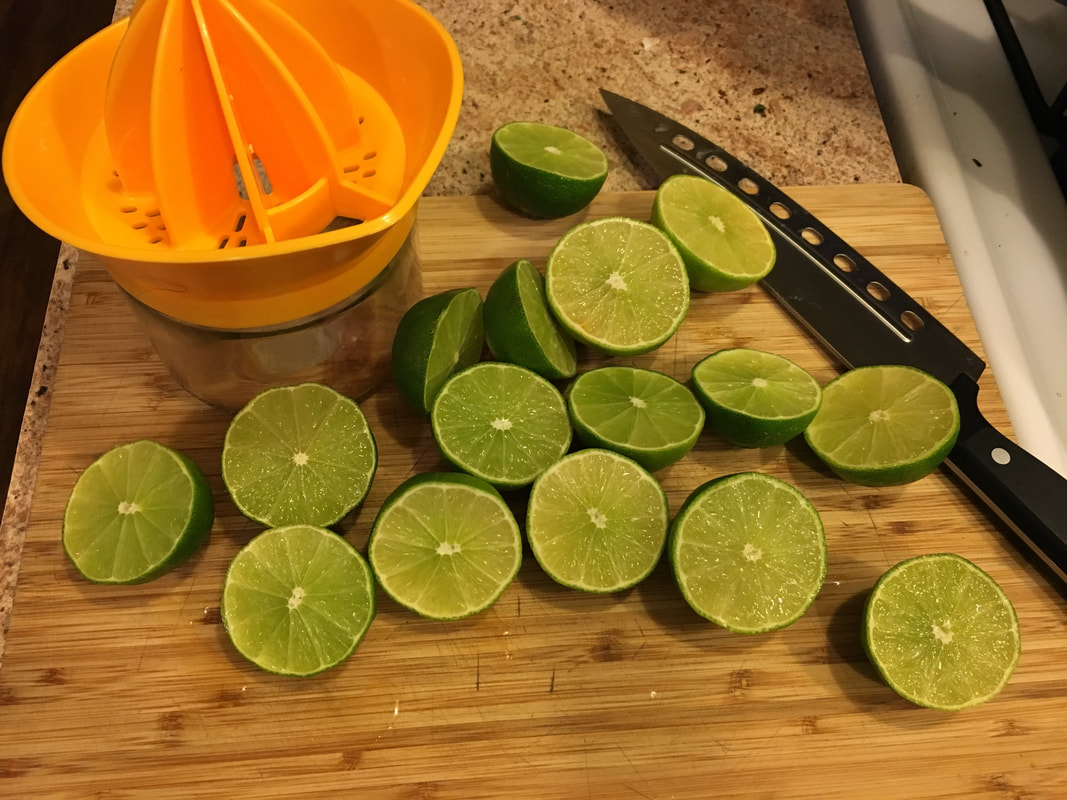 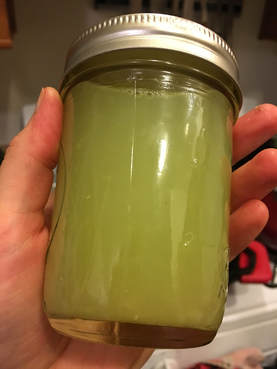 Then, cut your onion, tomato, and cilantro into small pieces like this:
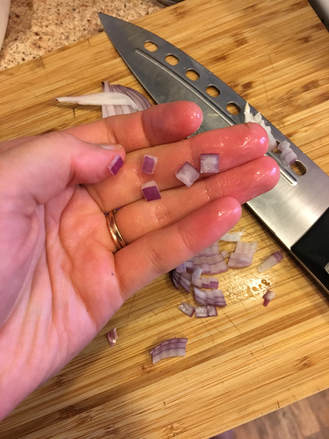
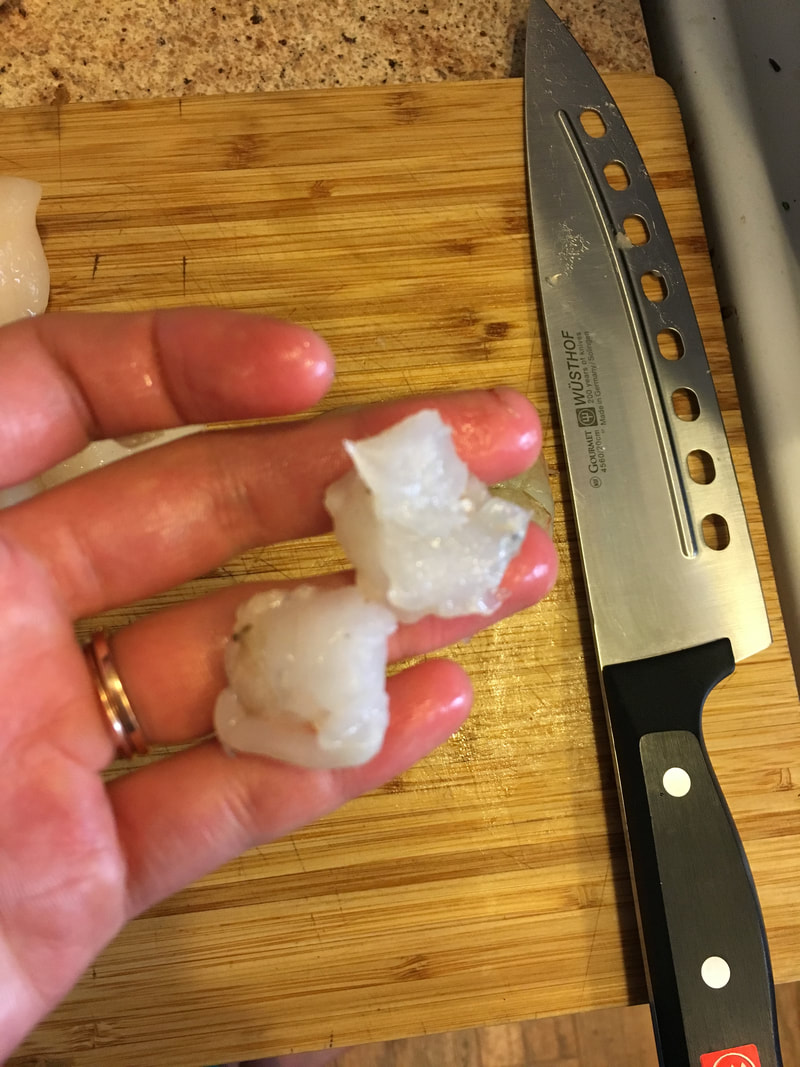
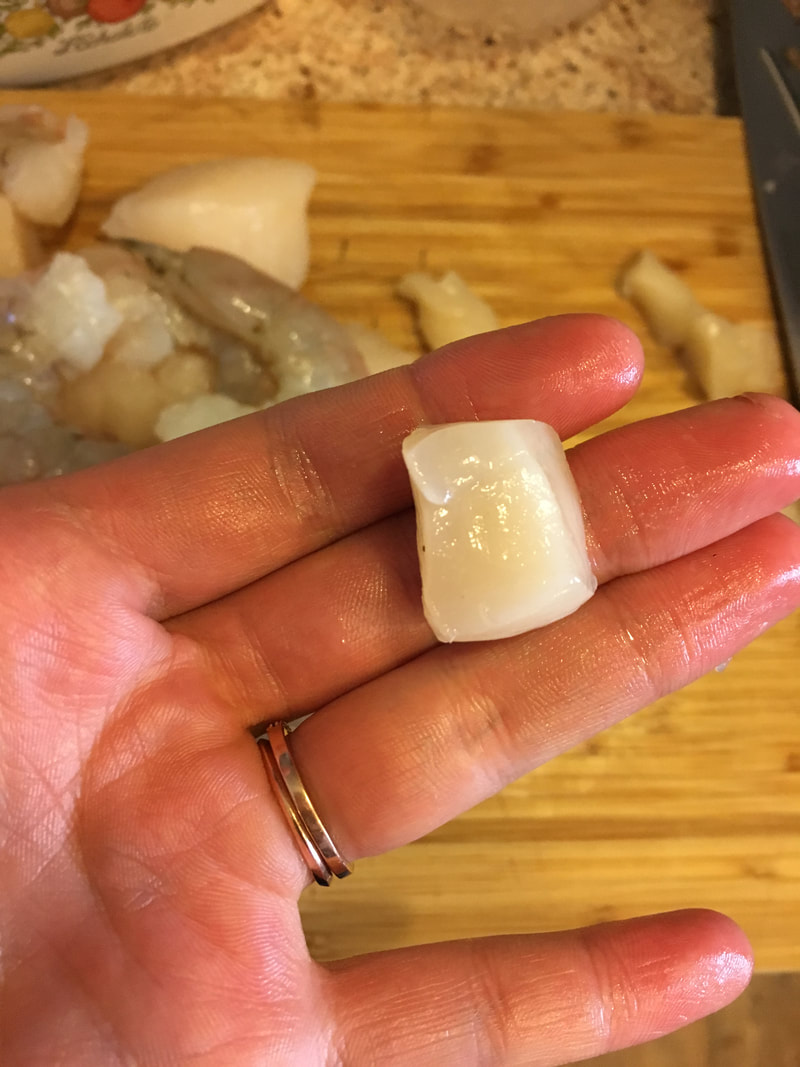
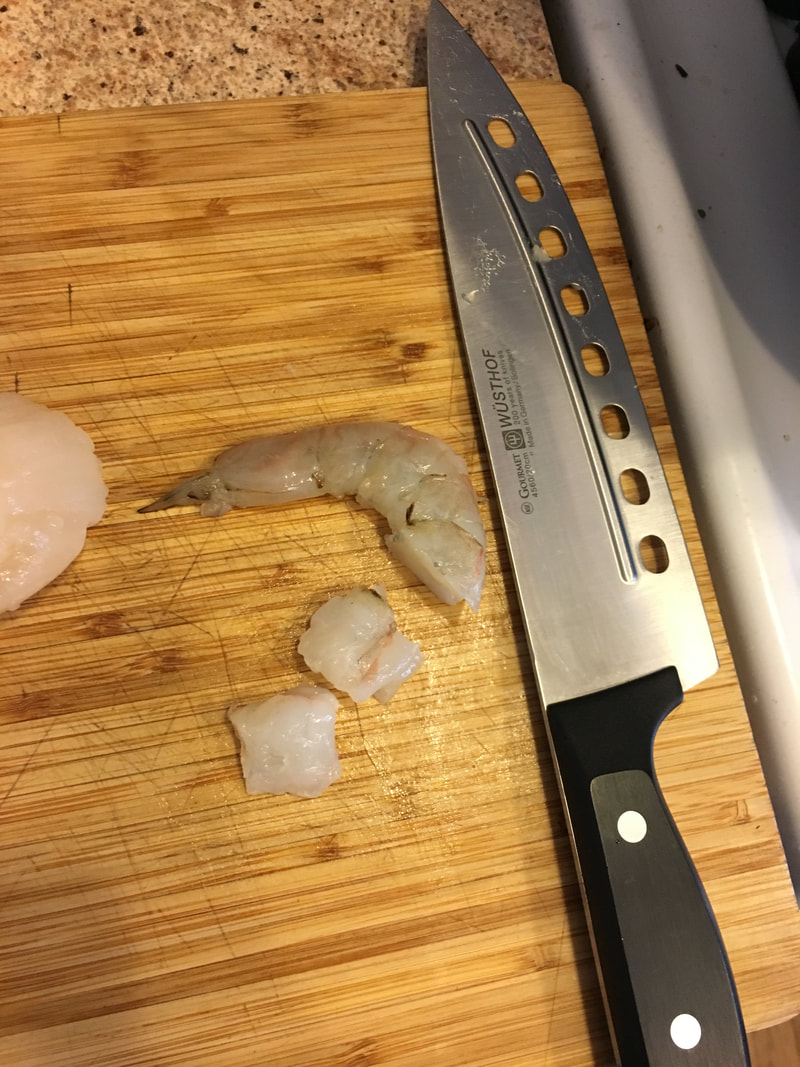
CHEF TIP: Before I worked at a restaurant, sharpening knives was something I rarely did. Actually, I didn't even have a good sharpener until recently. Now I do it like, literally after every use. Always make sure your knife is sharp, Especially if you are cutting seafood like in this recipe. It makes things like 100000x easier and is actually safer in a way. Next, you want to cut up your seafood into small cubes, shown below:
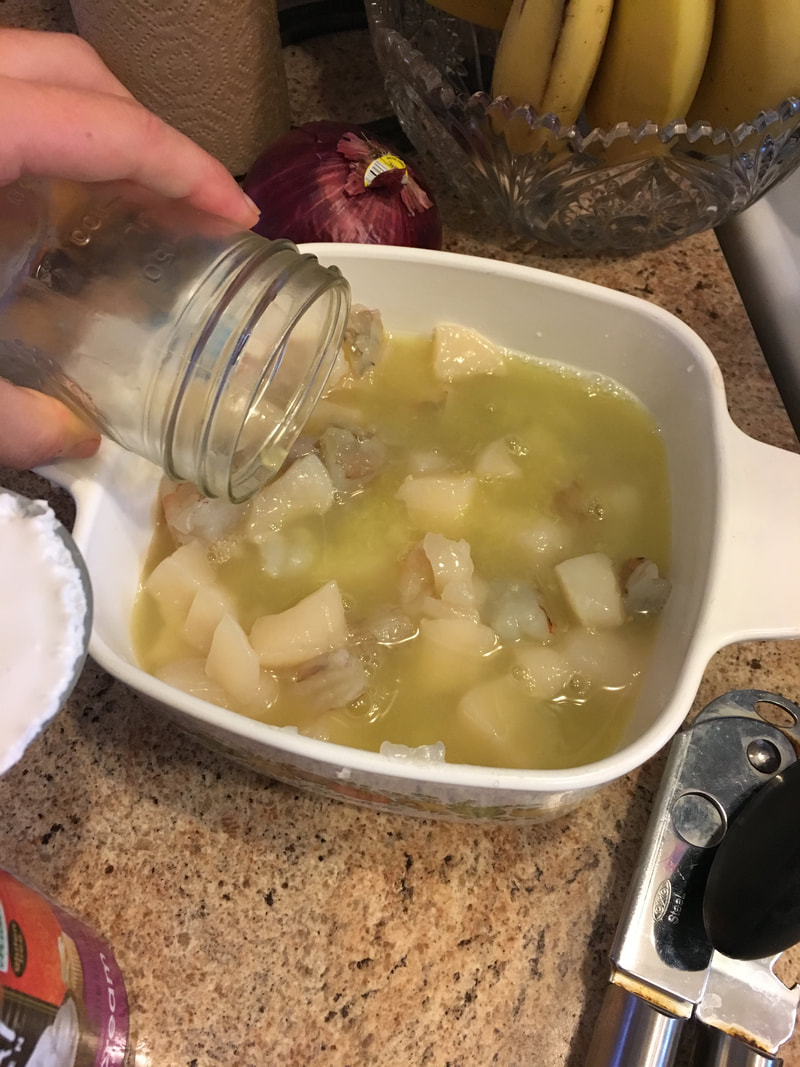
So when its all done, put it in a non-metal container (ideally glass or ceramic) like so... 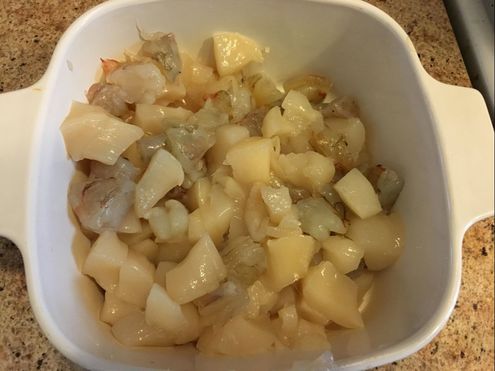 By the Way, side note: Did you know where scallops come from? I never did until I had been working full-time at a seafood restaurant for almost 4 months and finally decided to google it. Learn something new every day... 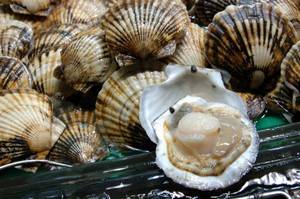 Anyway, back to the recipe. Next, add the lime juice and coconut milk (1/3 a can) to the chopped seafood Make sure the coconut milk is mixed well like the one shown below. If its a natural brand without additives, the cream may separate from the water. You may need to heat it up a little to get it like this. This is important otherwise the texture will be way different.
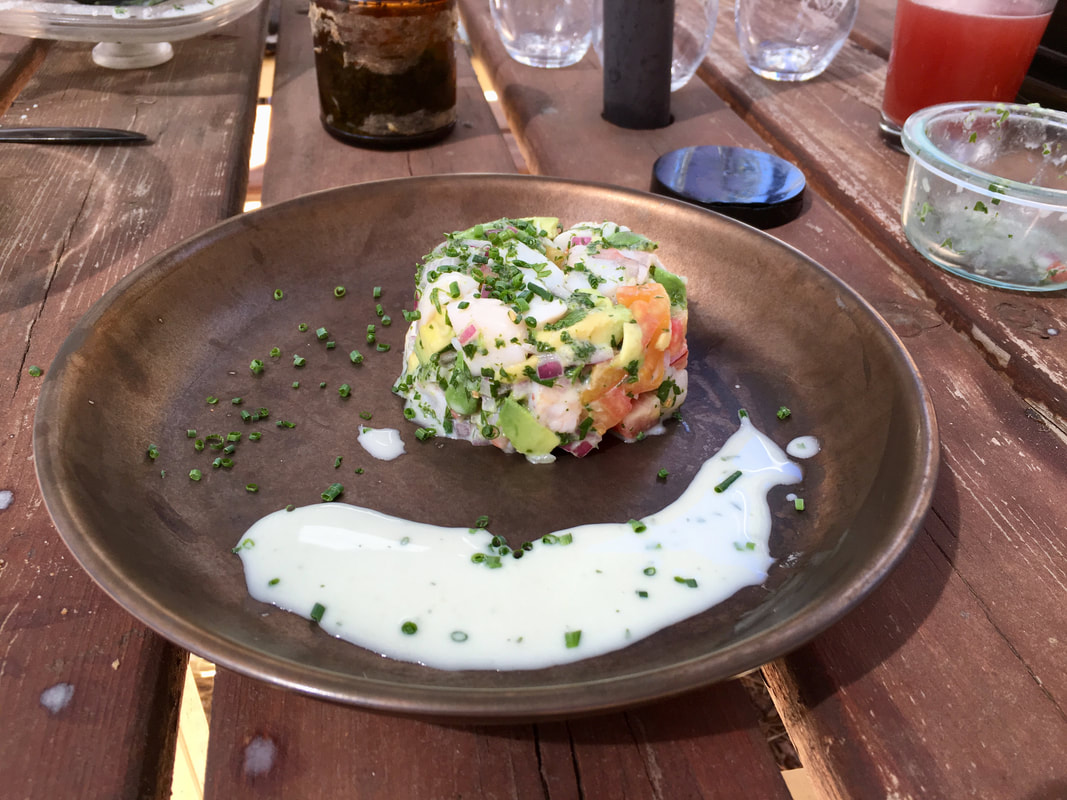
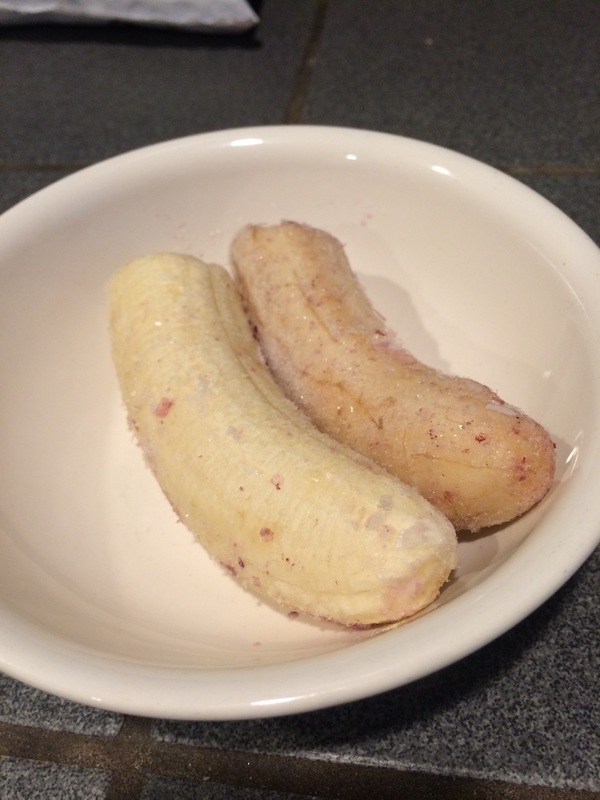
Mix it together with the onion, tomato, and cilantro. 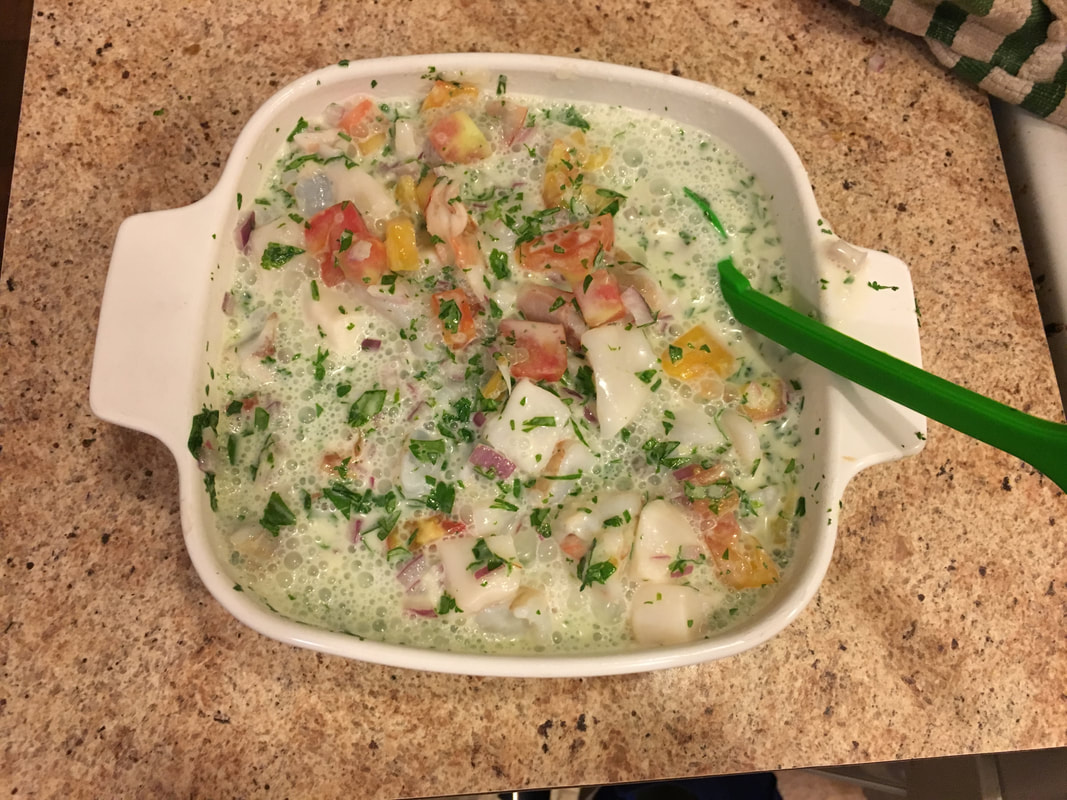 Now is the part where you just leave it in the fridge for 8-24 hours. This allows the acid in the lime juice to "cook" the seafood. Pretty easy, eh? 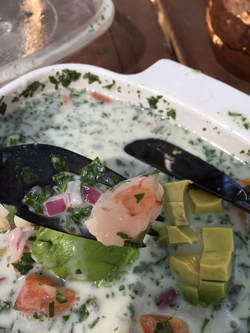 see how the shrimp went from grey to pink? The last step before you are ready to serve is to dice and mix in the avocado like so: 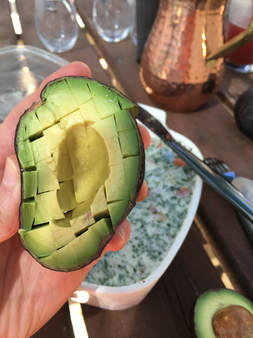 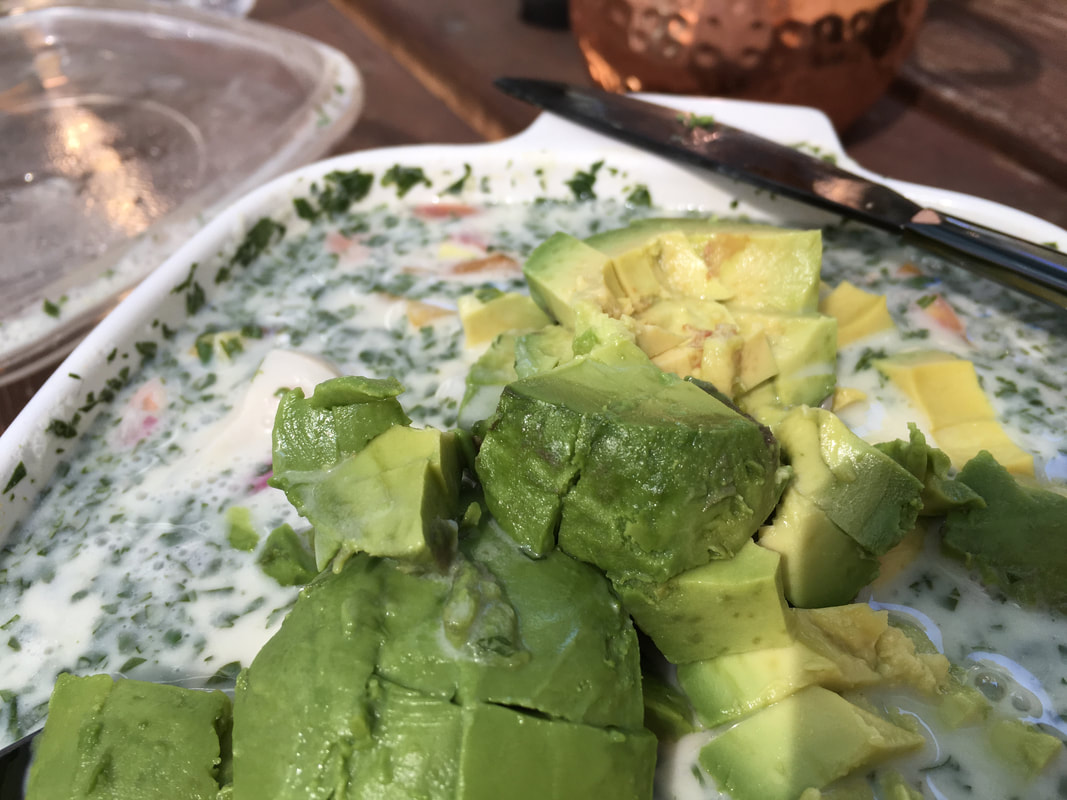 Strain the liquids from the rest. KEEP THE JUICE! It's very tasty and can be served separately or even drank on its own. 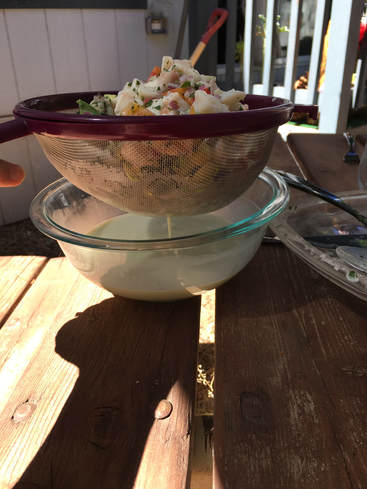  HOW TO PLATE LIKE A PRO: find a small ramekin like the one shown and pack the ceviche tightly into it. Then turn it upside down on the plate for a cool-looking presentation. Save a piece of cilantro to put on top to make it look even cooler. Unfortunately the rest of my cilantro froze in the fridge so I couldn't add that final touch. Oh well. 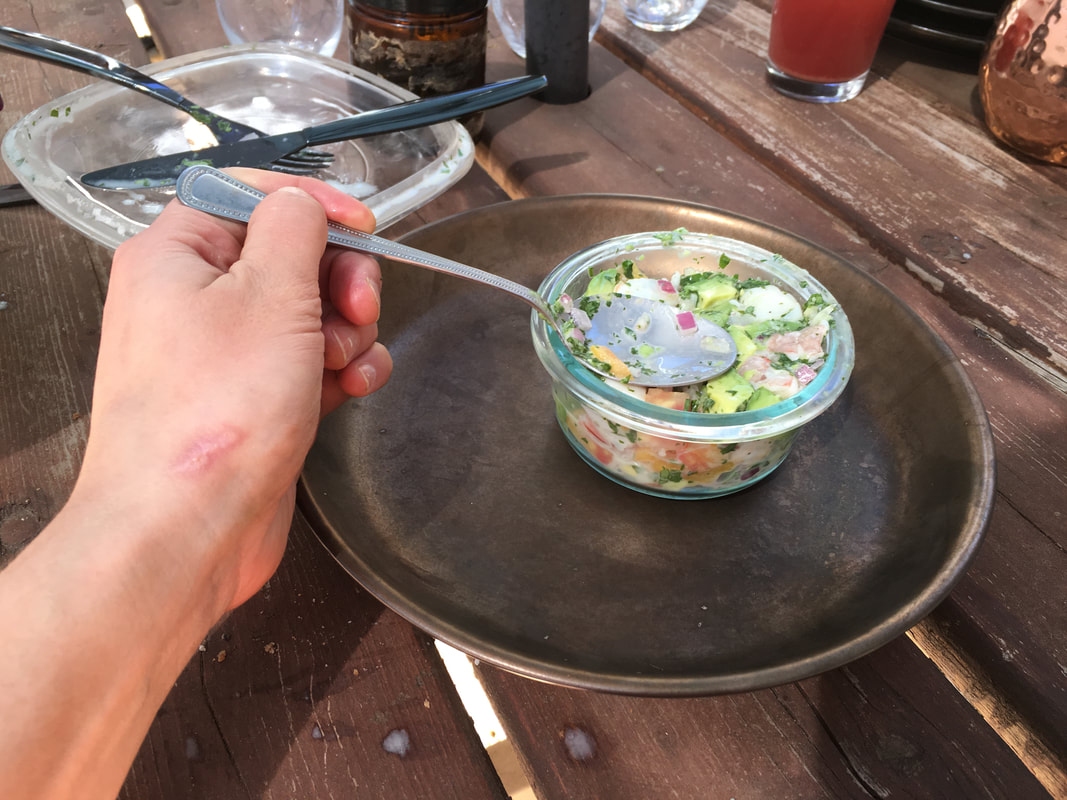 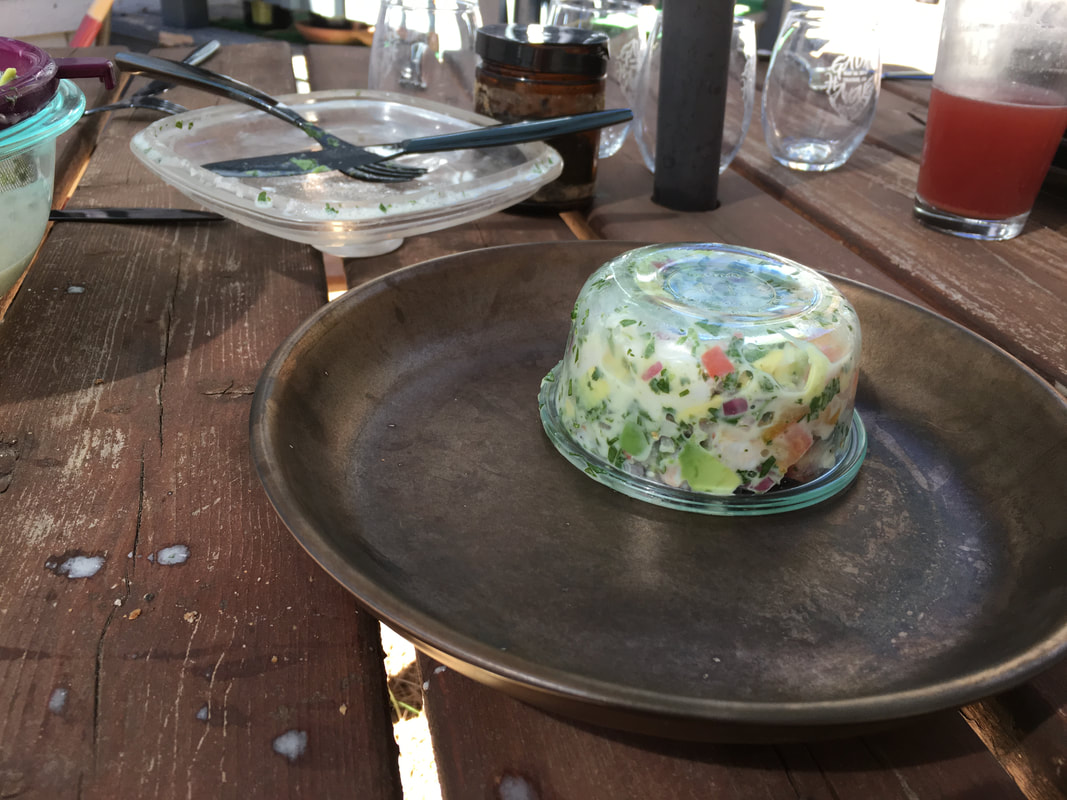 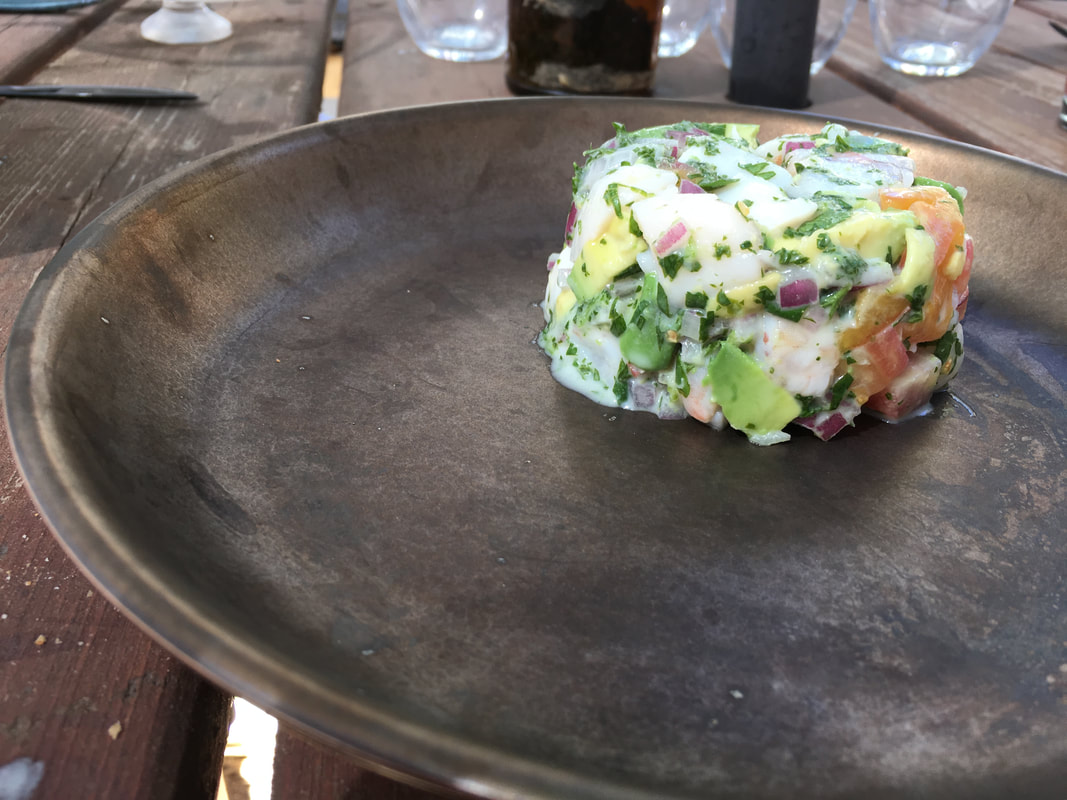 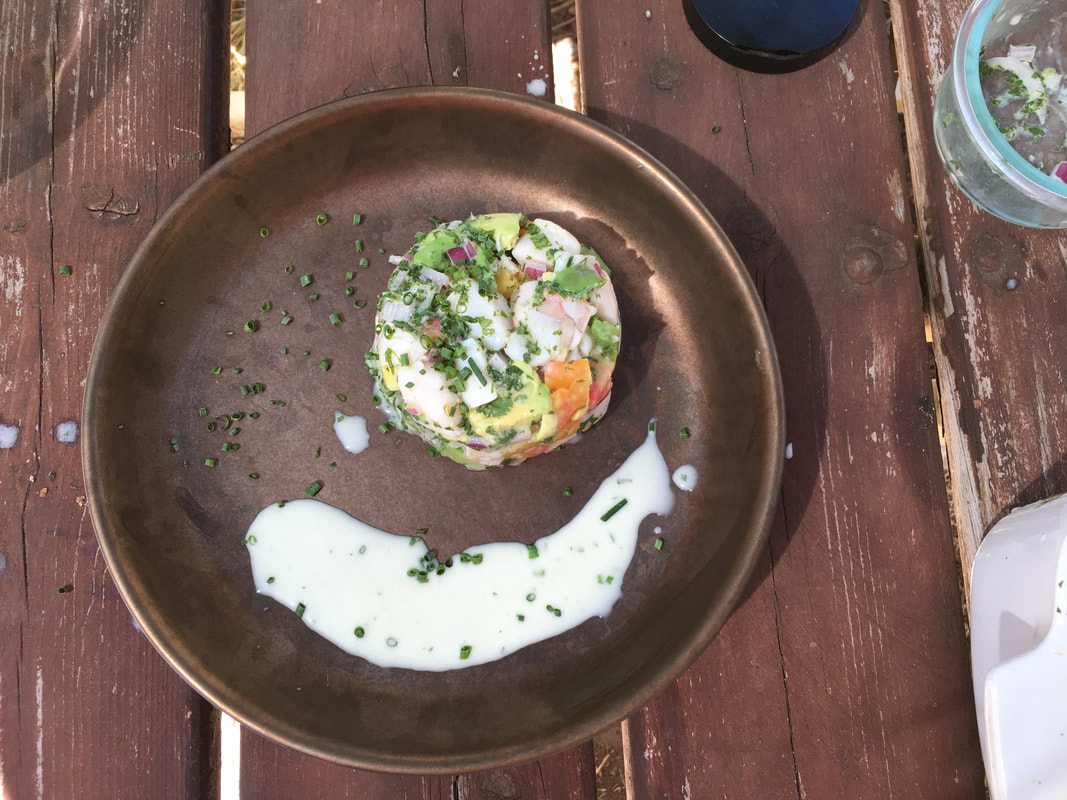 this is a good way to use the leftover coconut-lime sauce! 
1 Comment
This is part 4 of my 5-part series, "Go to Meals". These are recipes I do on a weekly basis that I find easy, quick, cheap, and healthy. Part 1: roasted veggies Part 2: Easy fritatta Part 3: Paleo Shepherd's pie 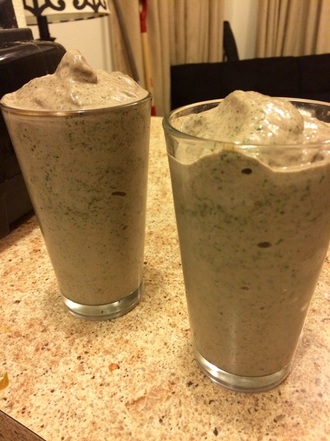 A cold, delicious blend of all my favorite things! A smoothie made just from fruit doesn’t sound like much of a meal, but if you add other things, it can actually be a very easy and filling meal with minimal cleaning up and no cooking time that can be made any time of day! Some smoothies can easily go from a “healthy” drink to one packed with over 50 grams of sugar. Yes, it is fruit sugar, but it still isn’t good to have so much in one go. It is much easier to eat too much fruit in one go if it is in a smoothie than if you were just eating fruit. Thats why my smothies use many other healthy ingreditnts along with some fruit. This post isn't necessarily a step-by-step exact recipe. To be honest, I don’t think I’ve ever followed a smoothie recipe, but here are a list of ingredients I like to put into smoothies, and you can add them together in pretty much any combination, and they will go. I usually don’t add all of these at once. This is just a list of my arsenal I might choose from. Omit what you like, get creative, and adapt quantities depending on how many people are going to enjoy it!
One false impression that people have about eating healthy is that it is really expensive and time-consuming. In a world where soda is cheaper than water, and “kale chips” are three times the price of regular chips, it is easy to see where this comes from. Not only do I hope to provide you with some ways I save money on food in this post, but I also want to remove the idea that eating healthy takes a lot of time and effort. 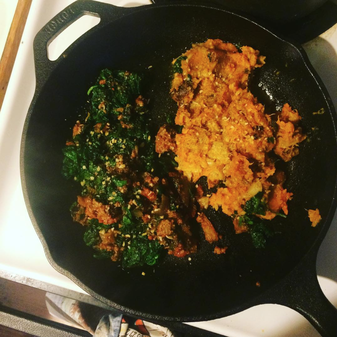 An average dinner in the life of me. Cost under $5 and took a few minutes thanks to some planning ahead! #1 tip is PLAN, PLAN, PLAN ahead!And I’m not specifically talking about meal prepping, since I’m not a big fan of doing that. (although if that is your style, then send it!) I’m talking little things like having an easy breakfast in the fridge instead of buying it on the way to class or work, or having a fridge full of real food, so when you come home after a long day you're not tempted to go out and get something pre made. What I have learned is that although I love variety and experimenting with food, I have about 7-10 under half hour recipes to cook from home, which I call my “go-to” recipes. Find them here Out and about all day? See how you can plan ahead when you’re out on the slopes here #2 Crockpots  slow cooked beef stew. You can buy the cheaper, tougher cuts and still enjoy tender meat! Speaking of thinking ahead, I can’t help but bring up my reliance on the crockpot. I call him my “personal chef” because I can come home and dinner is 100% done! All it takes is ten minutes in the morning chopping up vegetables, and adding seasonings and meat. Unlike the stove, you can leave it at home while you are out all day. I don’t think in all my years I have ever burned or overcooked anything in the crockpot, and I’ve left stuff in there up to fourteen hours! Not only does the crock pot save you money by being an alternative to eating out/takeout, but it also allows you to buy the cheaper, tougher meats because no matter what the cut, the crock pot makes it super tender and juicy! Want an easy recipe to get you started? Check out my go-to recipe here #3 don’t let anything go to waste.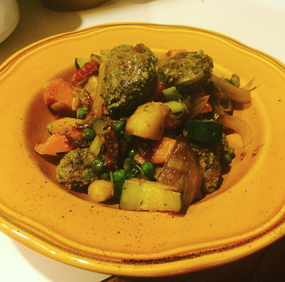 this is the kind of stuff I eat when I search the back of the fridge and freezer Have “What’s for dinner? Let’s look in the fridge” nights several times a week. (those meals are like every other night for me haha) planning is good, but also learn to improvise and use up everything. Here are two meals I like to use for finishing up extra veggies (cooked or uncooked!) Chicken soup Easy fritatta #4 your freezer is a huge asset 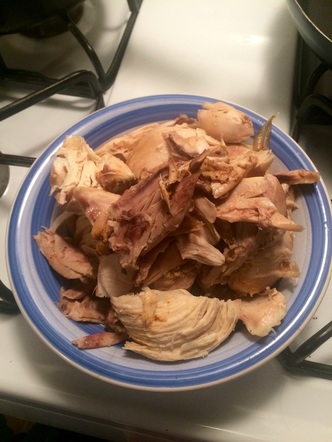 a couple days worth of cooked chicken after making crock pot chicken soup that can be frozen and eaten any time. When you live by yourself, it is tempting to buy pre-made dinners or go out instead of cooking. Meat is sold by the pound, and sometimes you just don’t feel like eating cauliflower for the next five days because you bought one whole head of it. There are two ways I have found a freezer to be a hero in the single-person’s arsenal. First, you can cook up a whole family-size stew or crock pot and freese one or two portions per container for another day. Yout busy-future-self will thank you! The other way I use my freezer is buying frozen vegetables. I buy more frozn veggies than fresh because you don’t have to spend any time chopping or washing. Plus, they can be a lot cheaper and are just as nutritious! #5 Avoid the “superfood” pitfall Humble meals, like chicken soup, omelettes, or stir-frys can be made healthy, and are not labeled as "superfoods" Chances are, you’ve seen the term “super food” thrown around a lot lately.
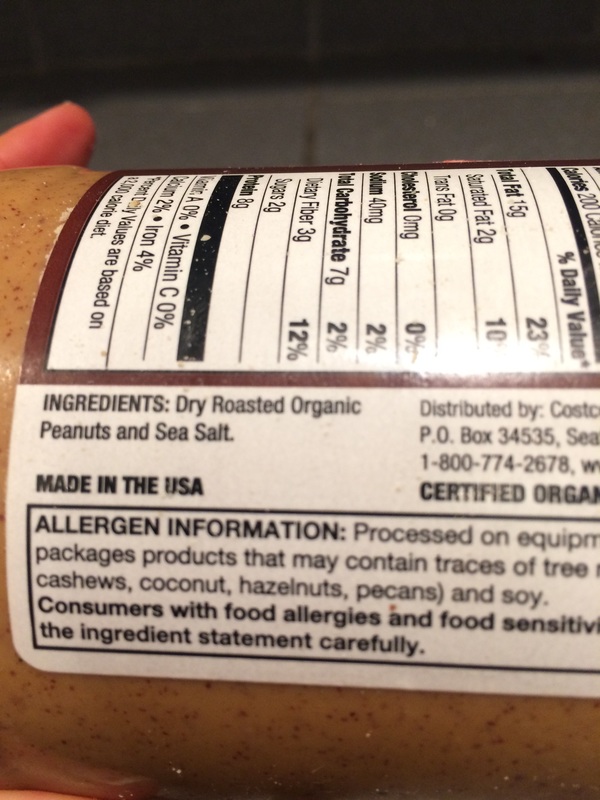
However, most of the food I buy does not have this word anywhere on the packaging. Actually most of the food I buy doesn’t even have much packaging Want to see what I buy on a average trip to the store? Check this out. Although Superfoods are usually good for you, they are not necessary to have a balanced, healthy diet. To me, “healthy” food means a diet of mostly fresh or frozen vegetables, some fruit, nuts, seeds, and a sensible amount of high-quality meat/dairy. By high quality meat, I don’t even mean the best, leanest cuts, but organic or grass fed does matter. Things like Kombucha, Maca powder, spirulina, or kale chips are great, but are in no way necessary to have a “healthy” diet. This is part 3 of my 5-part series, "Go to Meals". These are recipes I do on a weekly basis that I find easy, quick, cheap, and healthy. Part 1 - Roasted veggies Part 2 - Easy Fritatta 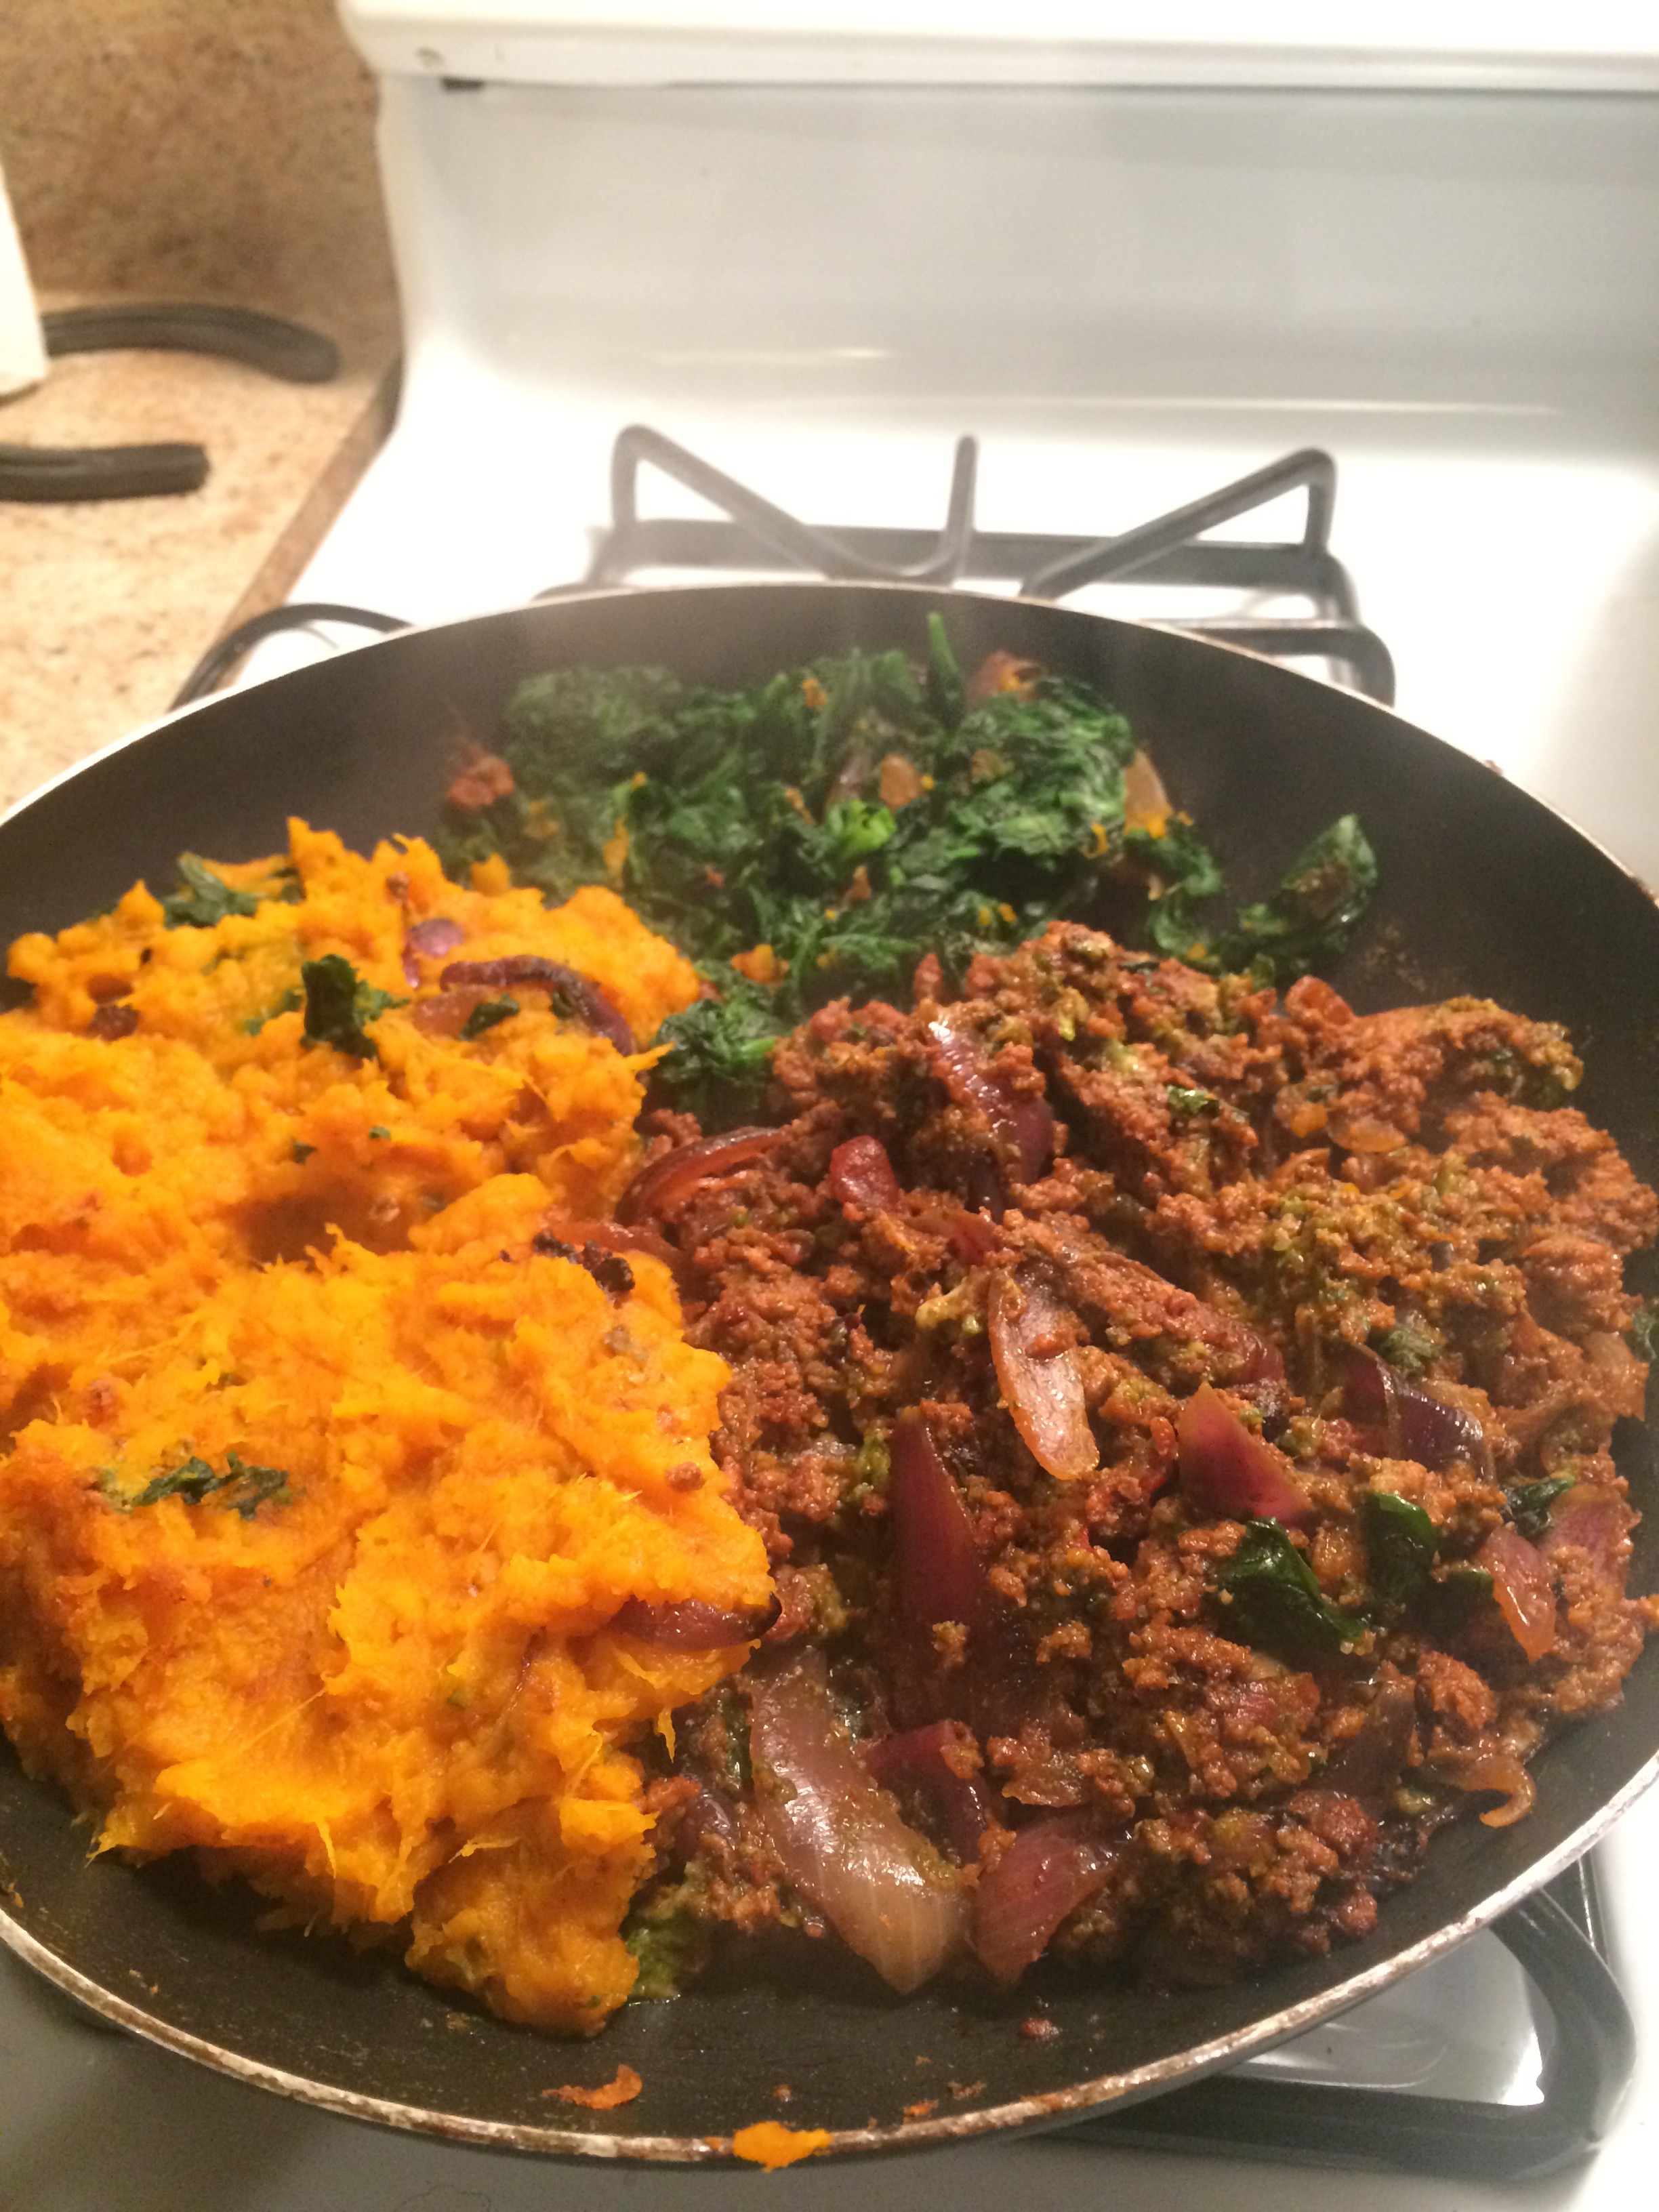 Ingredients
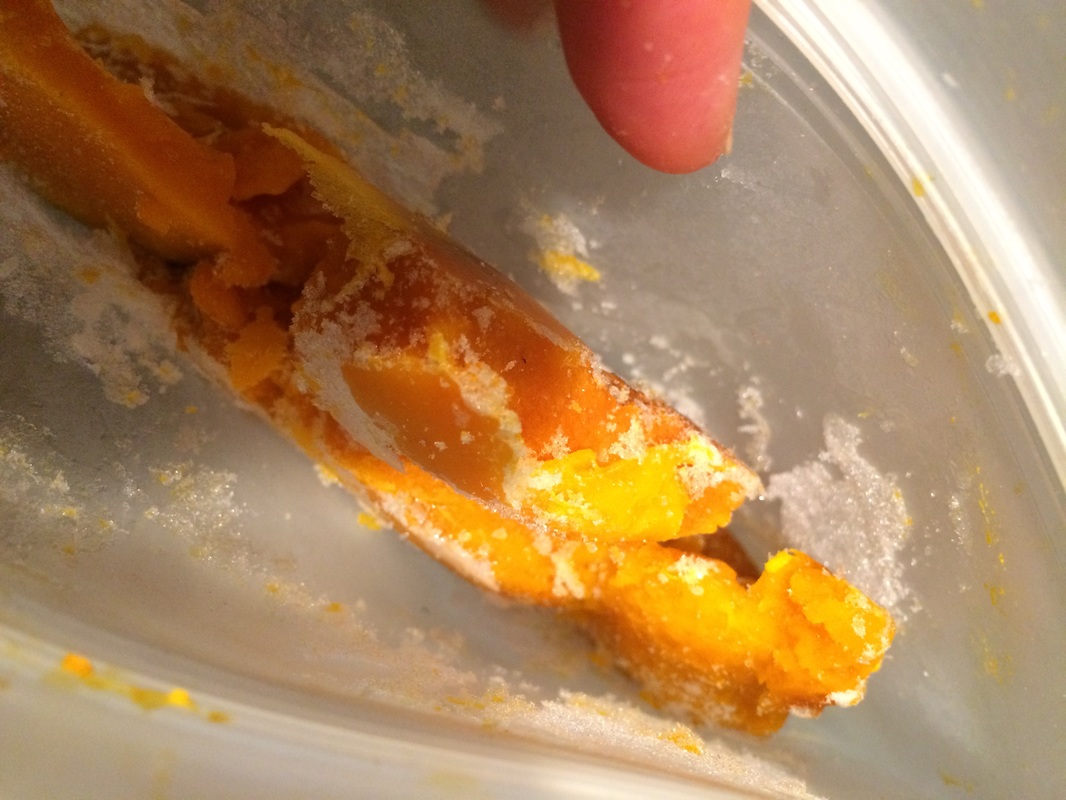
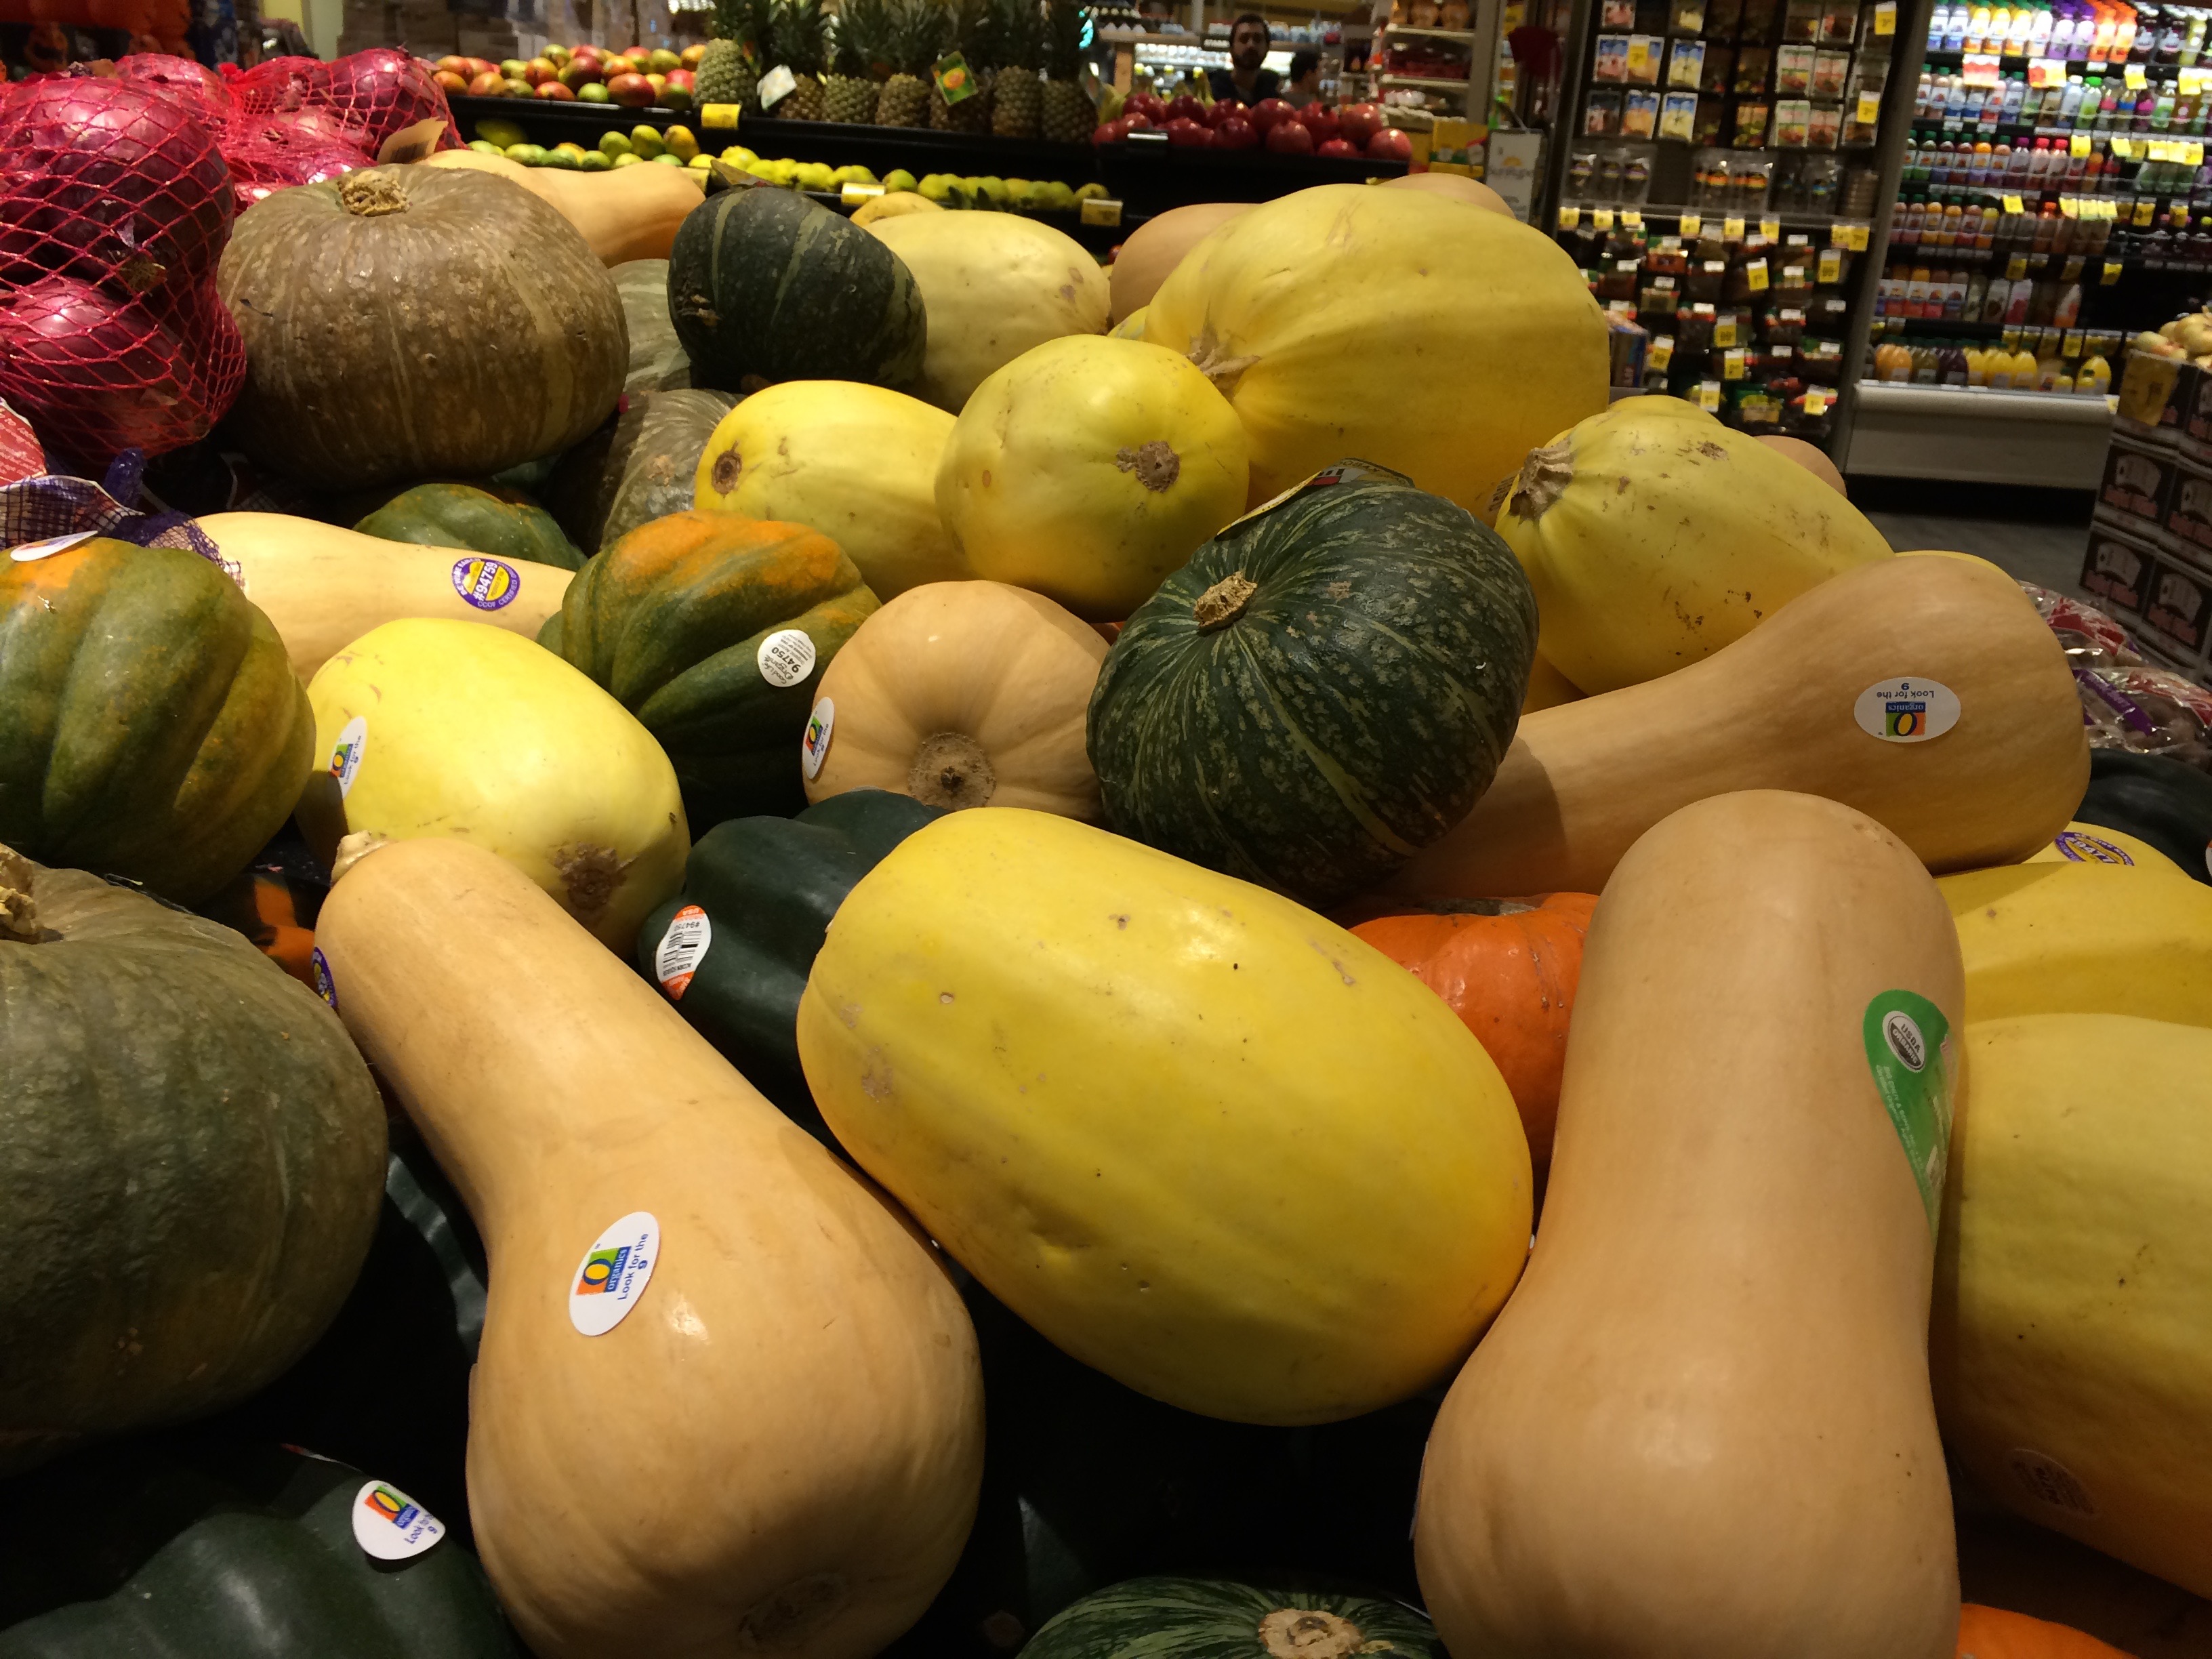
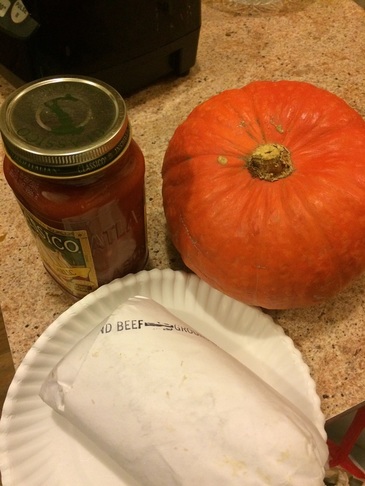 the orange pumpkin-looking thing is the kabocha, but it can also be dark green InstructionsFirst of all, the squash or sweet potato has to be cooked. The best way to cook the squash is to bake it in the oven for an hour on 350. this can be done a day or two in advance if you want. If you are using sweet potato, you may chop them up and boil them until soft, which usually takes 20 minutes. In the meantime, we will make the tomato-beef mix Let's start with turning the stove on to medium with your favorite large pan. Put about a tablespoon or so of grass fed butter in it, and while you wait, chop uo the onion into thin slivers, or dice it if you want. 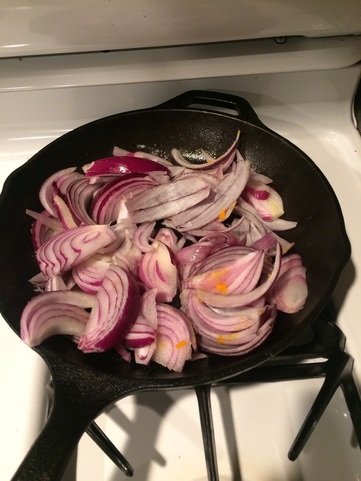 When the pan is nice and hot and the butter is all melted, put in the chopped onion and let it caramelize for a few minutes, stirring regularly. And once the onions look a little browned and are sizzling niceley, you can put in the ground beef and break it up into little chunks, mixing it around with the onion. Let this brown too for a few minutes, stirring regularly. Now is when you can add your jar of tomoto sauce. Alternativeley, you can add one of those small cans of tomato paste. Then stir in the dried oregano, garlic powder, and fresh or dried basil. A few shakes of the oregano and garlic, and aout 5-10 chopped up leaves of basil. 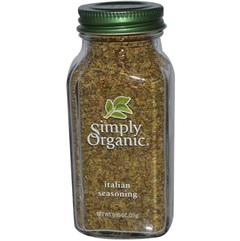 Alternativeley, you can buy these "italian seasoning" blends which are basically herbs. 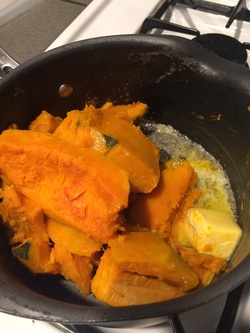 Cooked squash Cooked squash Let the beef-tomato mix simmer on medium-low for about 20 minutes. In the meantime, take a masher and a few tablespoons of that grass-fed butter and mash the cooked squash/sweet potato in a pot on low heat. It shoud already be cooked. We just need to melt the butter and make sure its served hot Once the beef mis has done simmering, push it to one side of the pan and get out your frosen spinach. Put it in the empty part of the pan and let it all defrost and cook. Stir it around every few minutes, but don't mix it in with the beef. If your pan is too small to do this, just use aother pan. I'm just showing you a way you can reduce pan usage and have less cleaning up at the end.  And when everything is hot, it is time to serve! Make 3 layers in each plate - beef on the bottom, spinack in the middle, and squash on the top. Even sprinkle some cheese on top if you'd like!
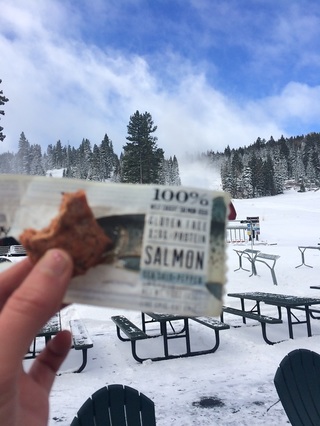
Enjoy! This keeps well in the fridge or freezer as leftovers for a few days, and makes a perfect pre-made meal for those busy days. Know the rules for a powder day — no friends, no pee breaks, and no lunch break. Even if you’re A-OK with spending $20 in the lodge, sometimes, the conditions are just too great for a break. That’s where else these foods come in handy. When I first started the Paleo diet, I thought I would never be able to find food that actually comes in a package that I could fit in my pocket. Since paleo food is mostly vegetables and meat, or “real food”, I thought it usually it couldn’t possibly come in packages. However, my mind was blown when I came across Mammoth bar. Since, discovering that, I have found many other foods that can fit in my pocket for my many days on the slopes NOTE I have not been paid or promoted to include these items and brands. I discovered them myself and just want to spread the good news for other paleo-ers with an active lifestyle 1. Yes, there are paleo "clif bar" alternatives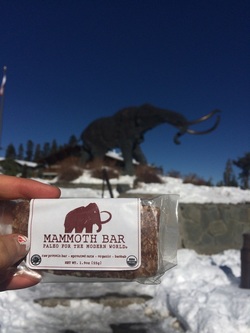 Since coming across Mammoth bars a few years ago, my on-the-hill lunches have never been the same. Since then, I have discovered many other paleo protein bar companies. Most of these are pretty filling and full of healthy fats, enough carb and protein, and calorie-dense, making the perfect pocket food! Others I recommend are: Exo bars Go Raw bars 2. Meat Jerky bars
3. dried fruit I don't eat dried fruit very often because of the high sugar content, but when you're out and about in the cold adventuring, some natural sugar is what you want for energy. Figs are my favorite kind of dried fruit! 4. Grass fed cheese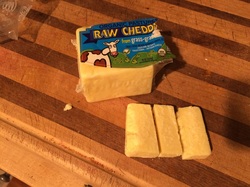 Probably a cheaper protein alternative to those bars I mentioned above, but still healthy! Grass fed is important in any dairy product. 5. stuff I've bakedI love baking all sorts of paleo goods at home, so I usually have some stashed away in the fridge. Here is my go-to shortbread cookie recipe with 4 ingredients.  And that's my list of paleo stuff I bring on the hill on almost a daily basis! Gone are the days of taking an hour lunch break and stashing my cooler in the lodge, hoping it won't get stolen.
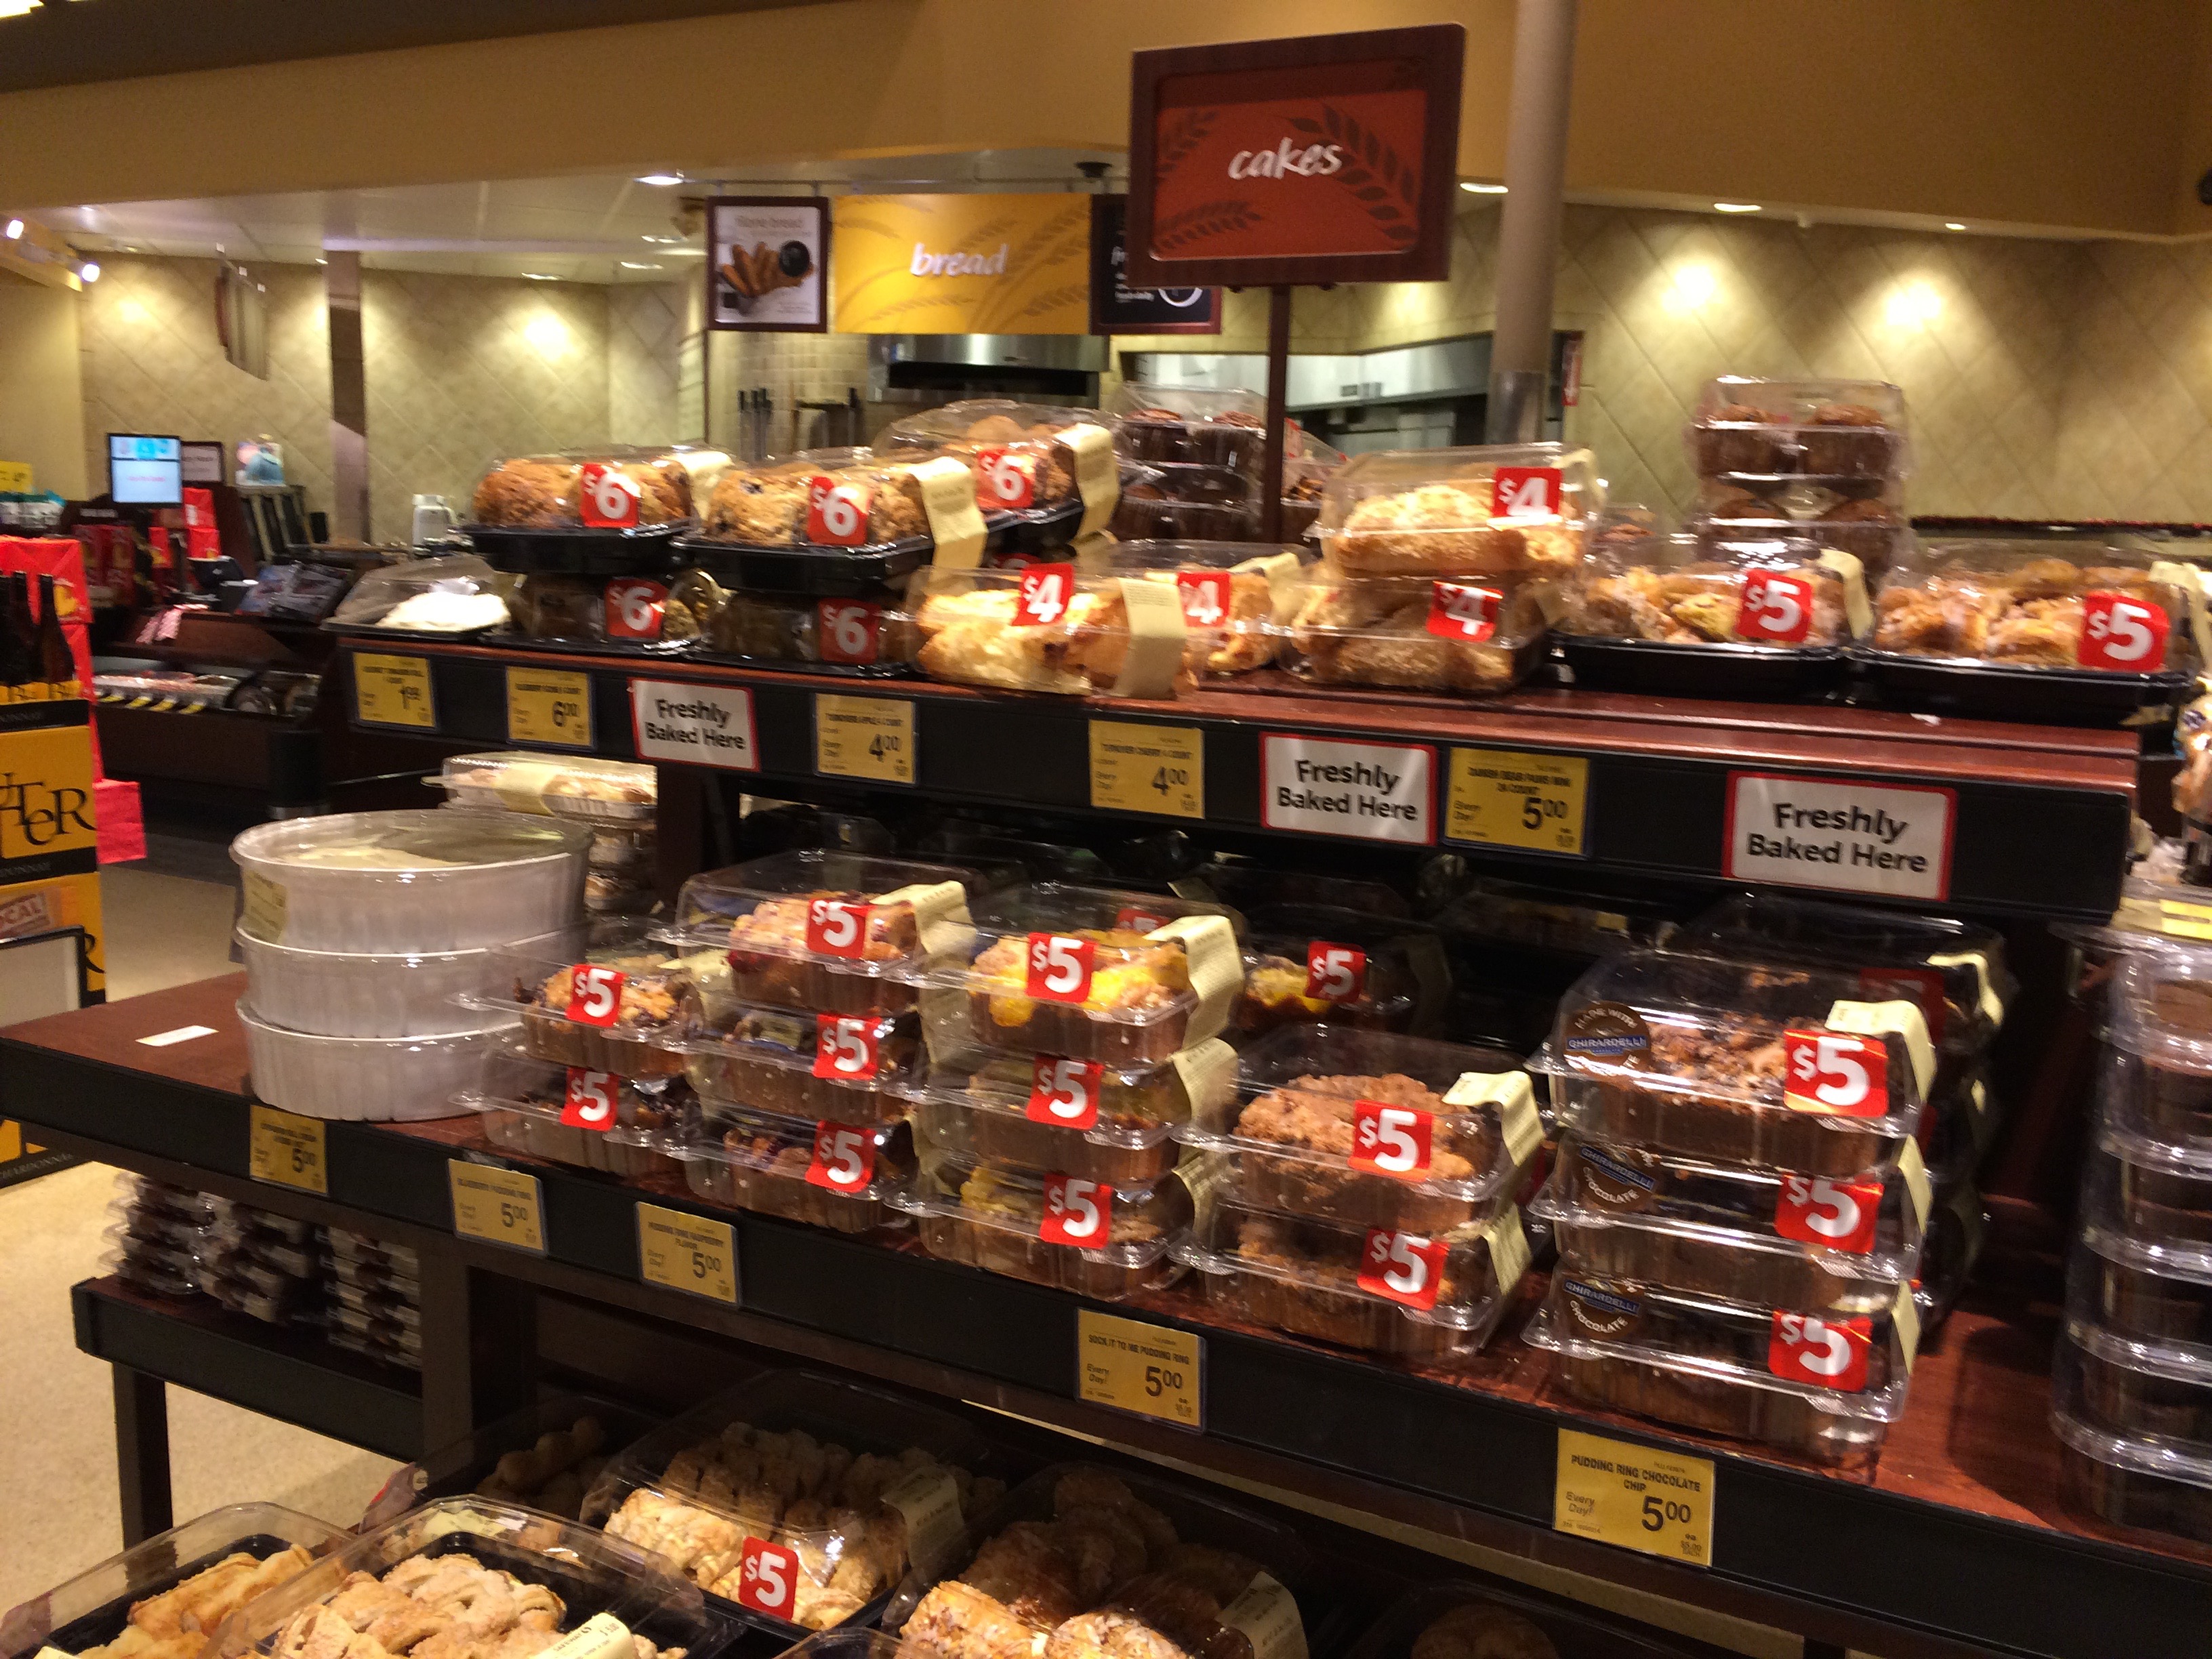
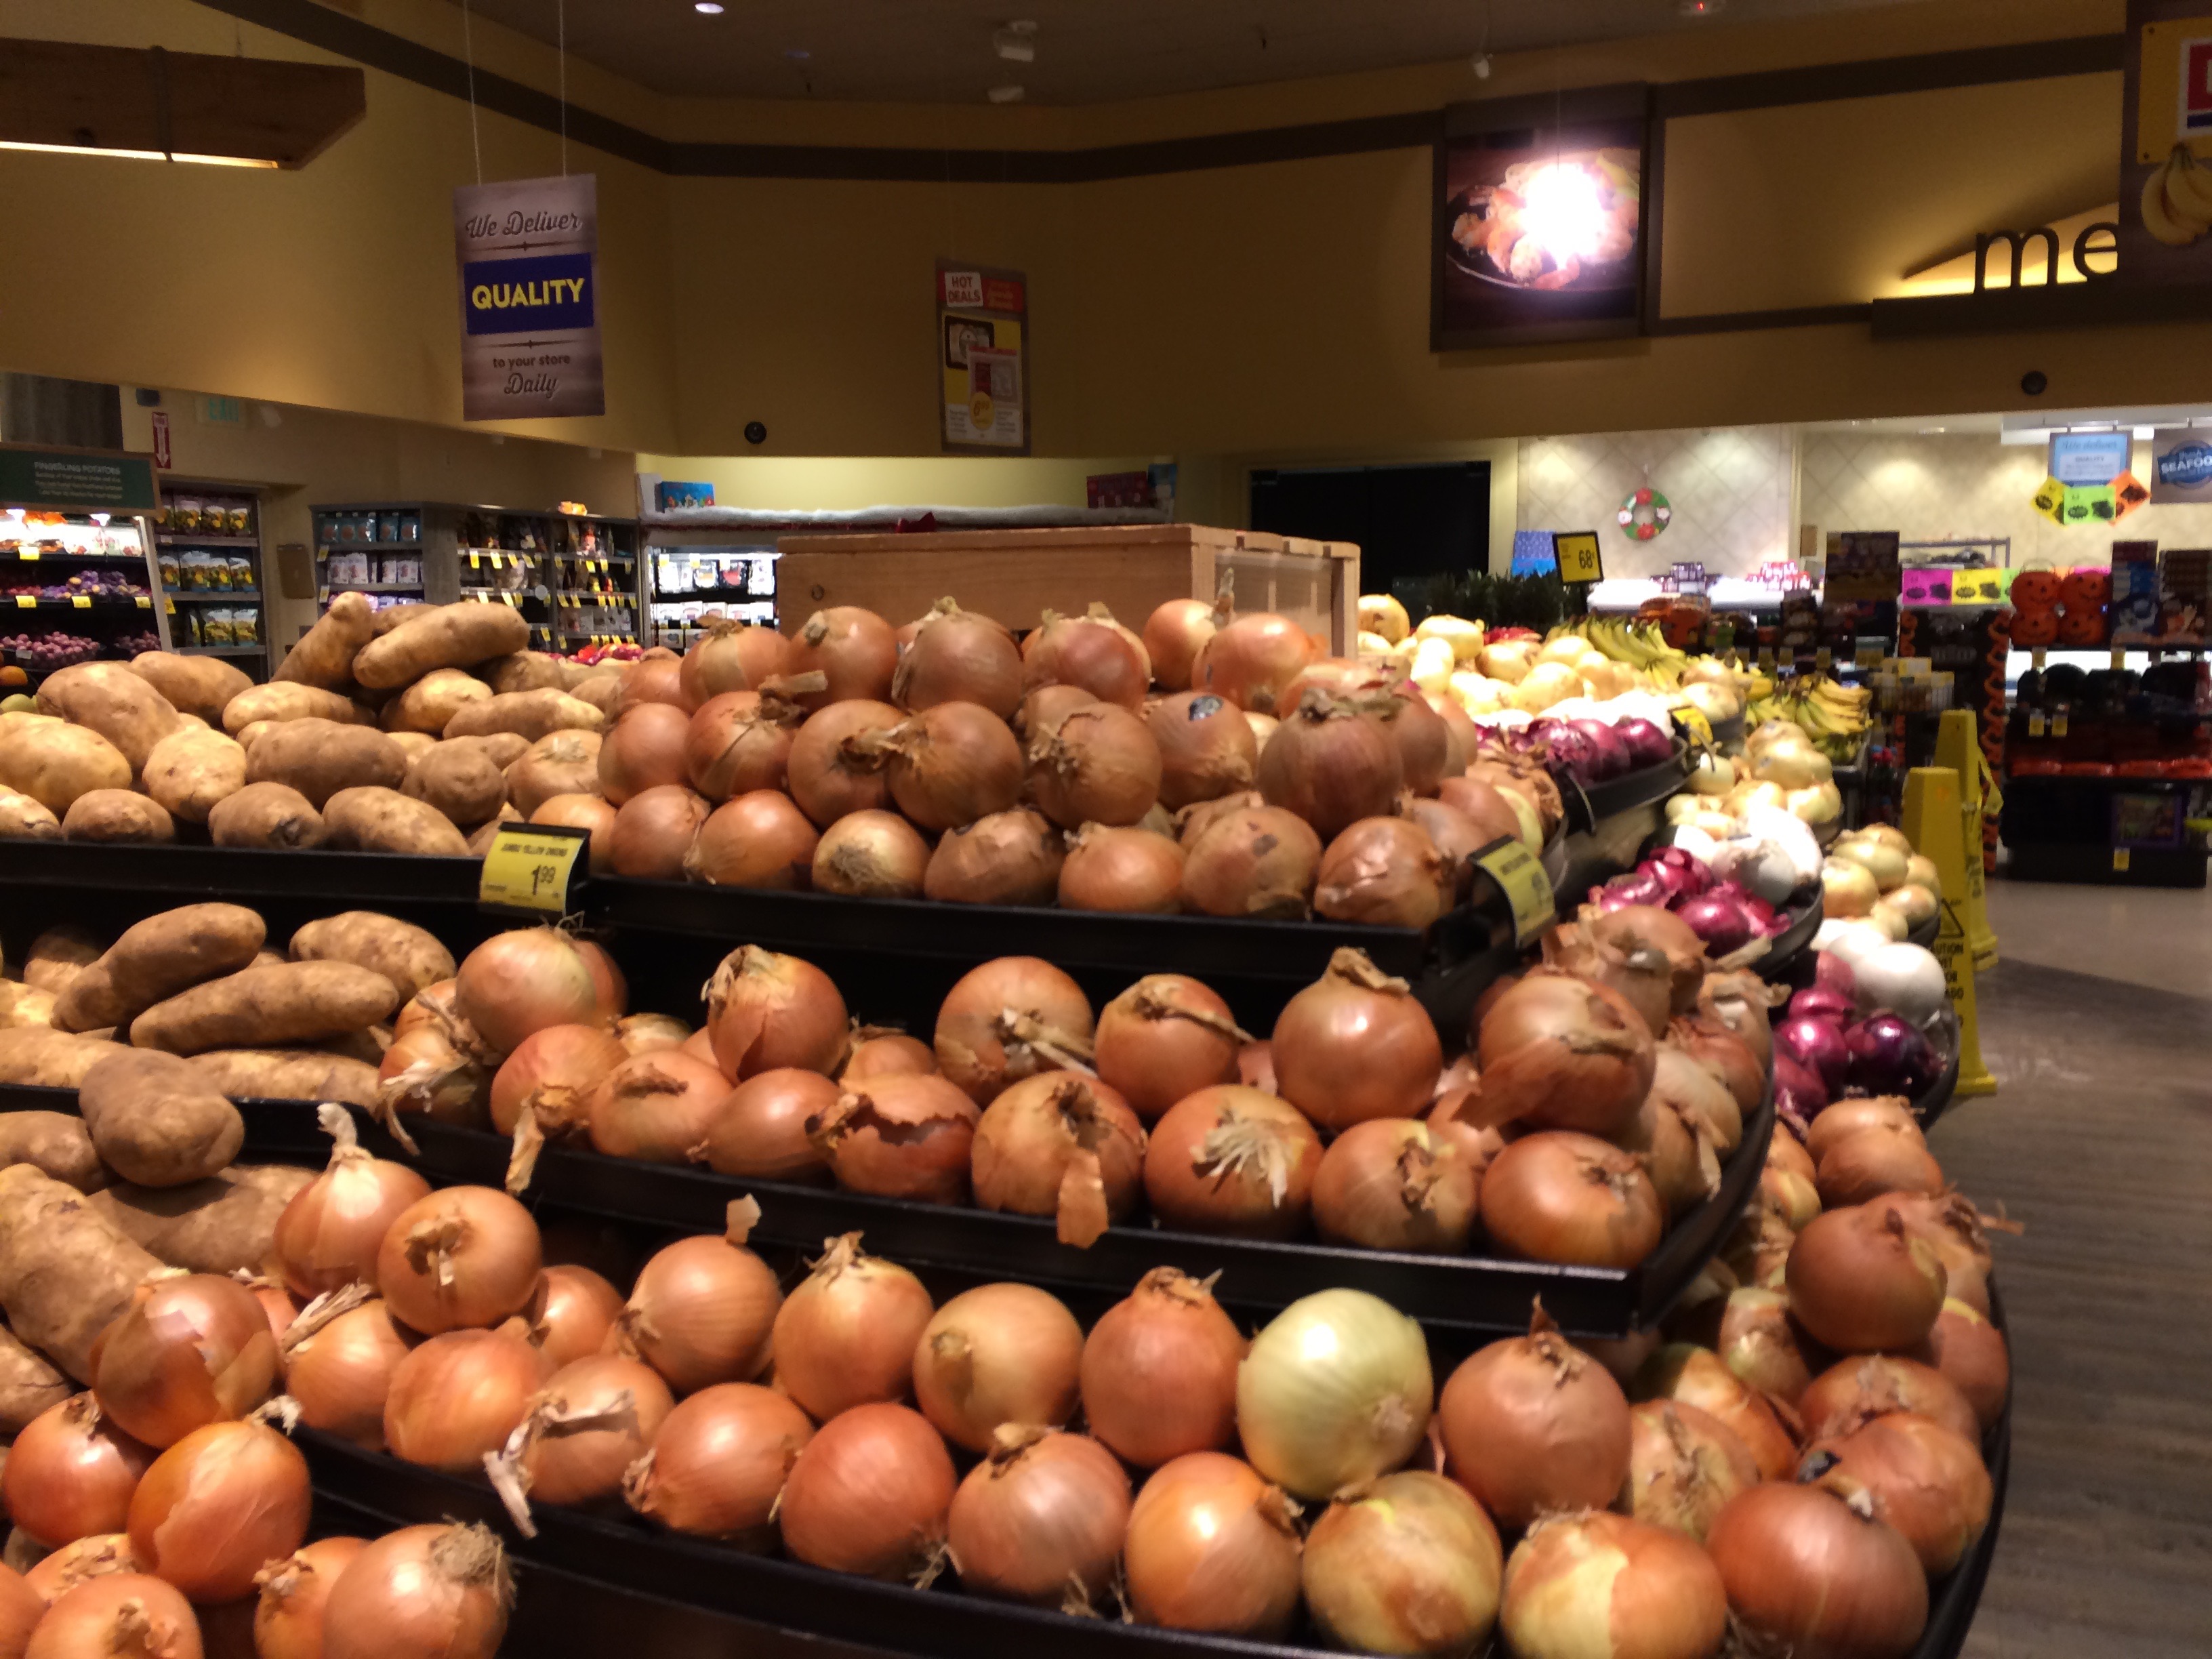
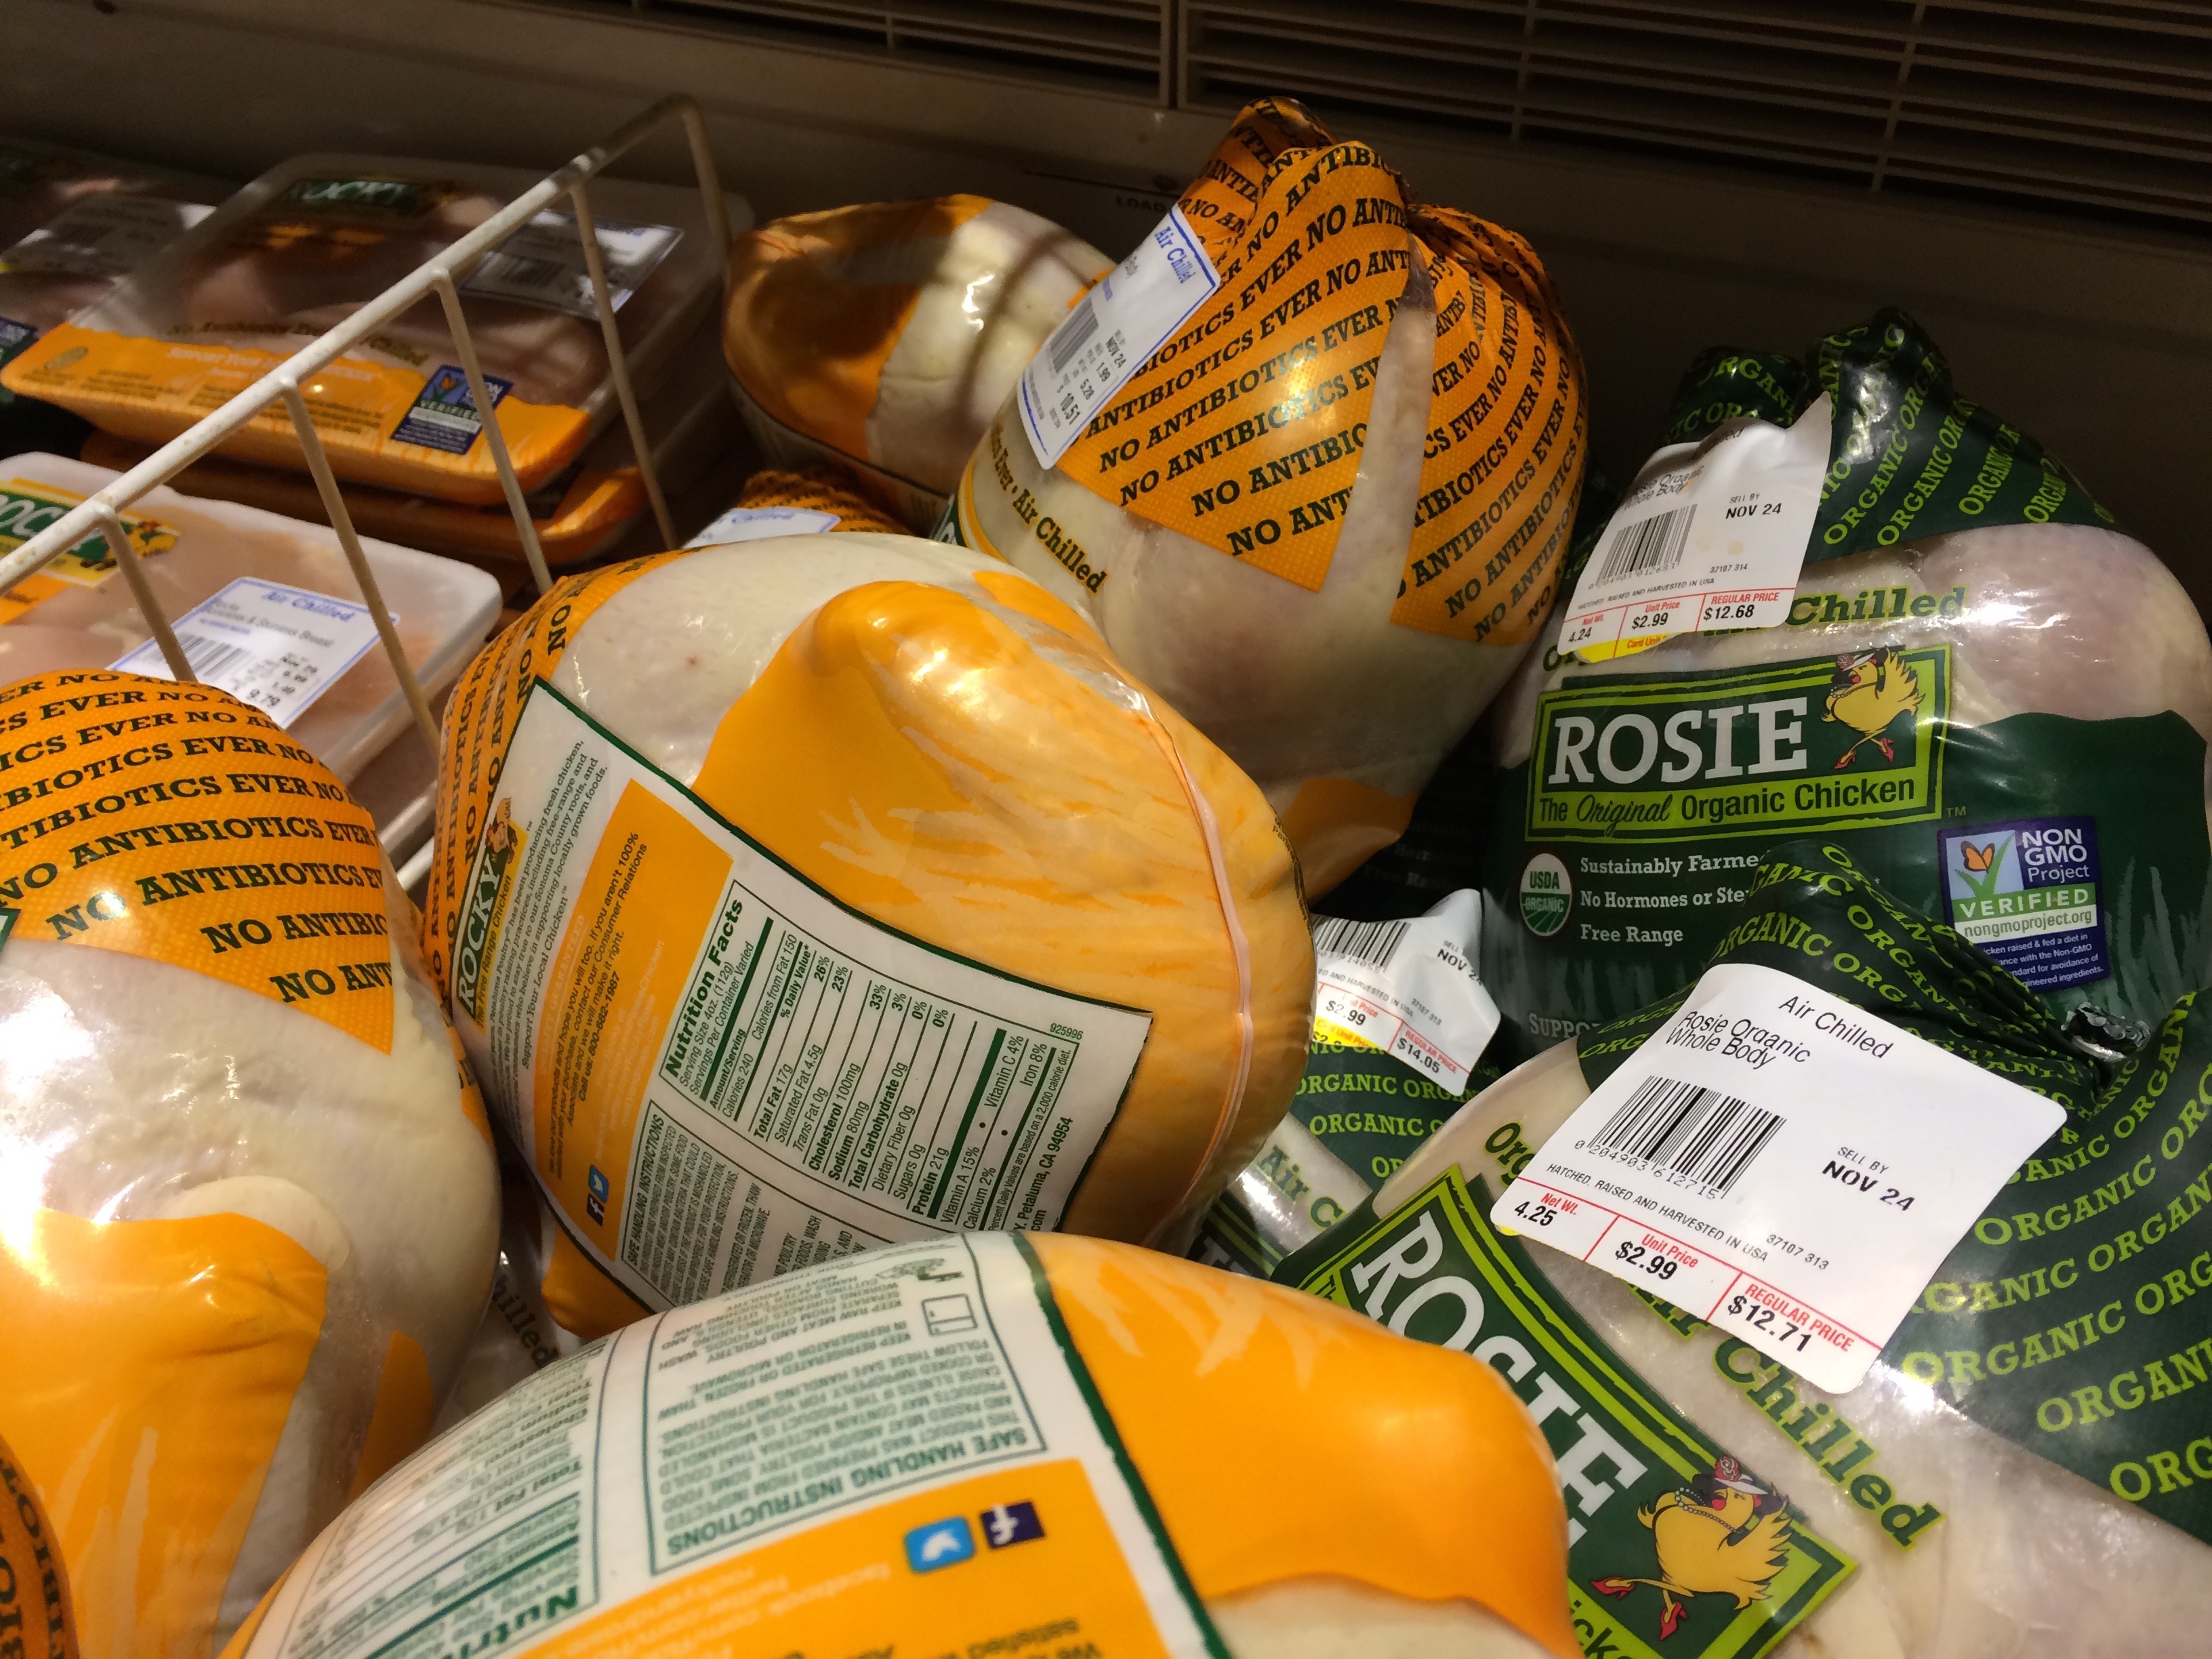
What foods will you bring on your next adventure? 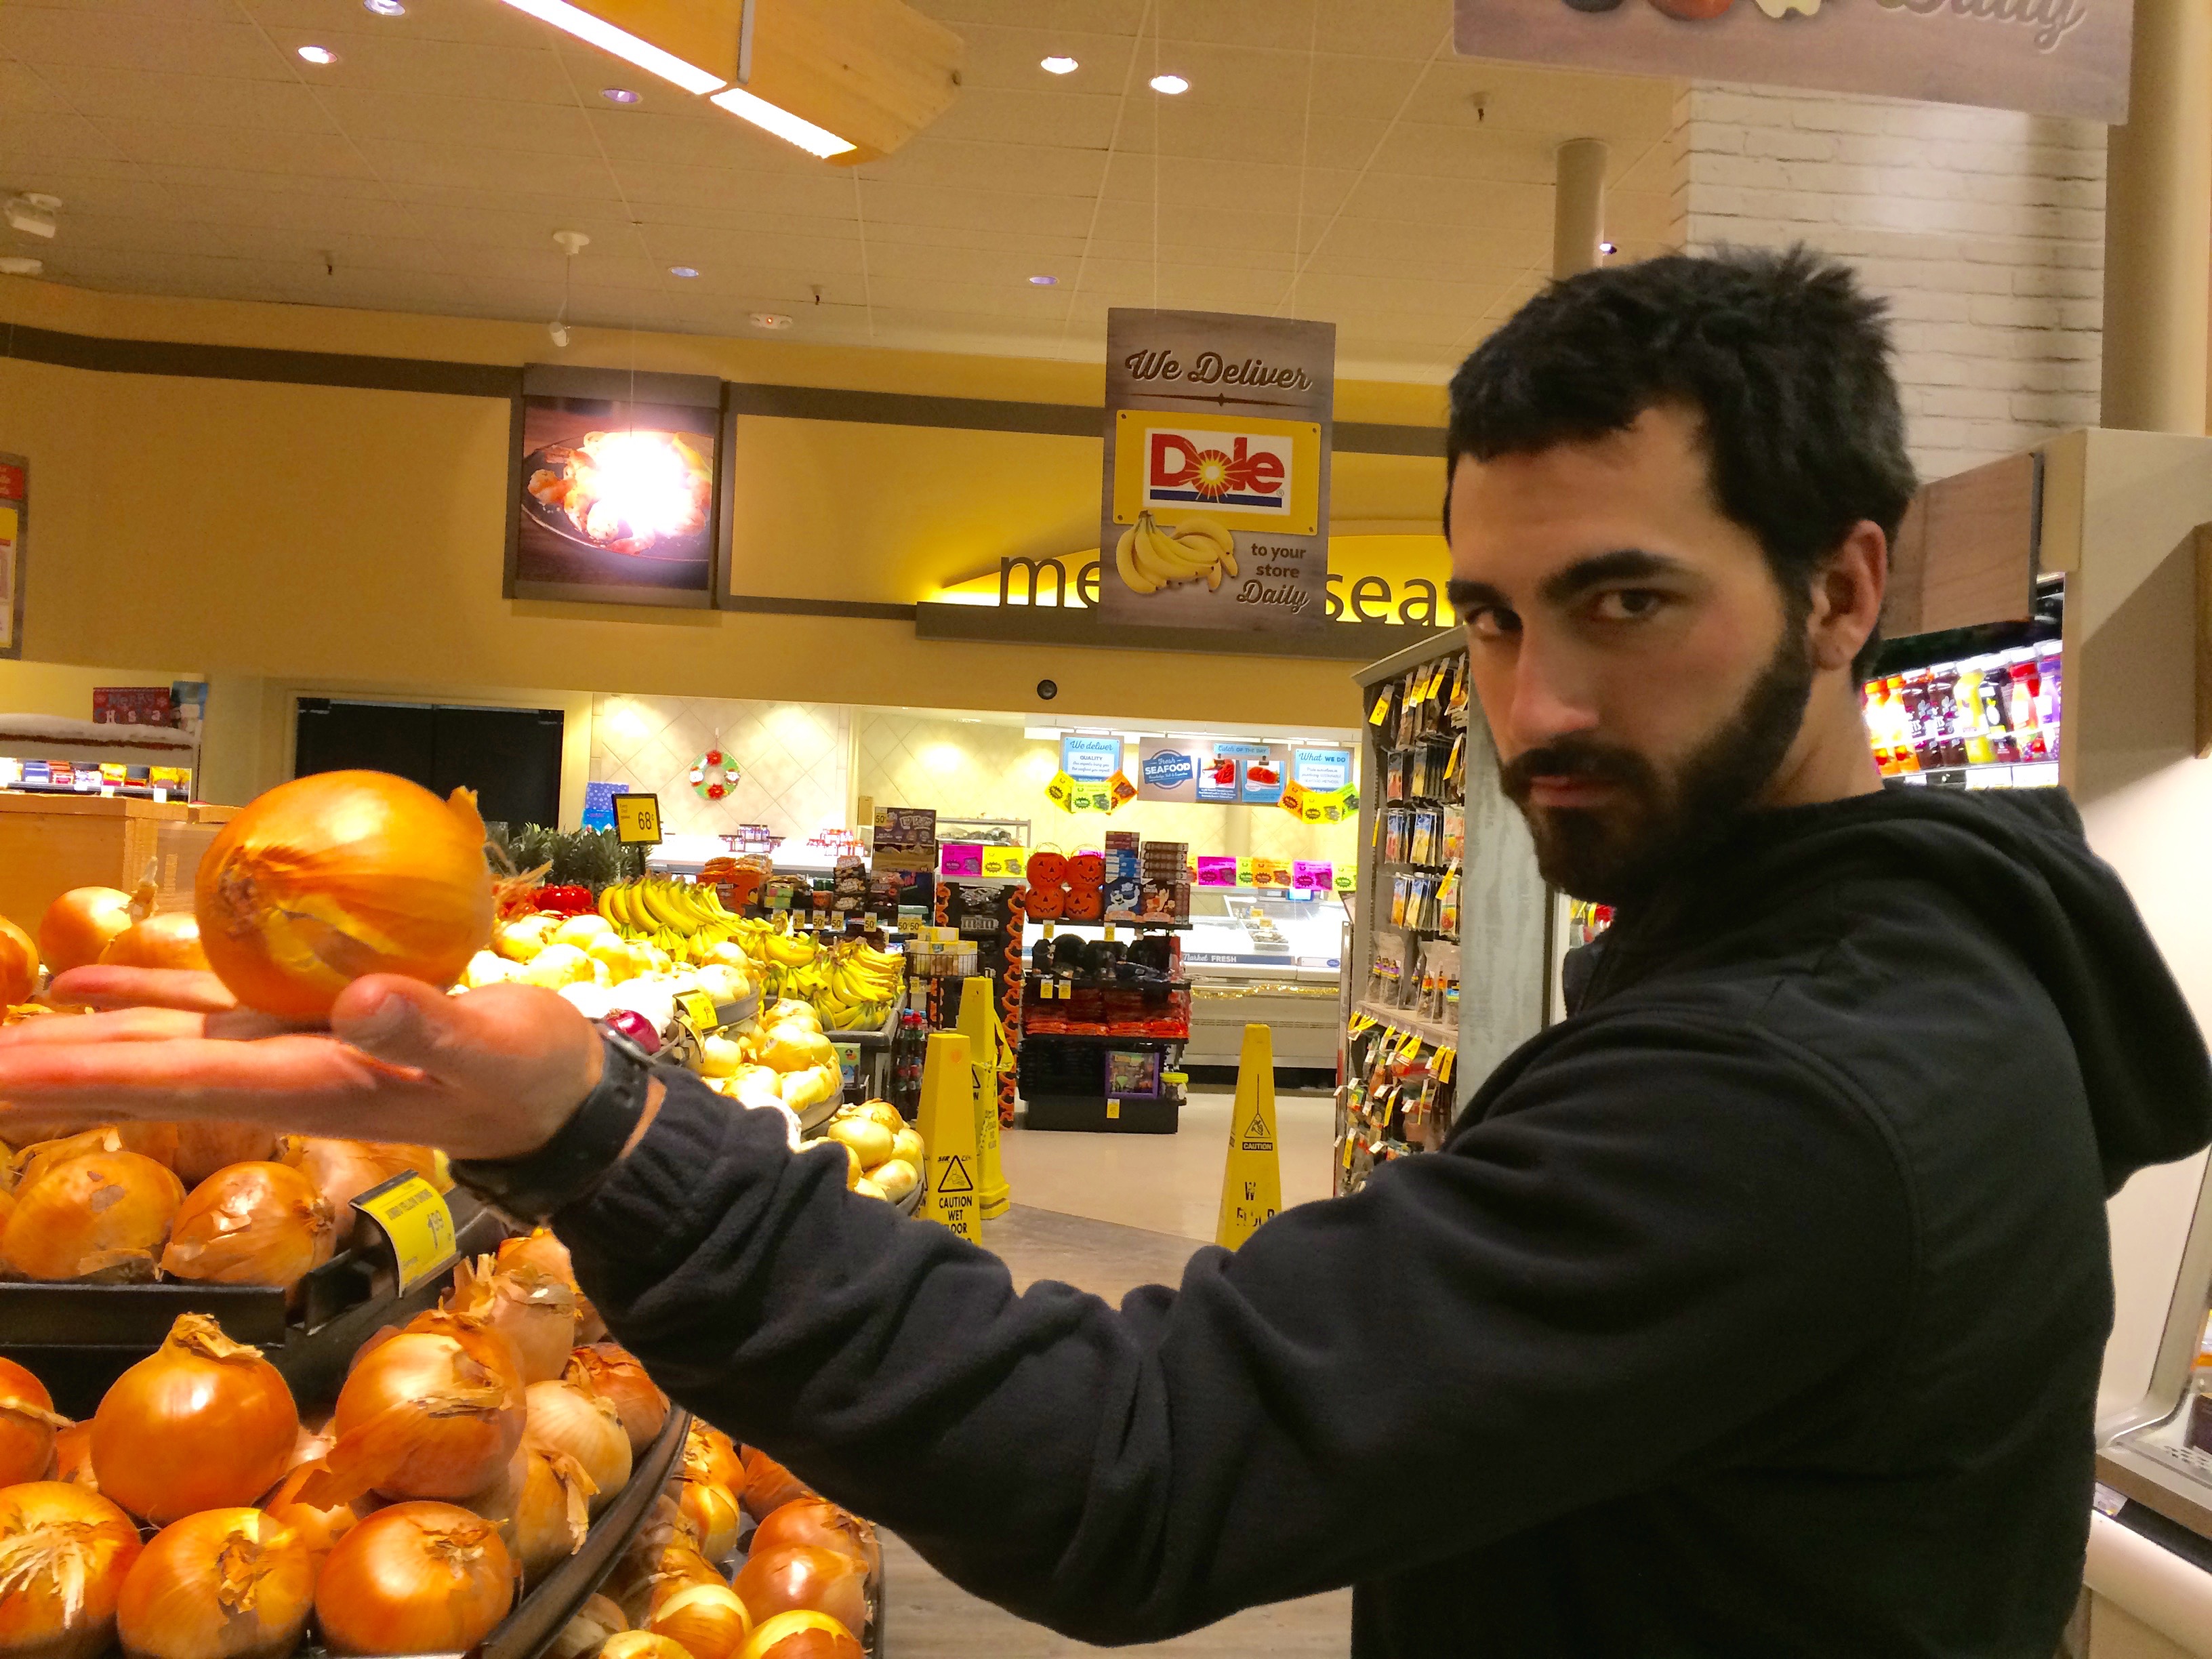 Its great to get all these recipes and health tips, but what am I supposed to buy when I go the grocery store? Do I meal plan and take a detailed list? Do I freestyle it? Do I buy all organic? Do I even step foot in any aisle that is not fresh produce? Is my end bill going to give me a heart attack? I should buy the fat free version right? 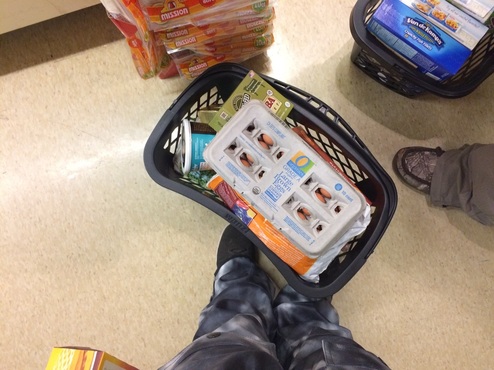 And yes, those are snow pants Whether you plan or freestyle, it is really up to you. What I do is a hybrid. I have a list of stuff I know I have run out of, and I have some staples that I make sure I always have in the house. During this example shop, you will see many of my staple ingredients. I hope to answer some of the above questions and help you save money, eat healthy, and avoid the common traps in supermarkets. So what about Organic? Well, it turns out that some foods should definitely be bought organic, and others don't matter as much if you want to save money. Click here to see the list What I didn't buy
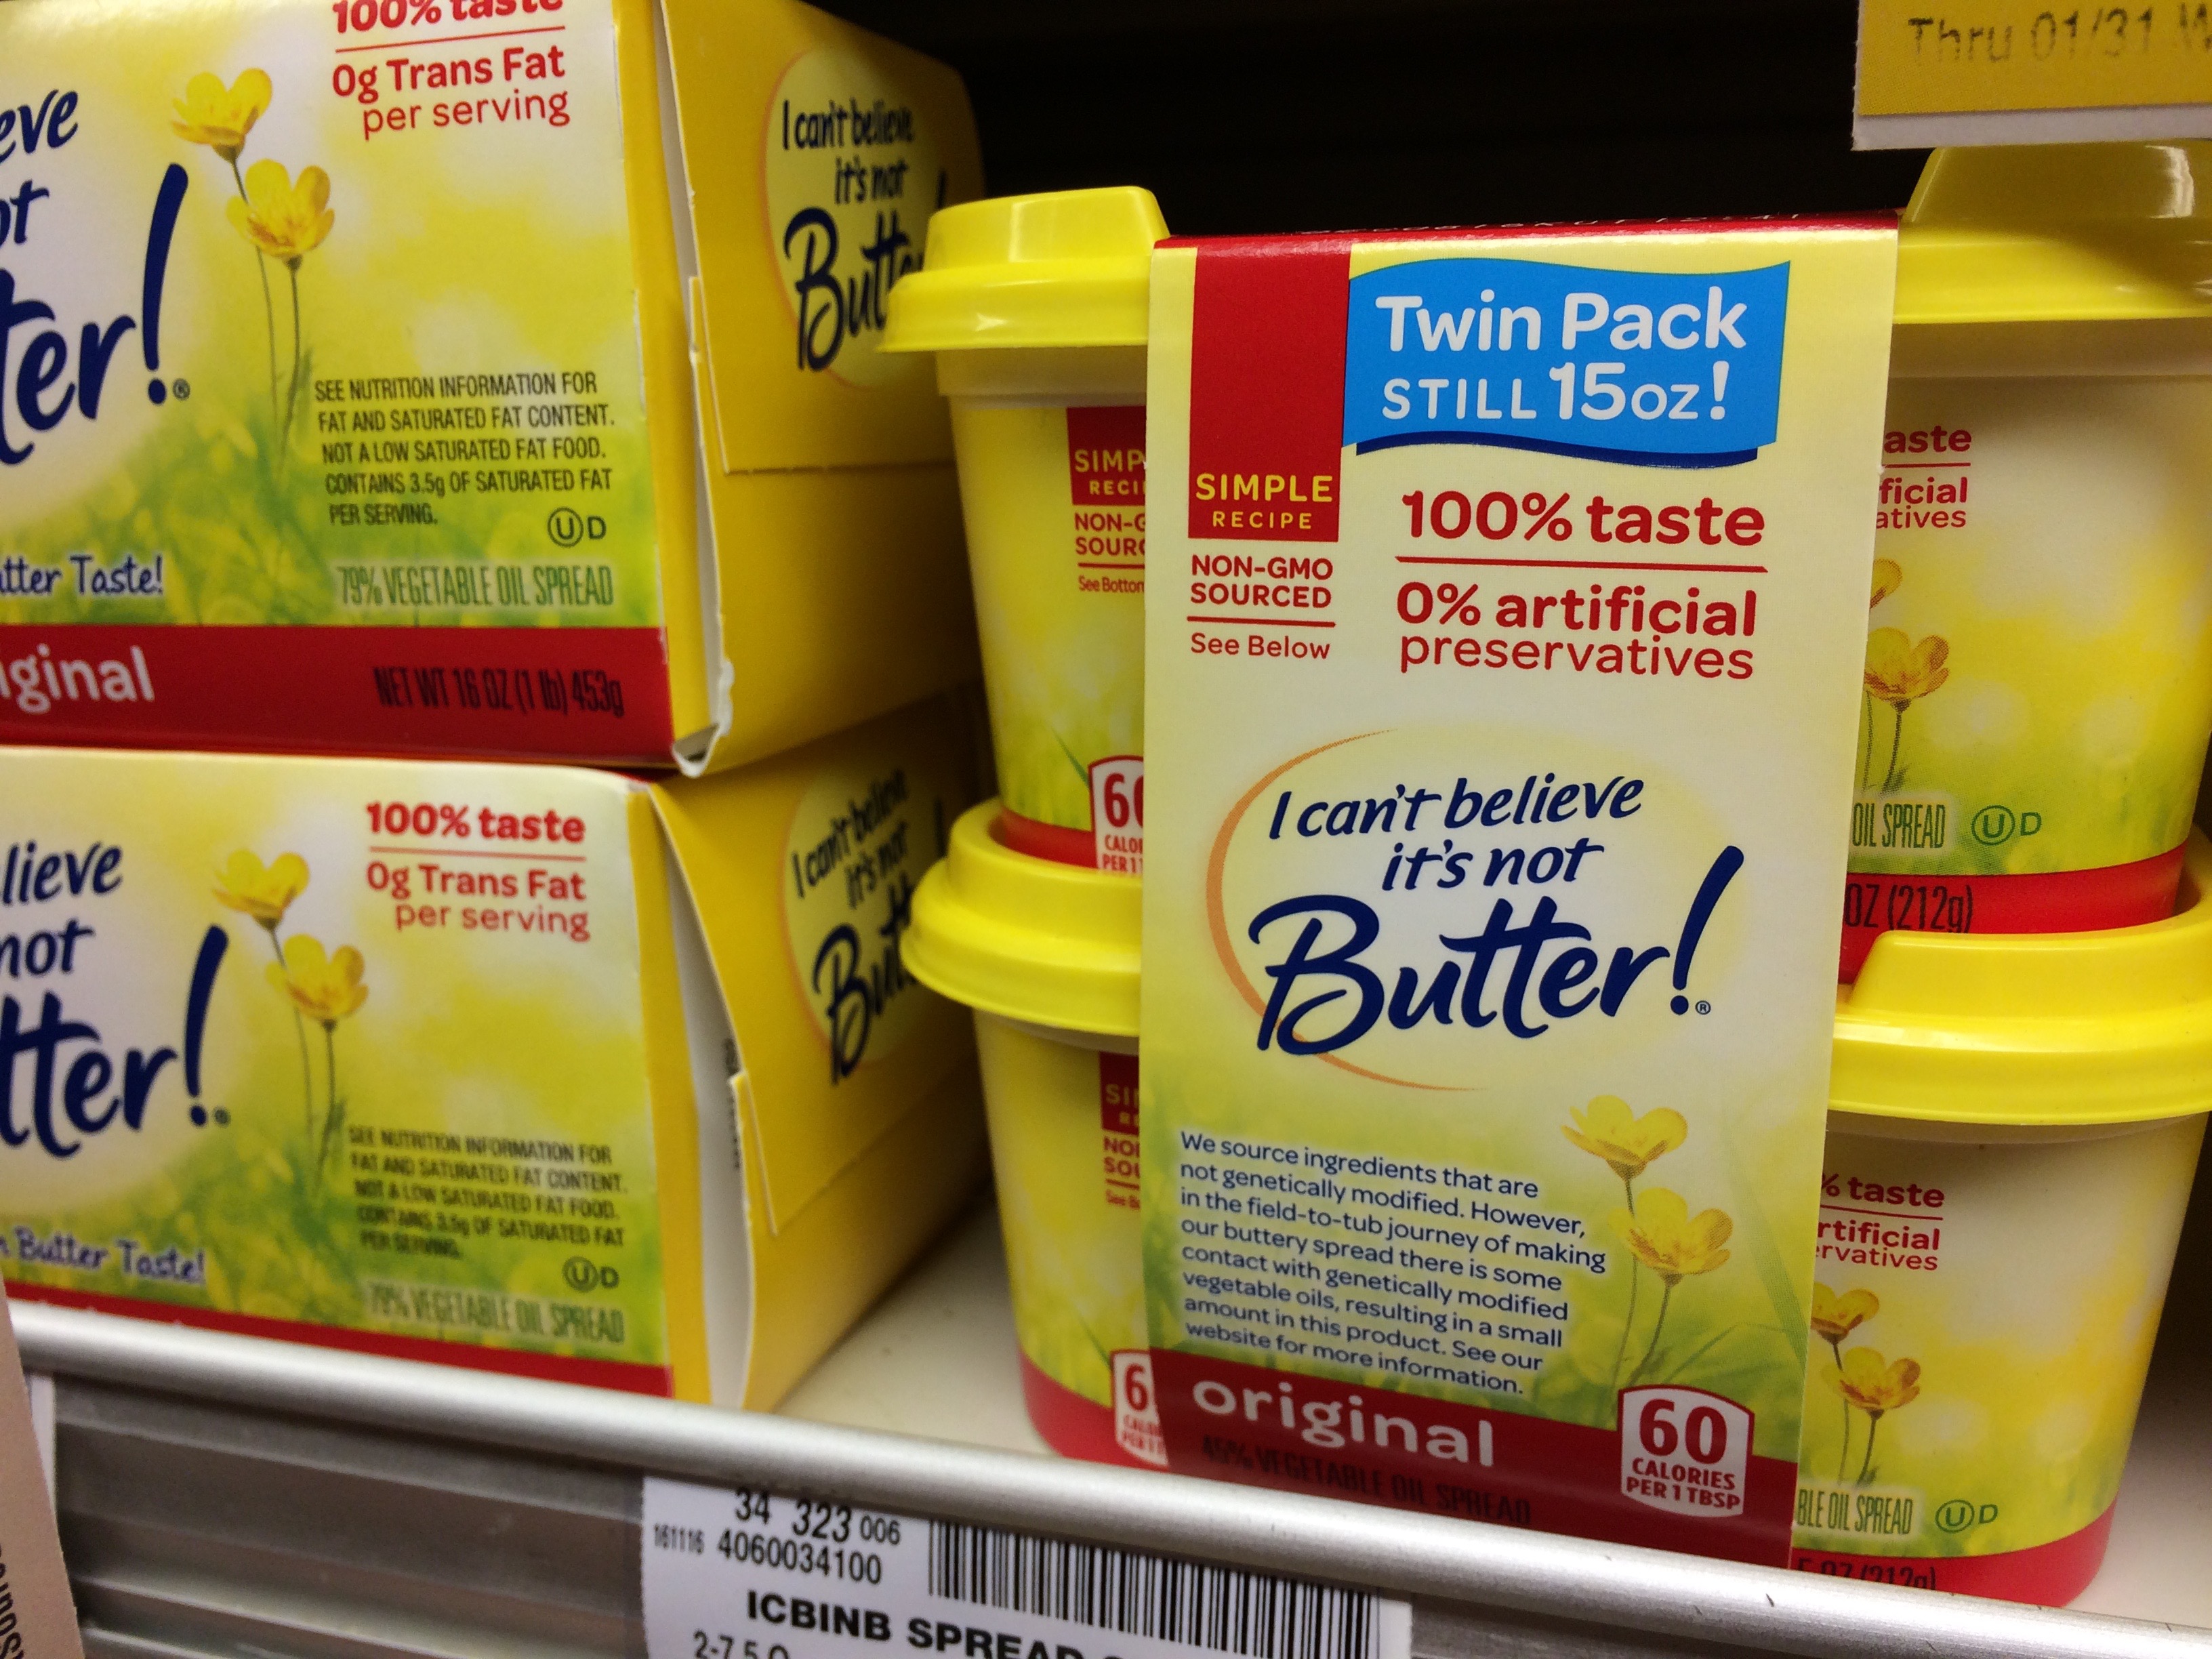
when something needs to be marketed as fat free/low fat, I usually steer clear of it. Chances are, you'll look at the ingredients and see tons of chemicals, sugar, or ingredients you can't even pronounce. High-fat dairy products, such as butter or yogurt can be healthy if they are grass fed or organic. 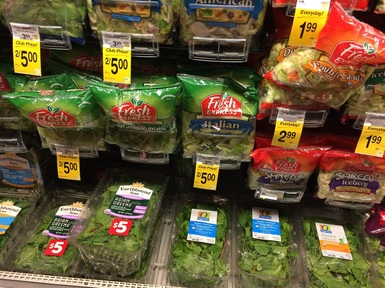 Lettuce is ok, but I don't often buy it. For the money, you don't get many calories, and to be honest, I'm not a big fan of salad anyway. I know- a shocker coming from a health food blogger! 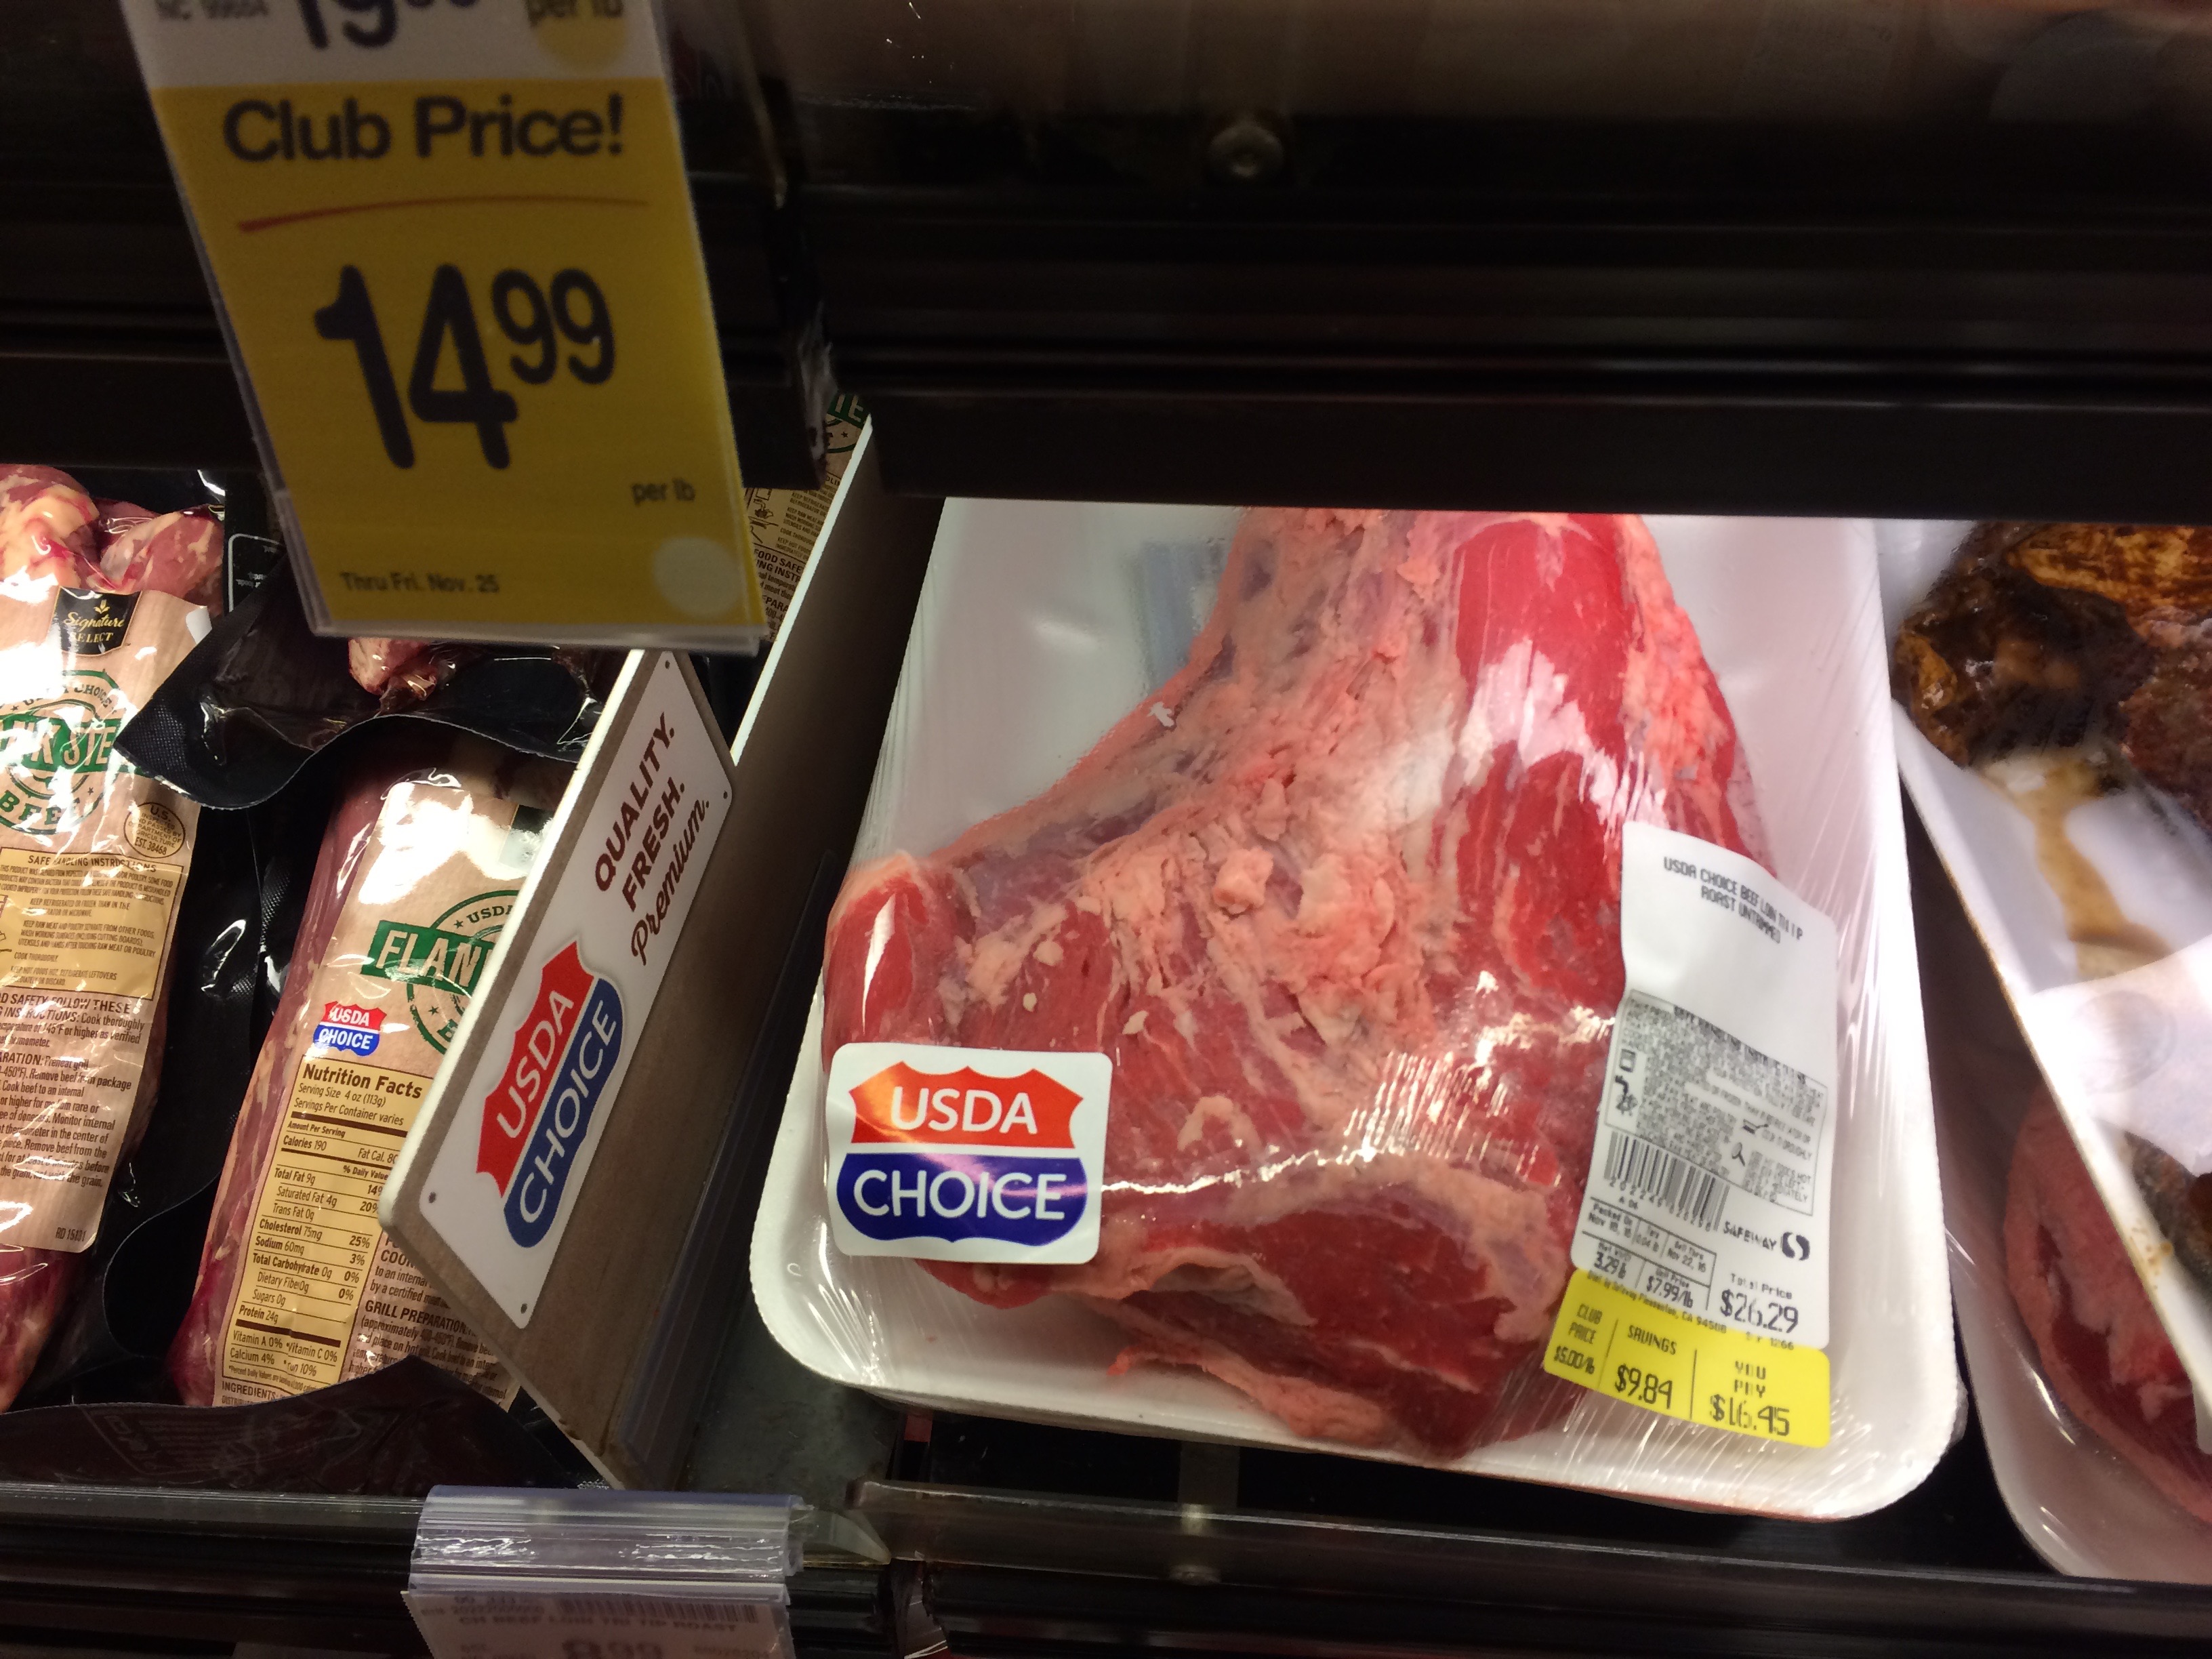 Corn fed beef. If it is not marked as "grass fed" beef, it is corn fed. I don't care if it is USDA choice.
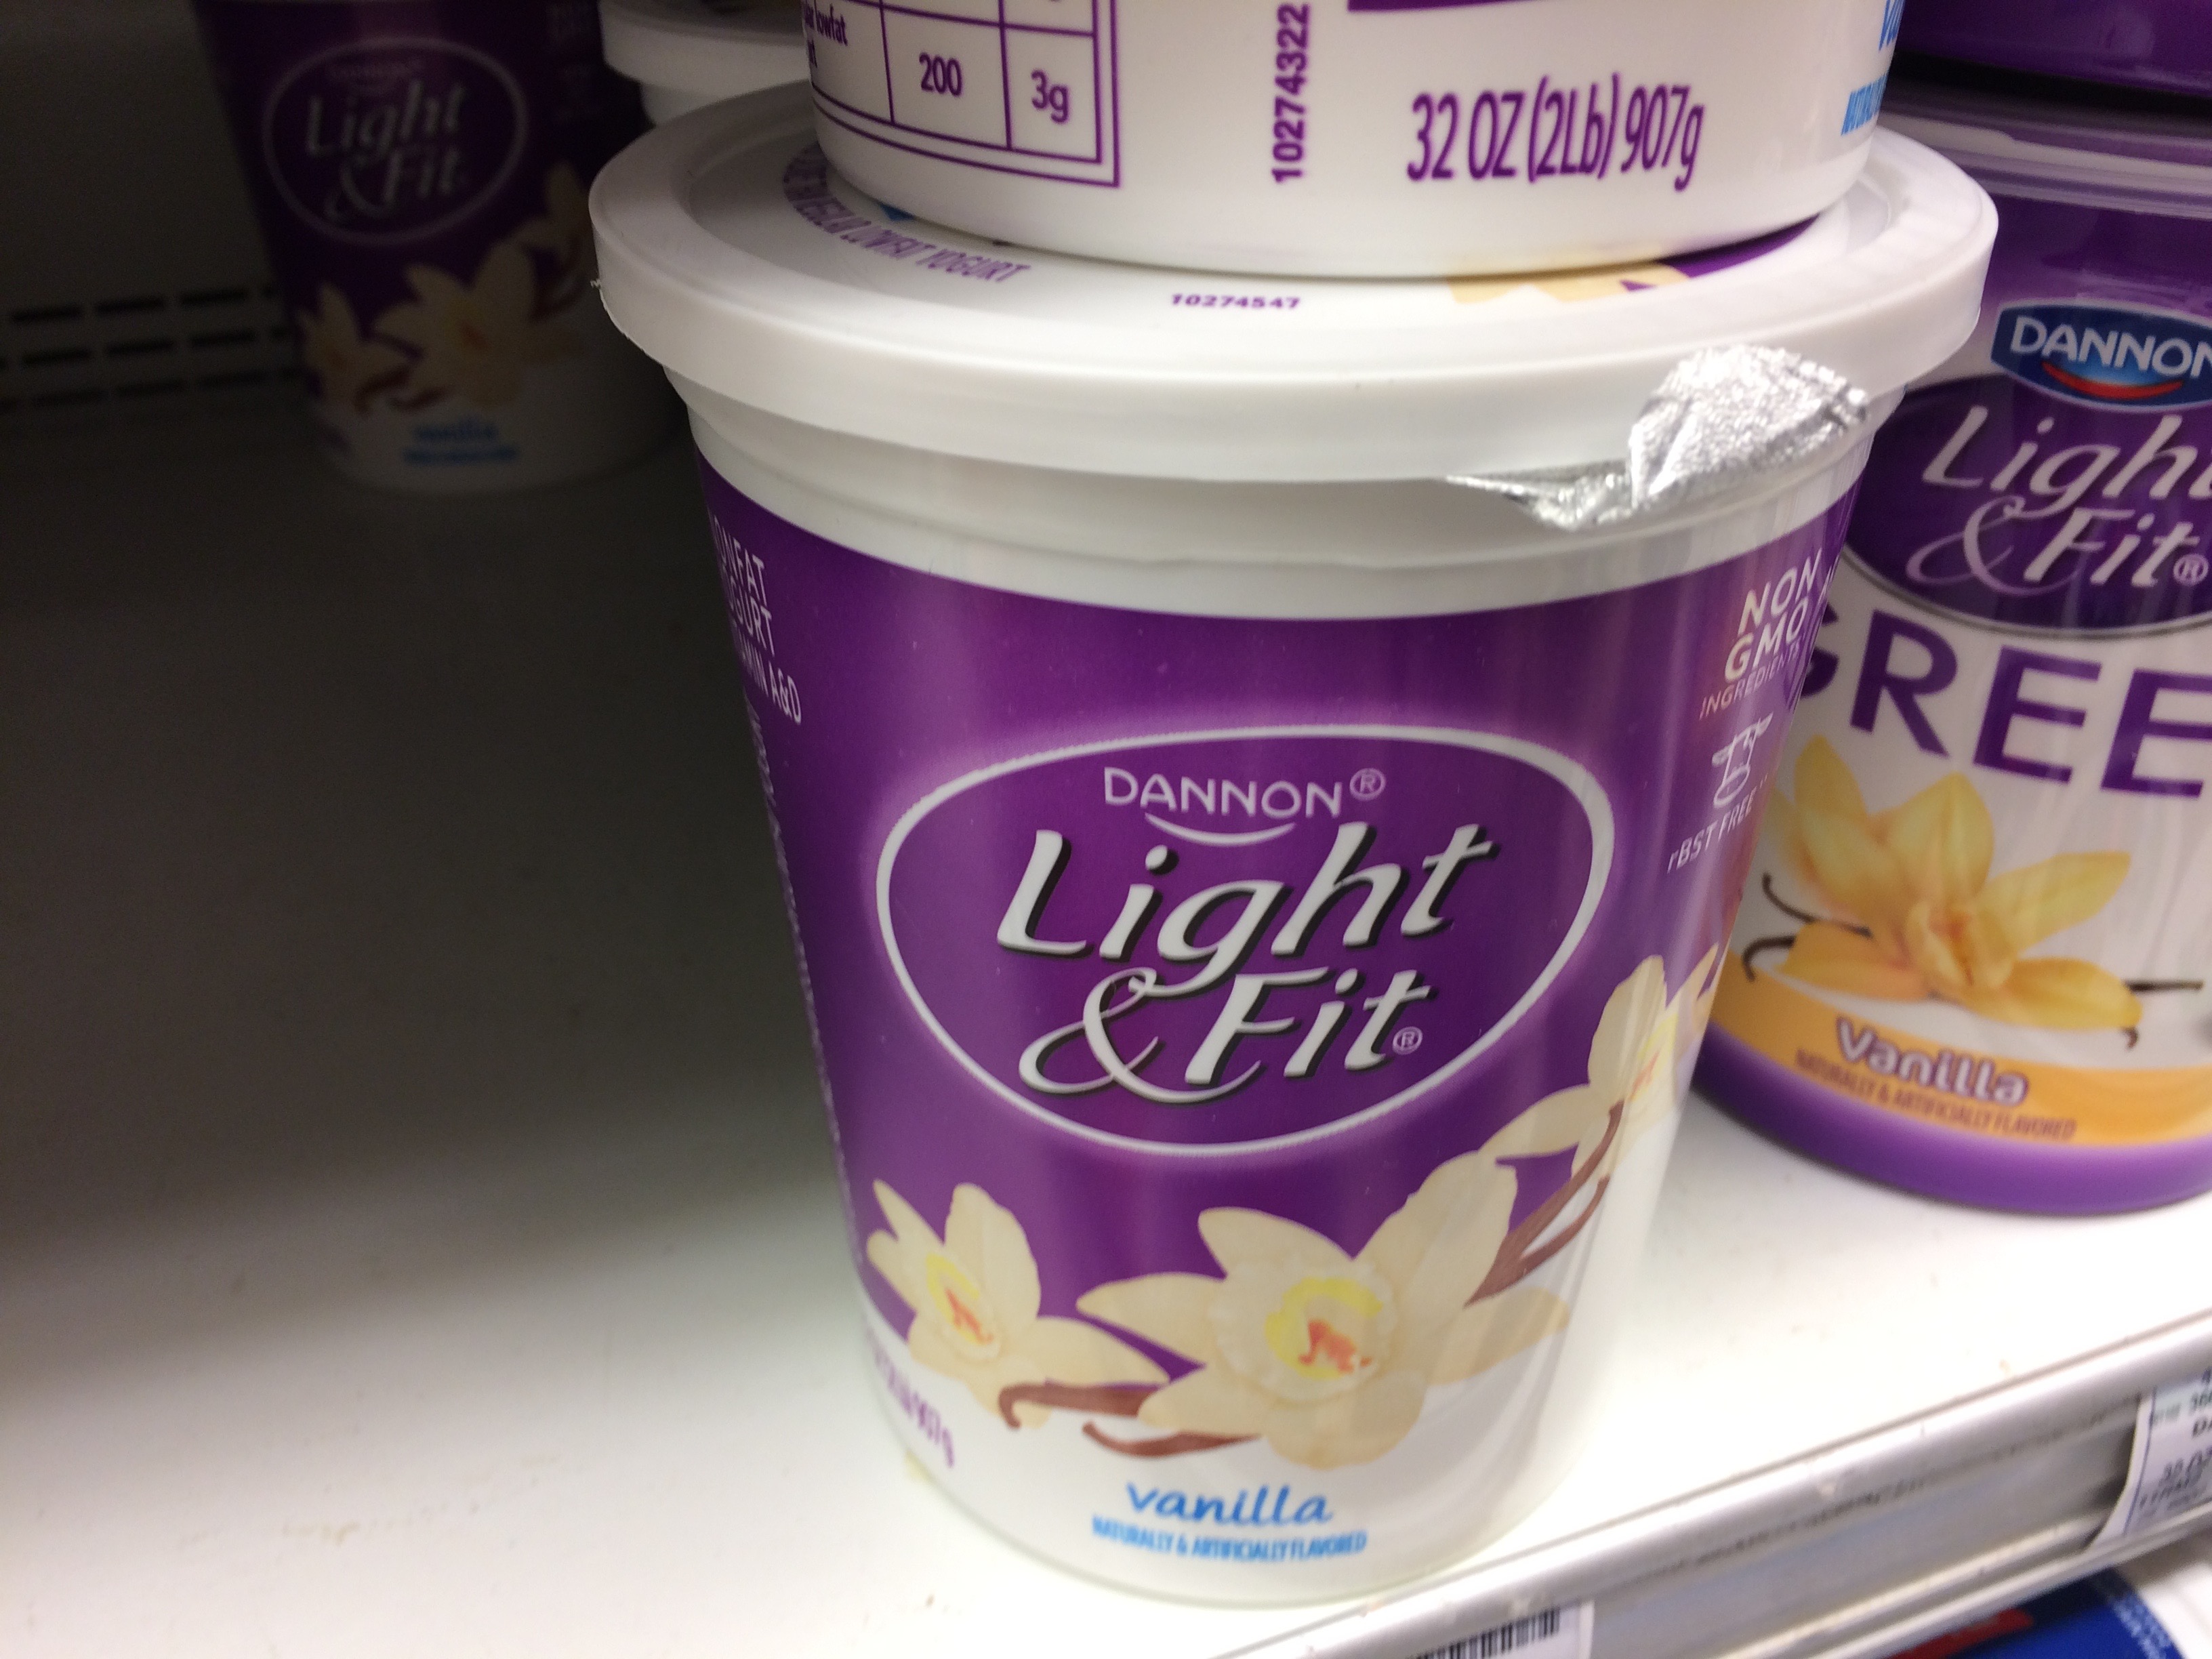
Processed food or prepared frozen meals. I don't even buy "lean cuisine". I do still buy some things from the freezer aisle. Just keep scrolling :)  Gluten free does not mean healthy. REPEAT: GLUTEN FREE DOES NOT MEAN HEALTHY
All this stuff above: Just don't.  Did you know one can of rockstar has 62 grams of sugar in it?  And finally, all this propaganda B******t you see at the checkout. What I did buy
 I like to buy whole chickens and cook it all up in the slow cooker and have cooked, frozen chicken on hand for the next week or two. 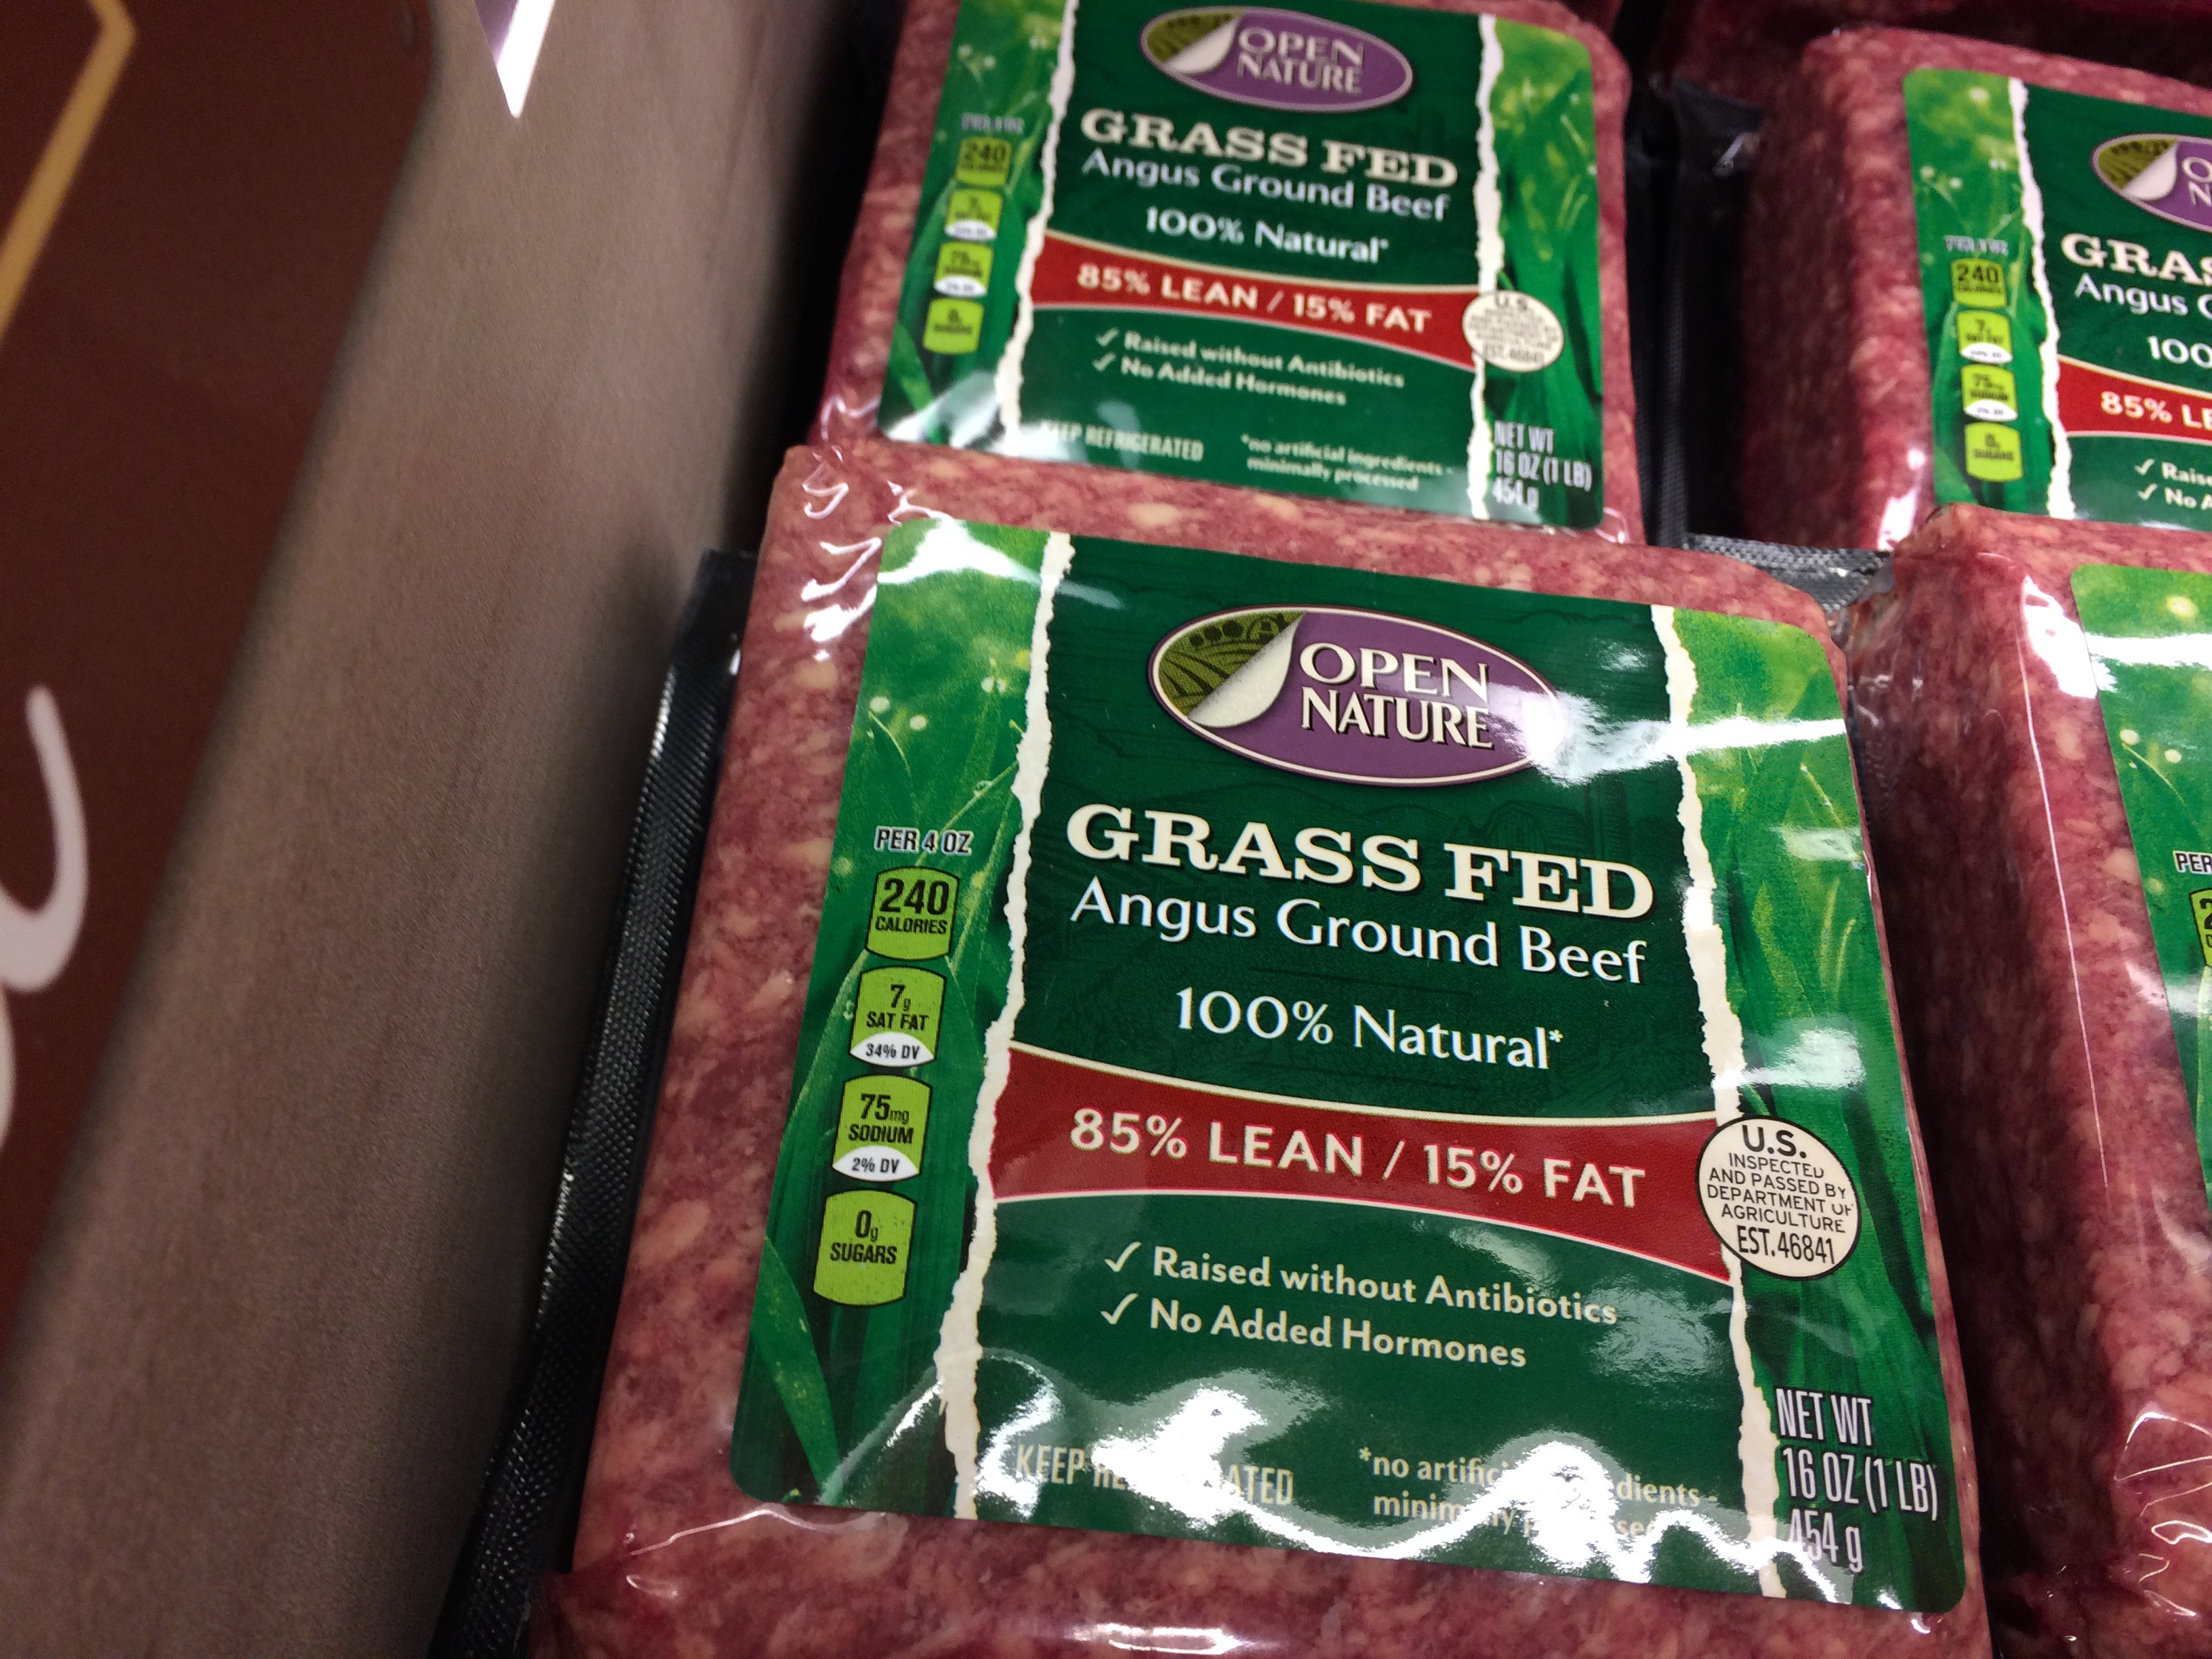 Grass fed, full-fat beef 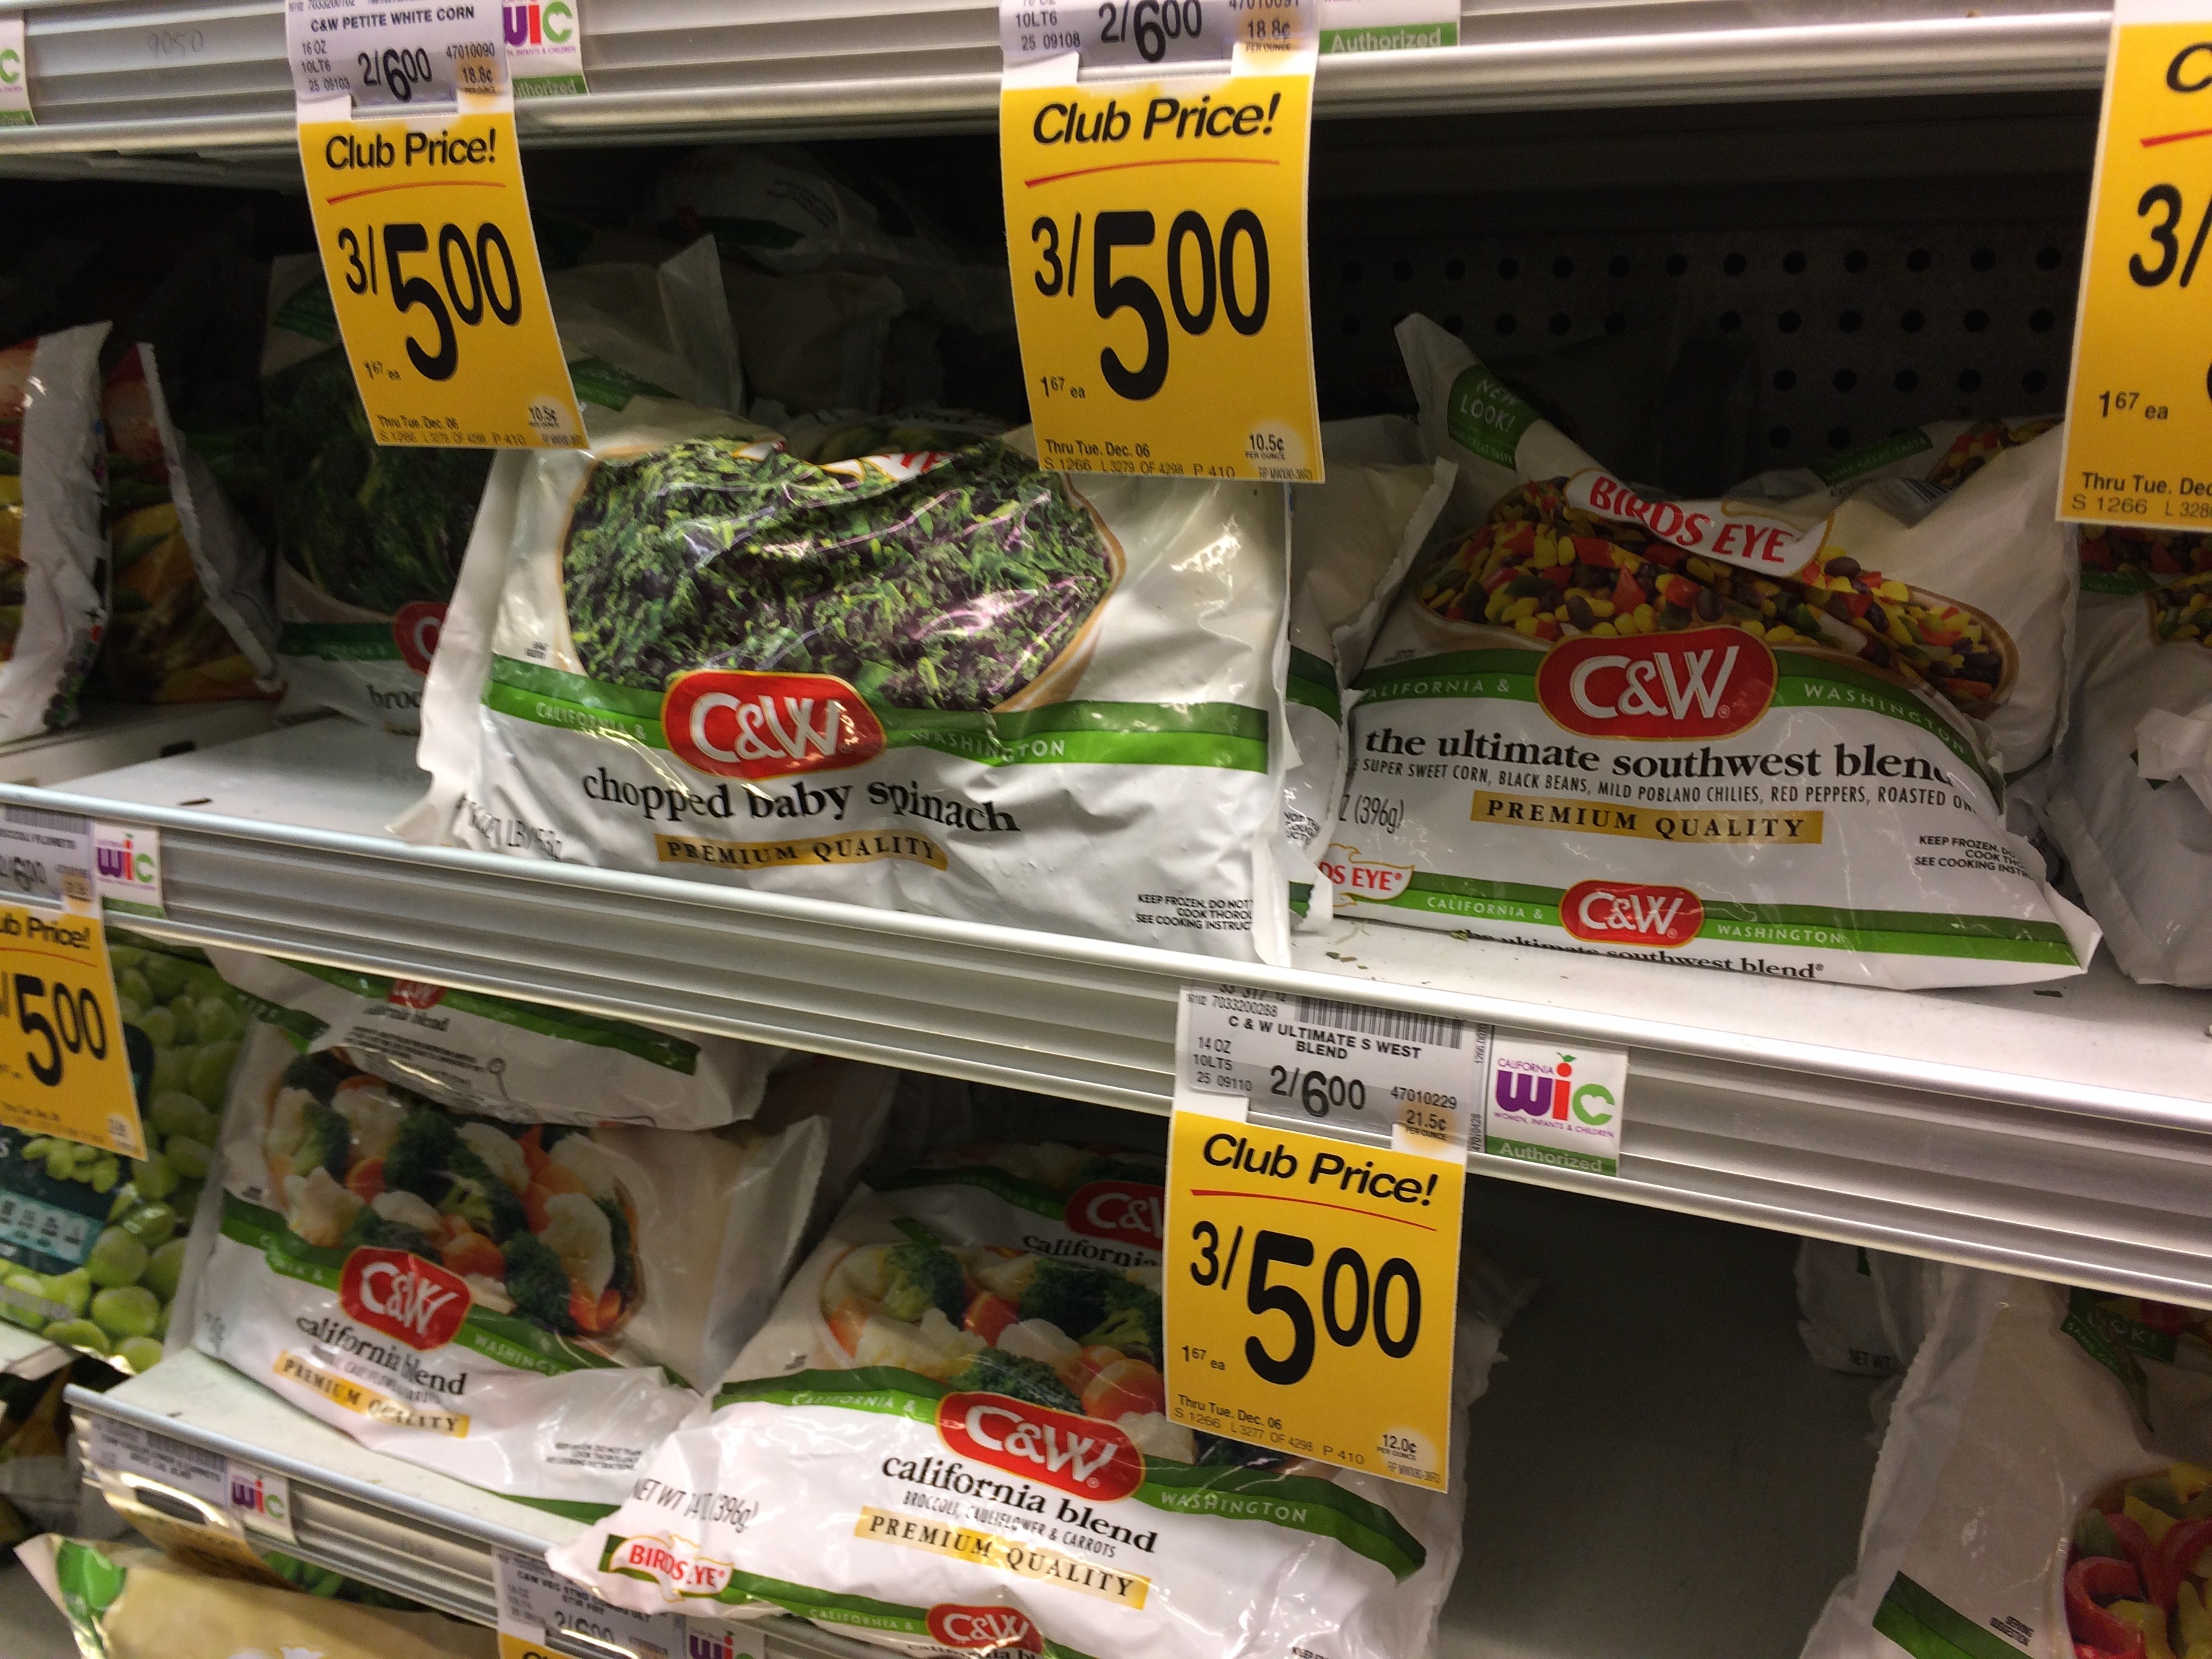 frozen veggies are not only cheaper and much easier to cook, but are equally healthy as fresh ones! 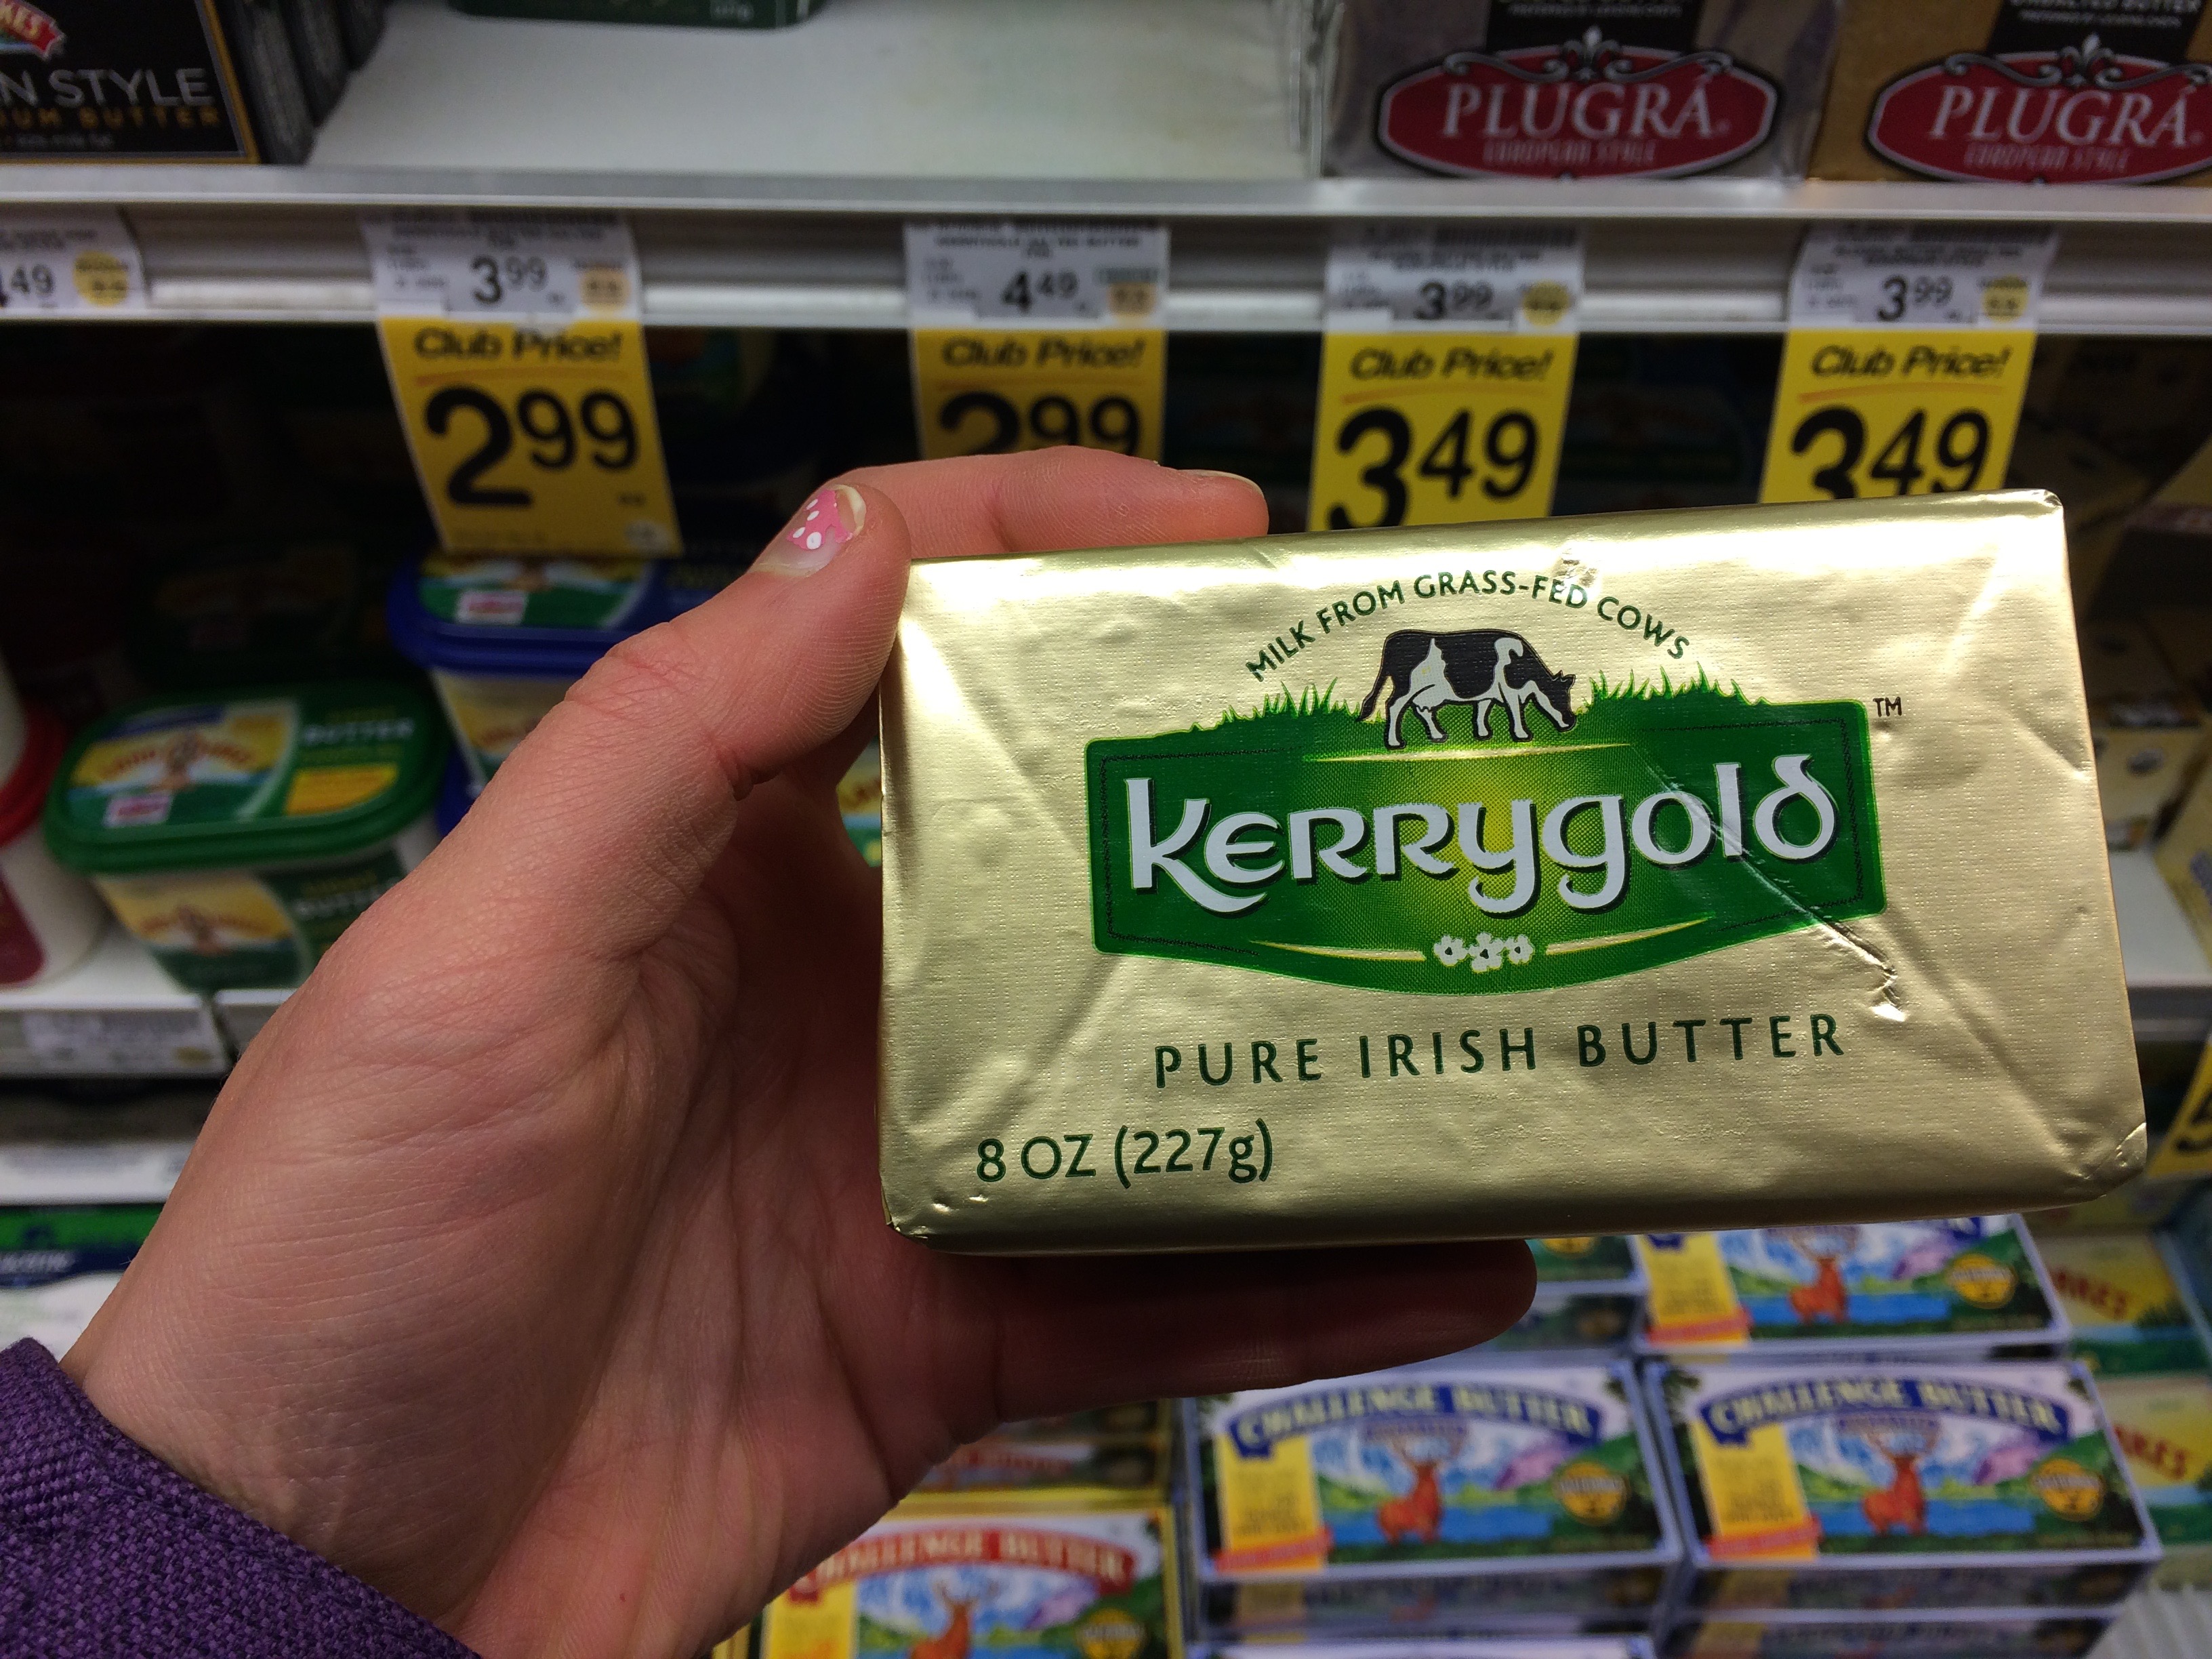 Real, grass fed butter. Non of that other fake junk. 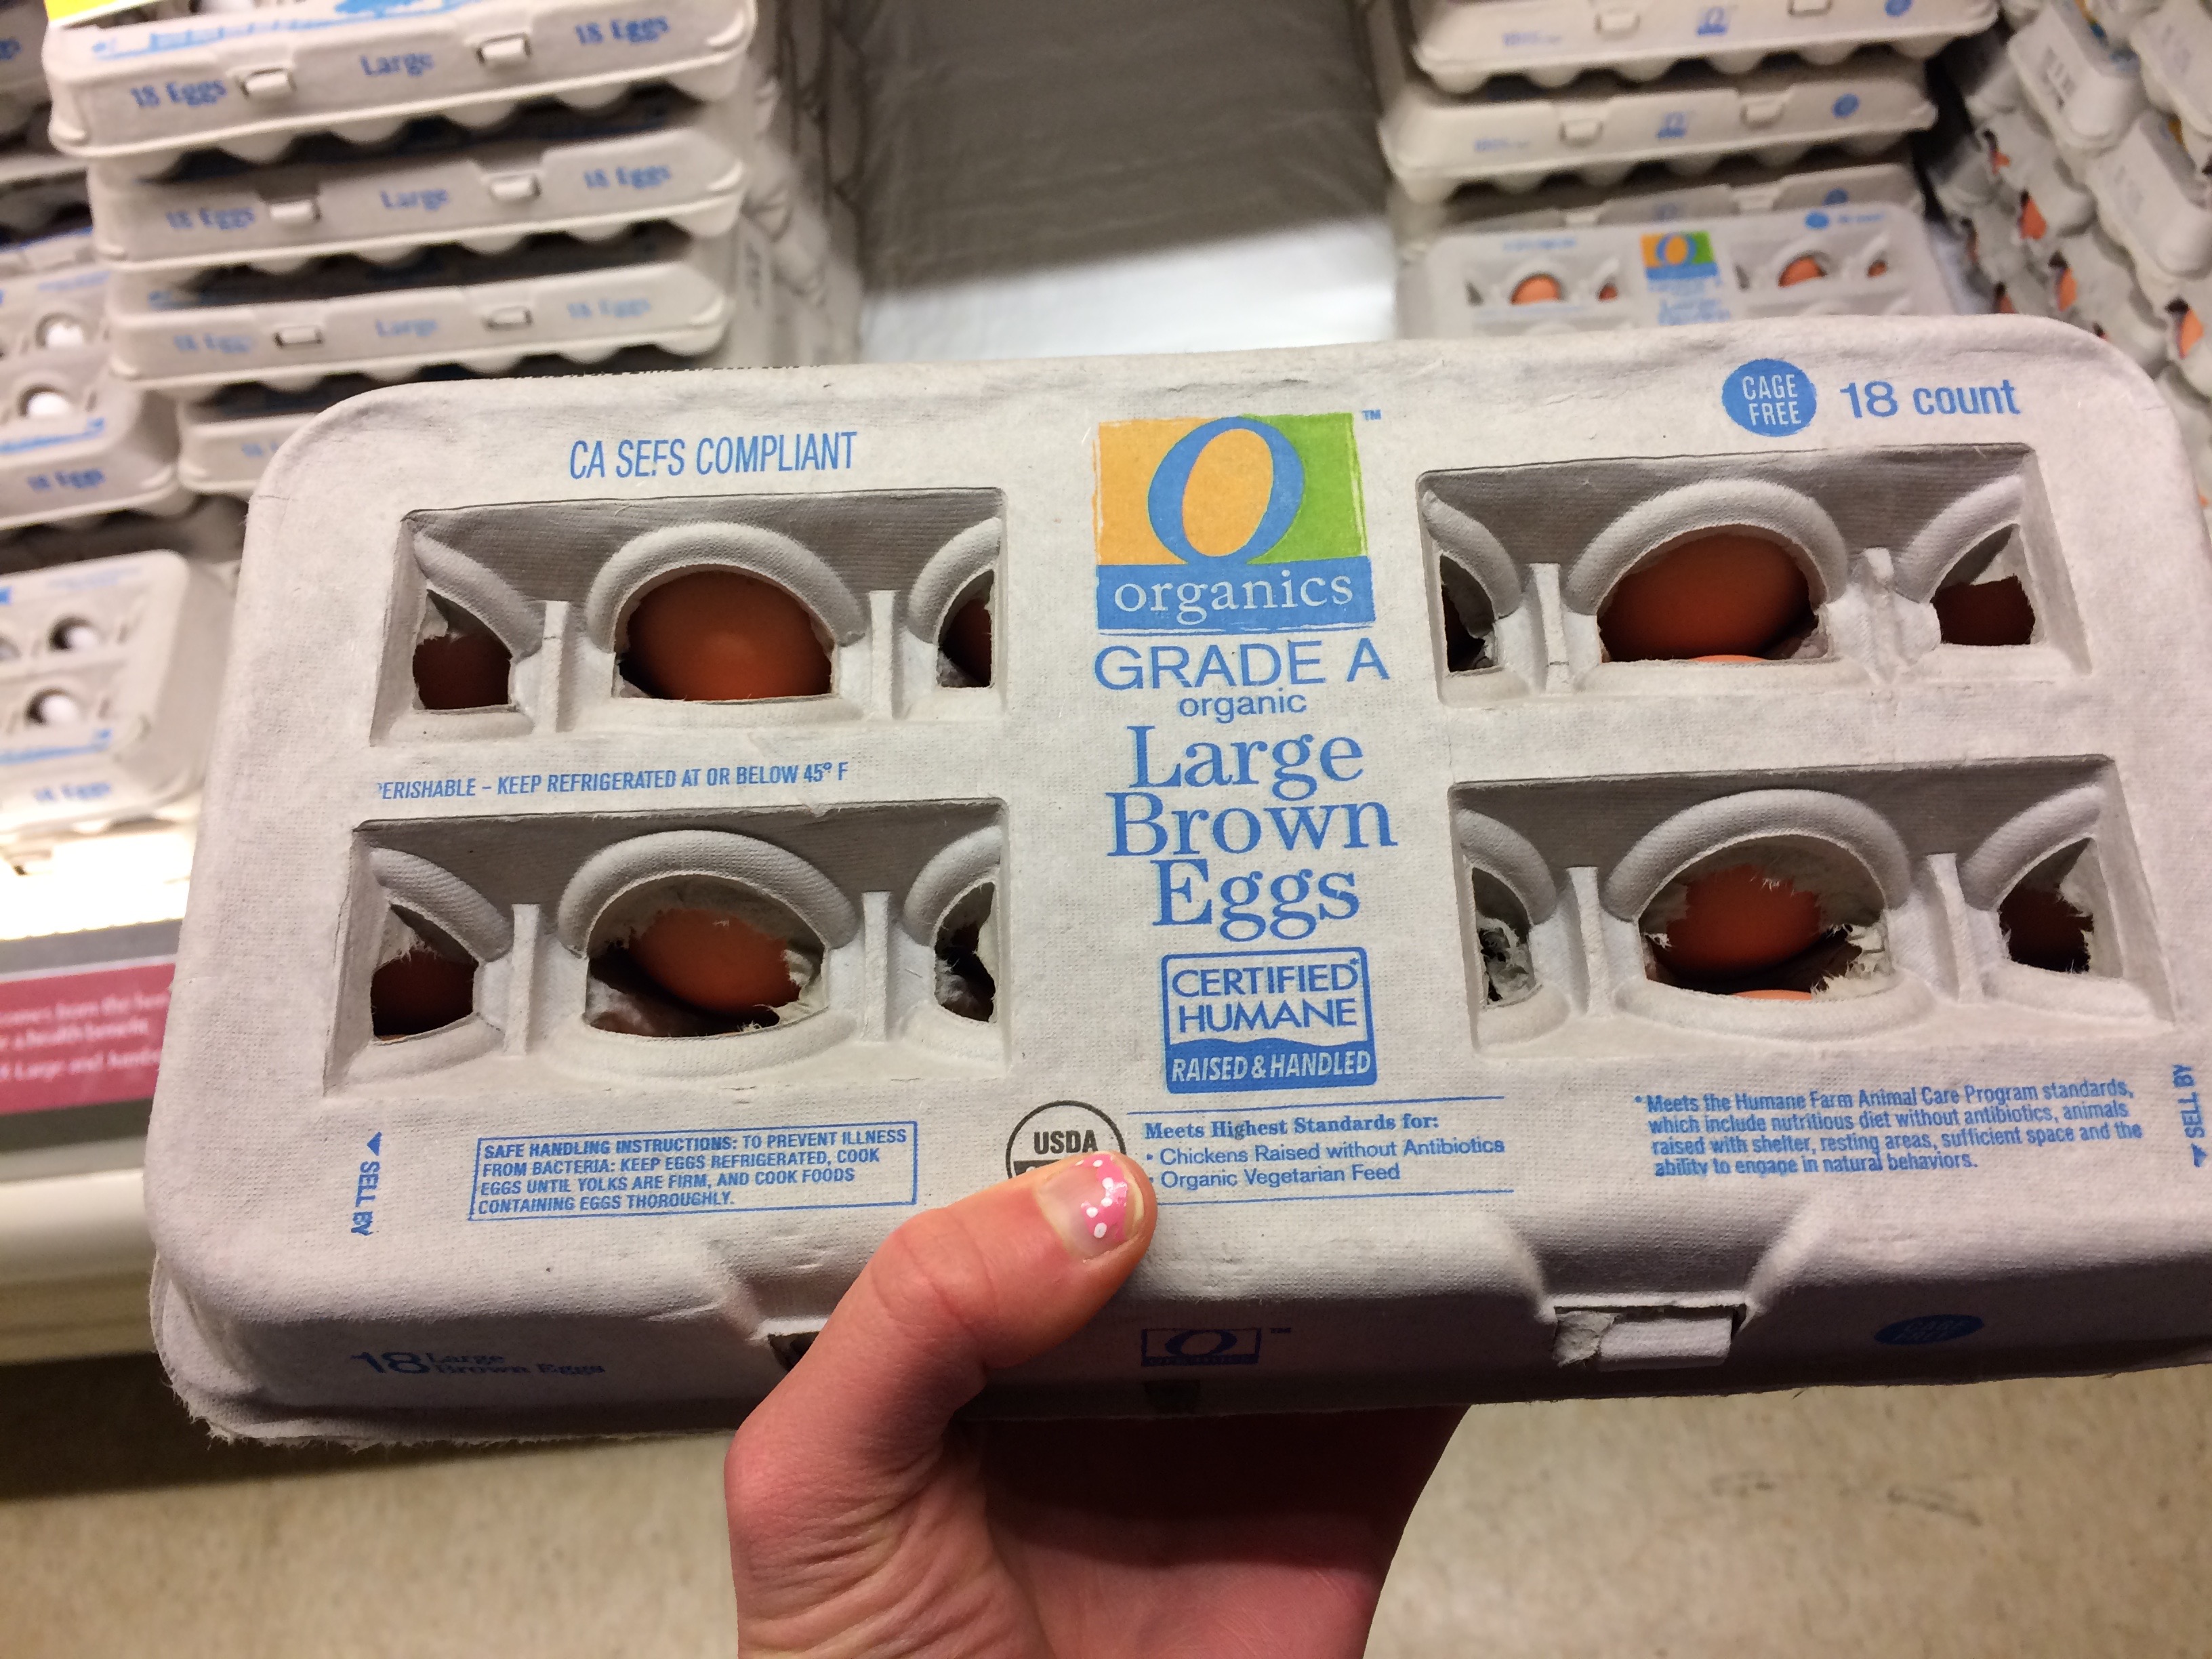 Organic eggs. Not the most expensive ones. I usually get the one in the middle of the price spectrum. So, find anything interesting? Surprising? Let me know!
This is part 5 of my 5-part series, "Go to Meals". These are recipes I do on a weekly basis that I find easy, quick, cheap, and healthy. Part 1: roasted veggies Part 2: Easy frittata Part 3: Paleo Shepherd's pie Part 4: Smoothies Super low-maintainence and warming, this is perfect for winter nights. Although I do find myself making this year-round because of how tasty, easy, and cheap it is. I like to make a large amount of this and freeze the extra chicken and broth to use in other recipes or salads. 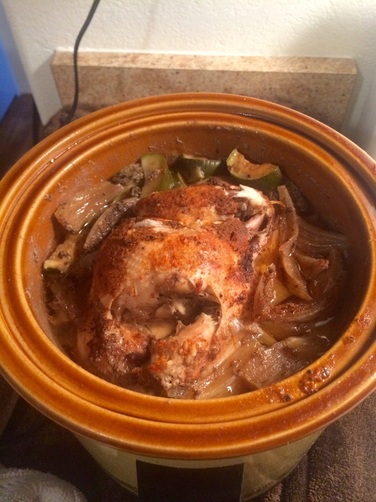 Ingredients
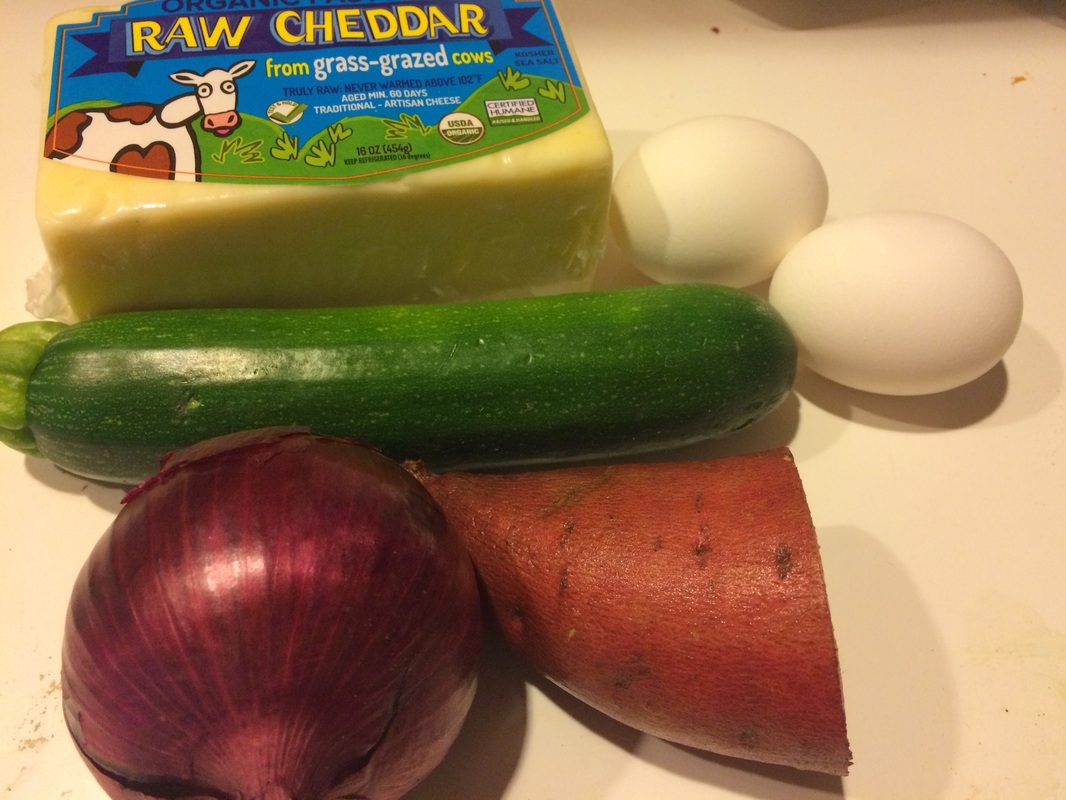
instructionsFor the TL;DR people: chop up veggies, throw everything in te crockpot, leave it on low for 8+ hours, go out and do cool stuff, come back, and boom, you're done. Now for the step-by-step version with pictures Chop up your veggies into pieces... 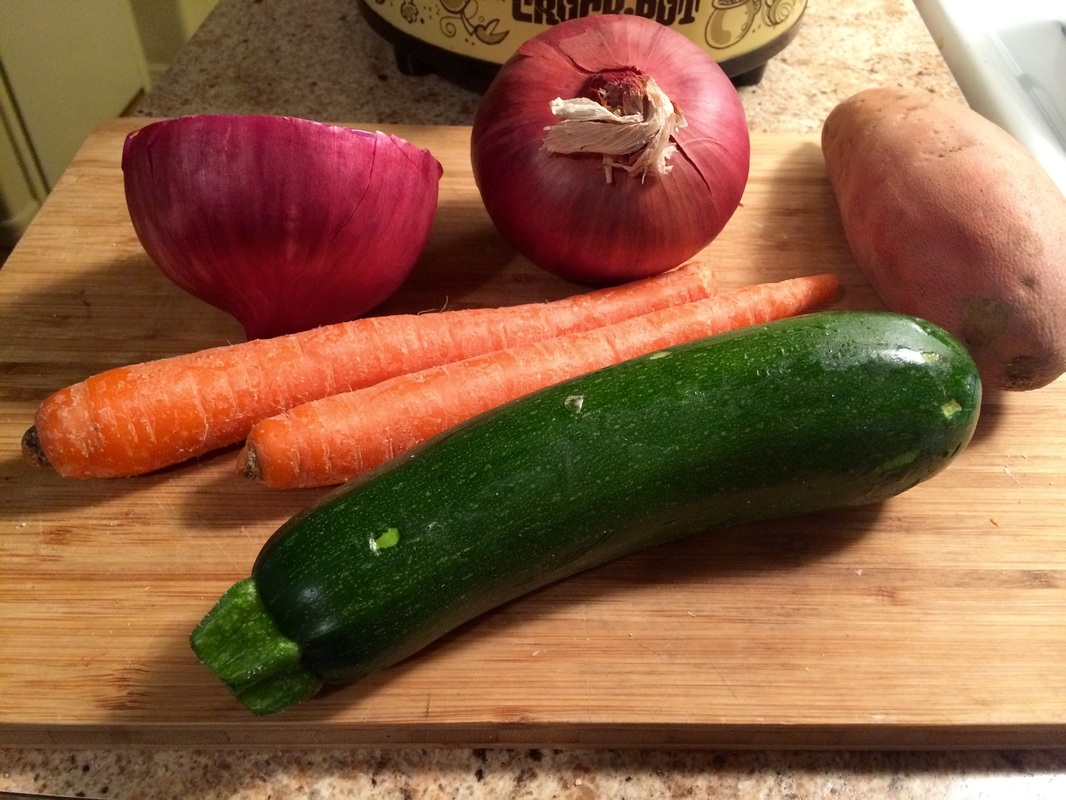 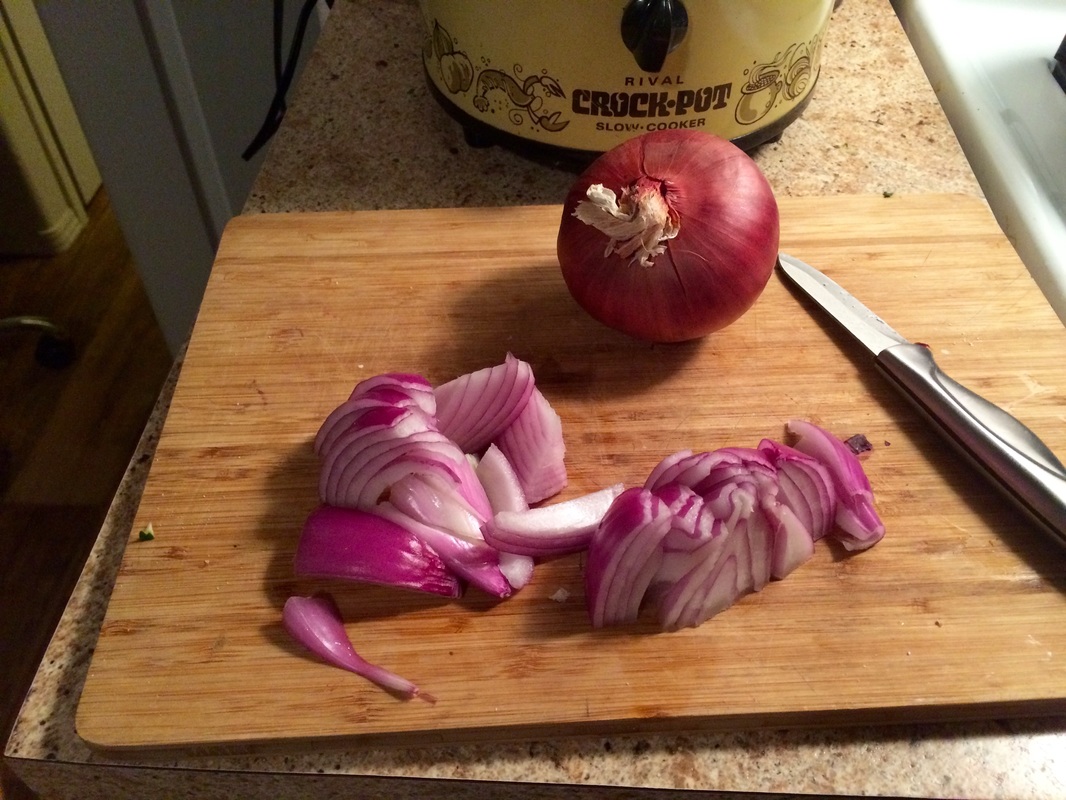 Put the chicken in the crockpot and pile the veggies around it, however they fit... 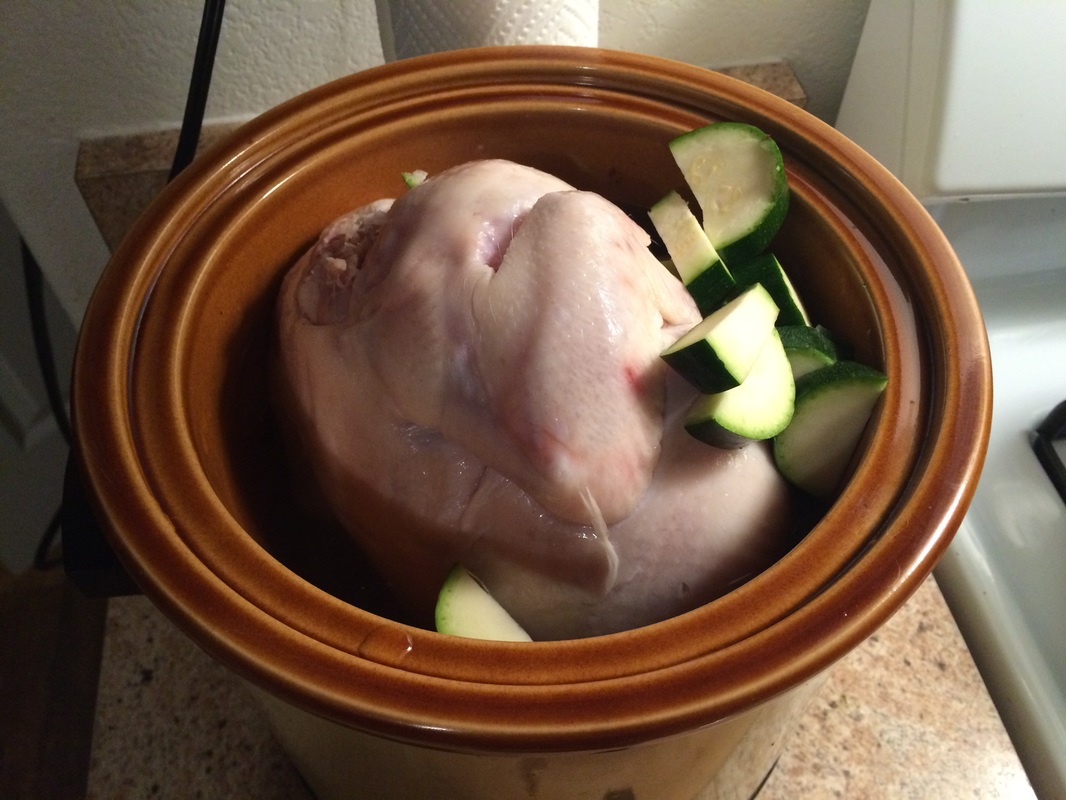 Sprinkle it with salt and seasonings, then fill the rest of the crockpot up with water. Make sure the lid fits. 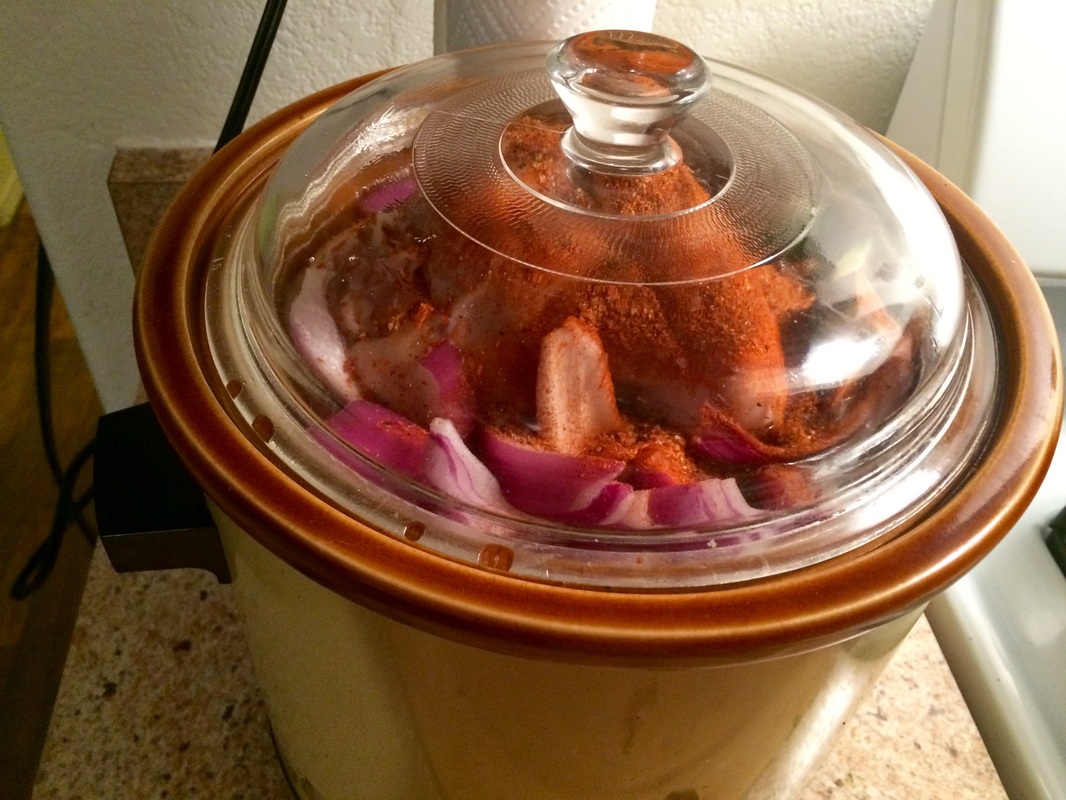 Turn it on low and leave it 8-12 hours, dpending on what is convenient for you. Heck, I'm sure 14 hours would be ok. You can totally leave the house and do whatever you want. It's impossible to screw up. 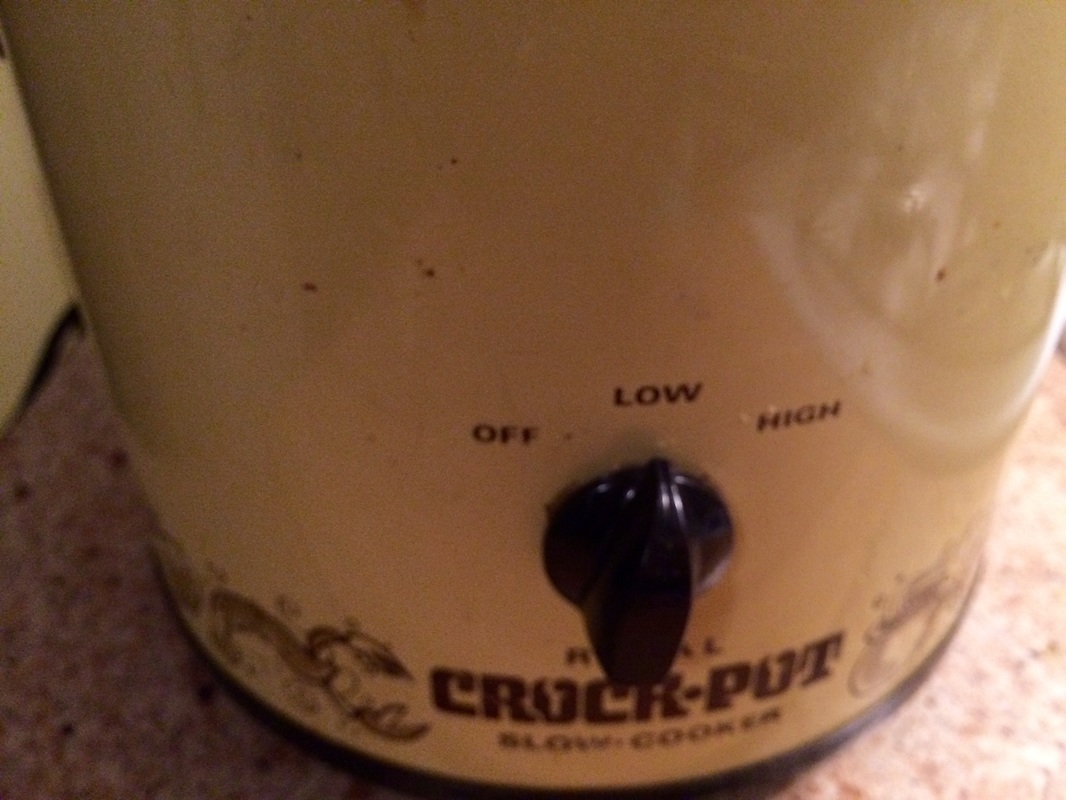 Come home, and boom, dinner's done. Woohoo! 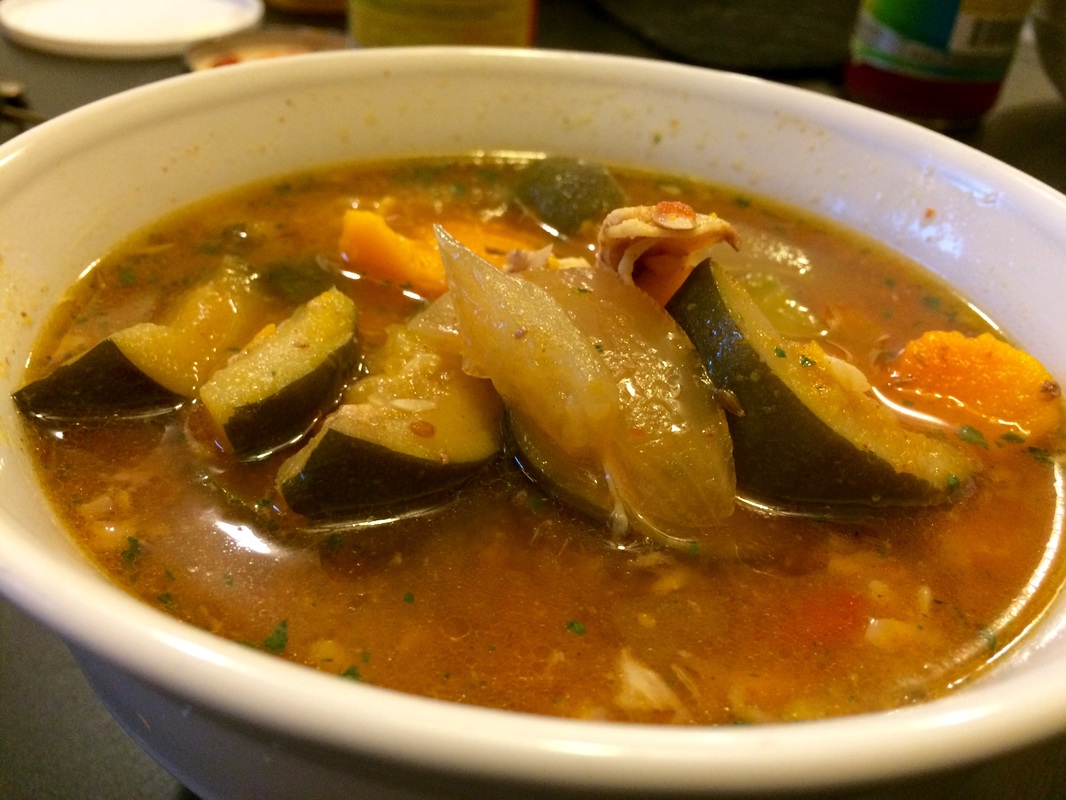 Also, if you did a lot of chicken, you can have leftover chicken and broth to use another day!  This is part 2 of my 5-part series, "Go to Meals". These are recipes I do on a weekly basis that I find easy, quick, cheap, and healthy. Click for part 1 When cooking for one, eggs are the hero. When I just want something quick and cheap and don't feel like cooking up a whole meat dish (as meat is usually sold by the pound and can make shopping for one difficult), this is my go-to. Even if you buy the expensive, high quality eggs, the protein in this meal comes to a grand total of a dollar. Add on the veggies and you have a meal that takes 20 minutes or less and costs about three dollars. I like traditional omelettes, but they can be a little bit difficult and actually require the right frying pan and some cooking talent to perfect. This is like a "lazy omelette", which has more veggies than eggs. It is not quite a scramble, but kind of like a bunch of veggies held together with eggs and cheese. On other words, it's pretty good! 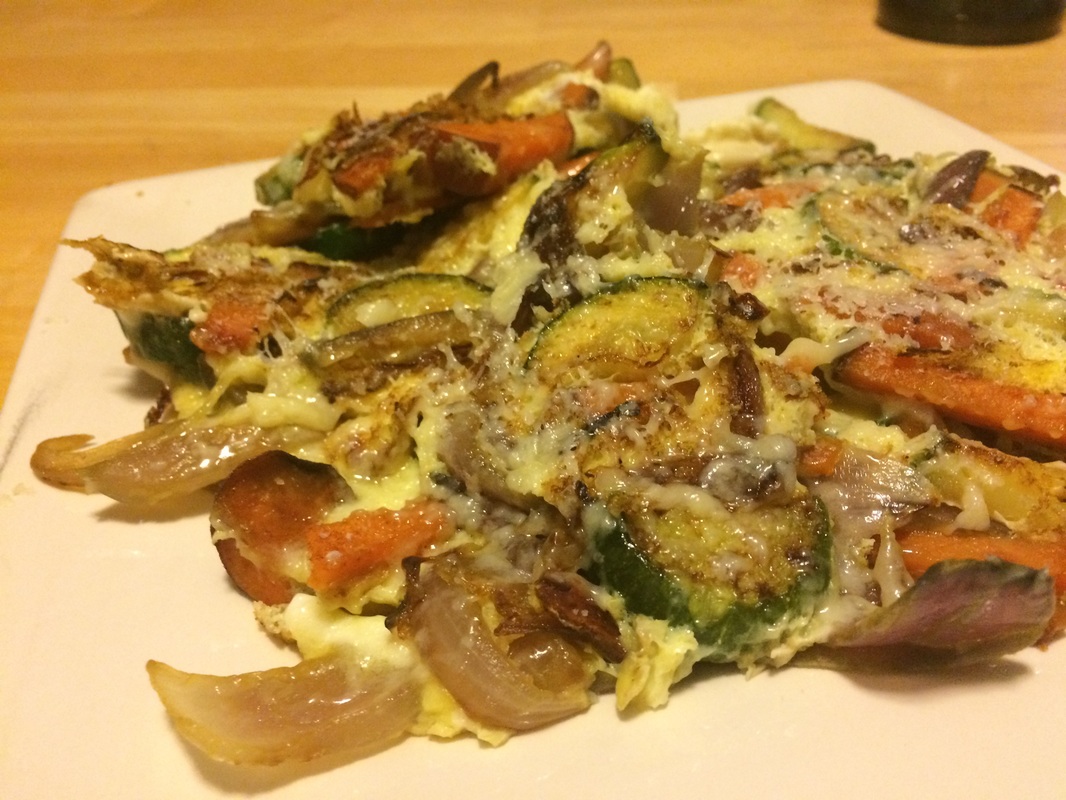 Ingredients:
 InstructionsTurn the stove (with the pan on it duuuuuuui) onto medium heat and melt some lovely grass-fed butter on it (maybe a tablespoon or so). Yes, if you haven't heard, butter is back (and healthy) and grass-fed is the healthiest kind. It's also a high-temperature fat, meaning you can use it for frying, unlike olive oil, which is a low-temperature oil. 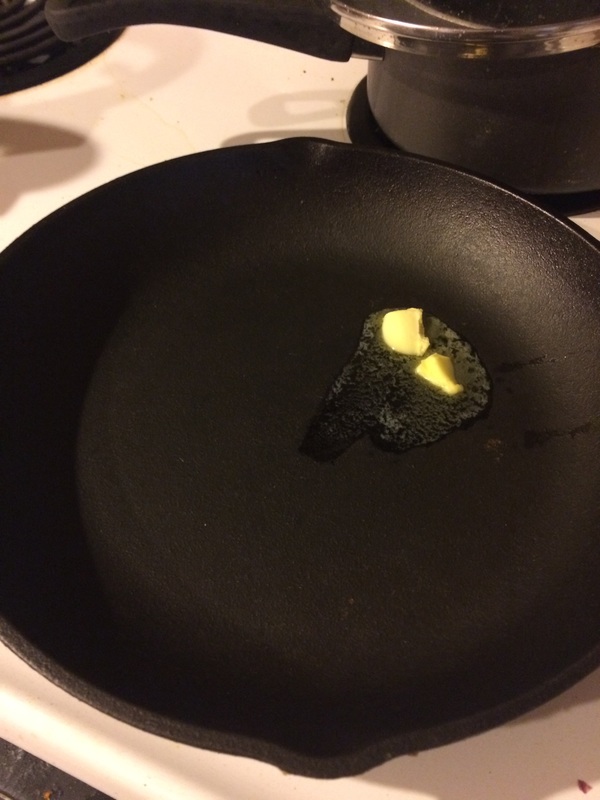 Those veggies won't work if ya don't cut them up, so while you're waiting for that delicious butter to melt, cut them up into pieces like so (shown below). The smaller you cut them, the shorter time it takes to cook them. Only put them in the pan when the butter is melted, and the pan is hot. You know the pan is hot if you put your finger on it and you get a 2nd degree burn. (DON'T ACTUALLY DO THAT!!!) No, but seriously, you can test if it is hot buy putting one piece of vegetable in and hearing if it sizzles. Then you may put the rest in. 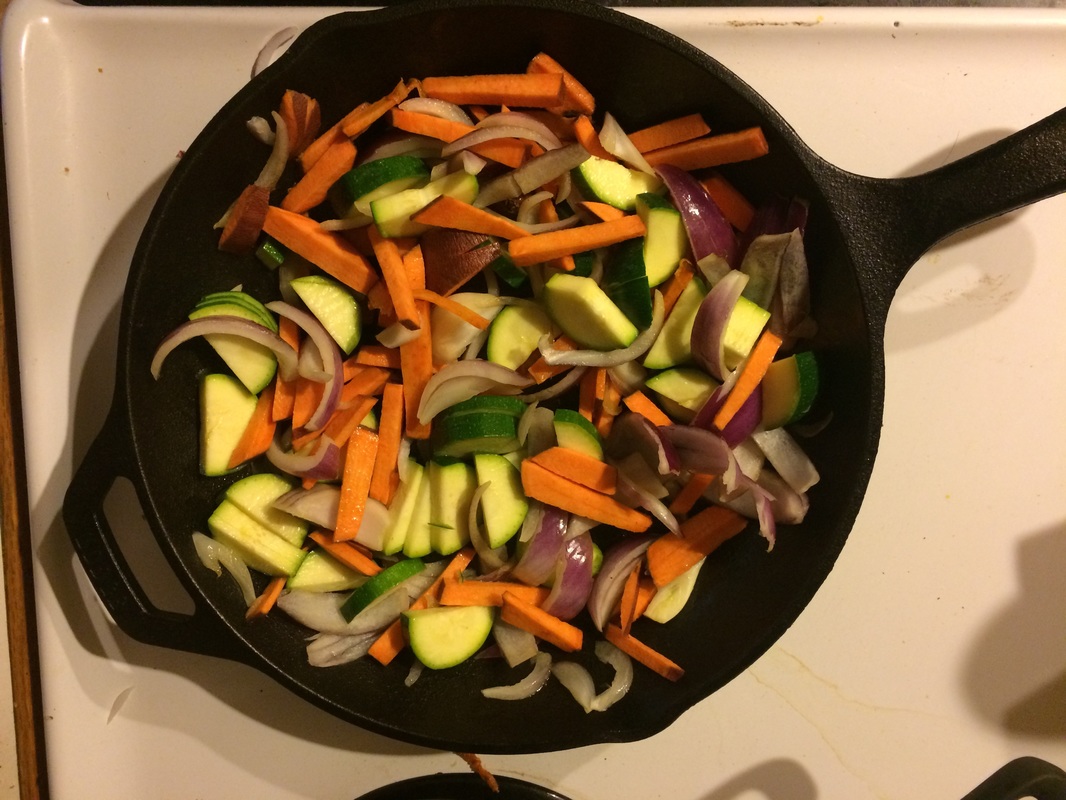 These veggies will probably take about 20 minutes to cook. Make sure you check on them and give it a stir every few minutes, cause we don't want them to burn. While you're waiting, you can crack open the two eggs into a bowl and beat them with a fork. We are not putting the egg mix in until the veggies are cooked, so hang tight. 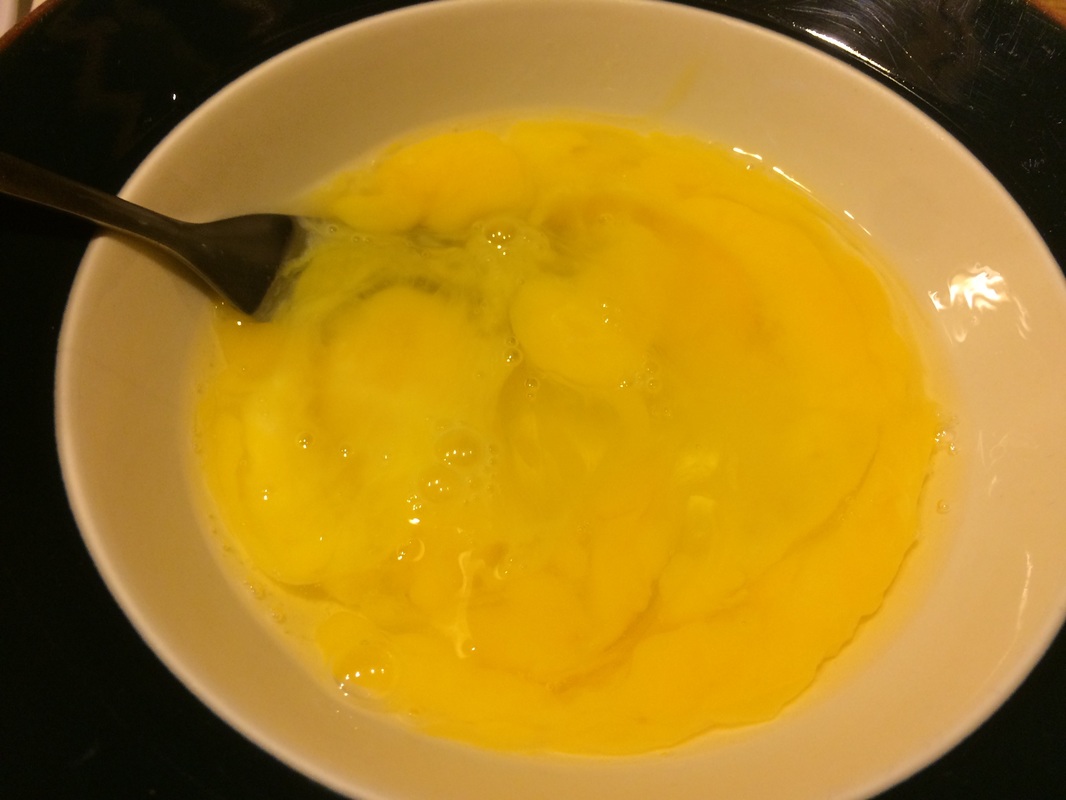 Shown below is what the veggies should look like when cooked. This took about 20 minutes, but you may want to taste one first to make sure they are done. 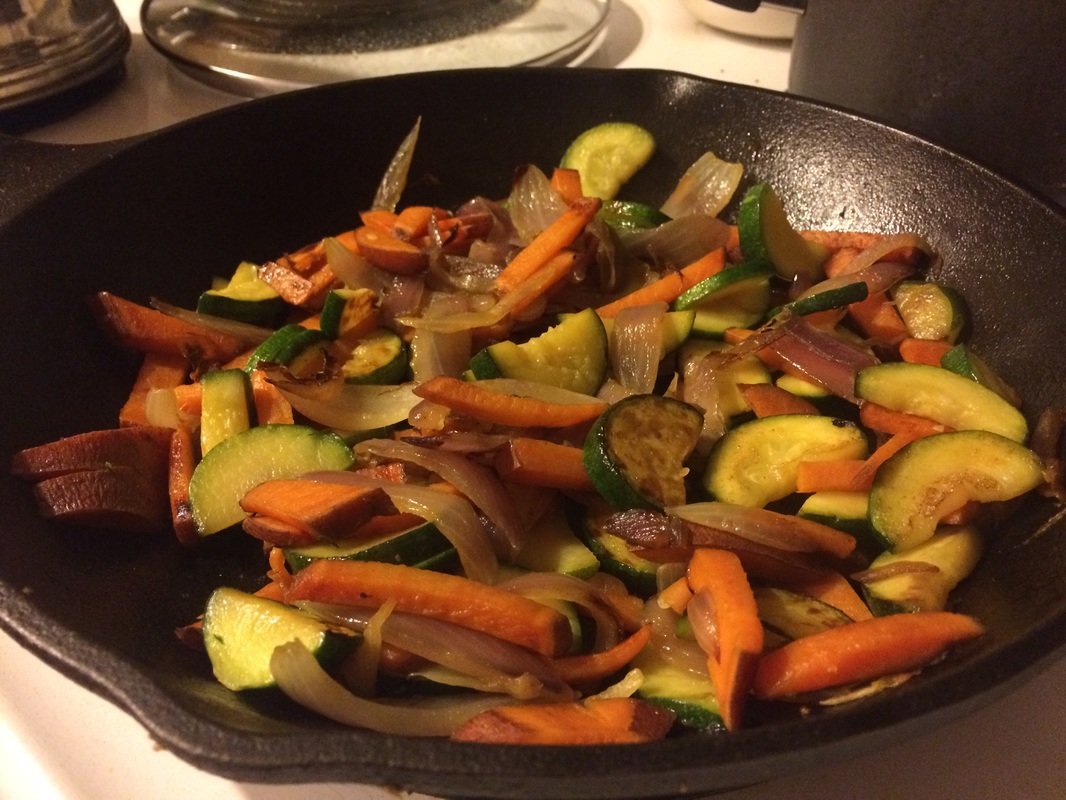 Now is the part where we add the egg mix. Spread the cooked veggies evenly over the pan, then slowly pour the egg mix all around, trying to cover the whole pan. 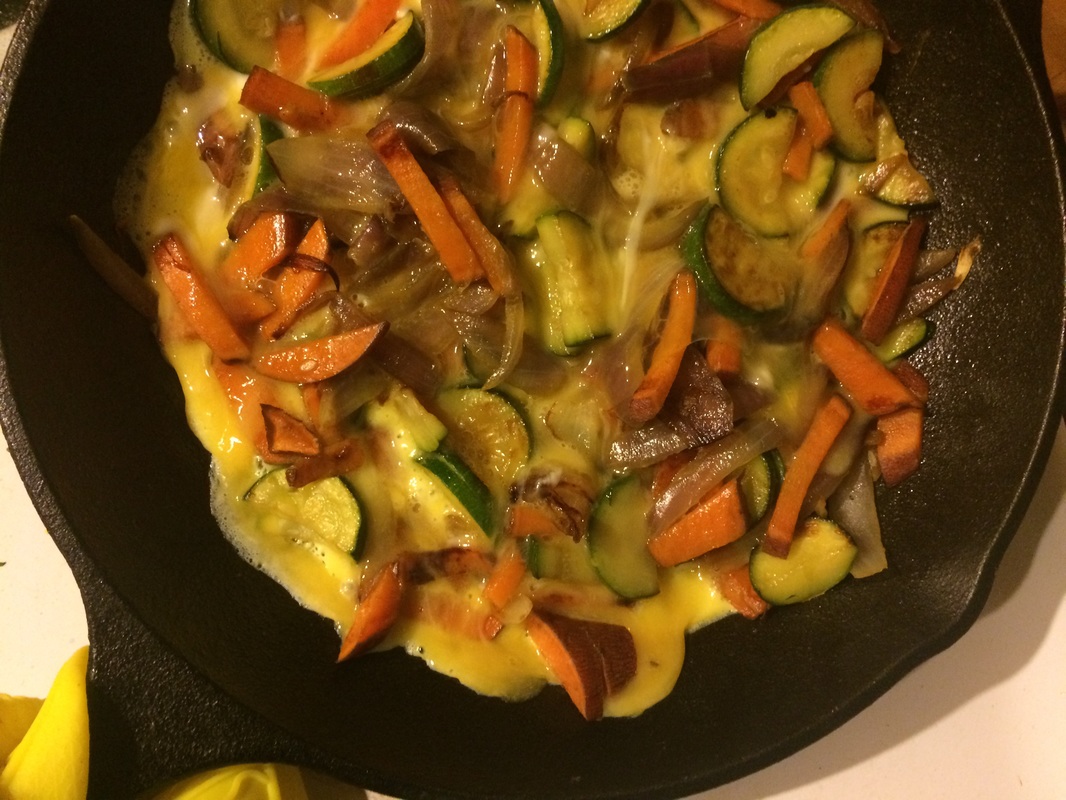 Don't touch it for a minute or so. Just keep your eye on it. Look for little bubbles in the egg mix. What I did next was flip it over in pieces. It would take a lot of skill to flip the whole thing over in one go, and to be honest, it would probably taste the same. The picture below is what t looked like after I flipped it over. Just remember, if all fails and it all falls apart, you still have a great scrambled egg dish. 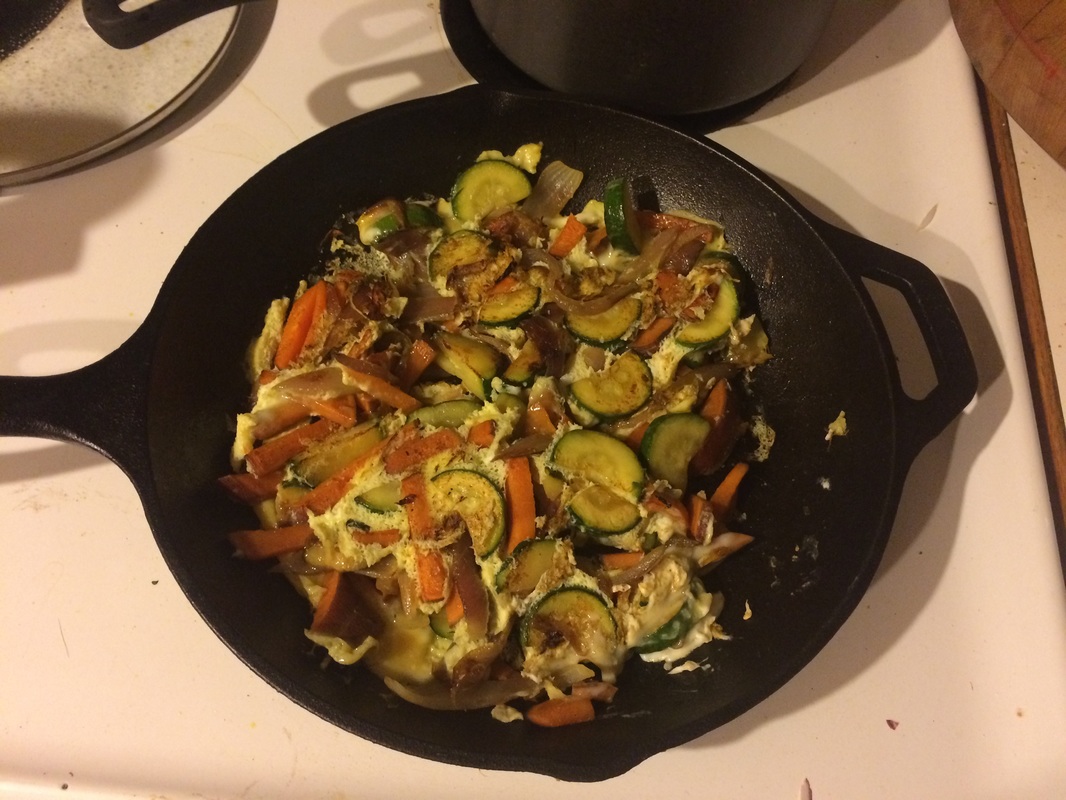 Finally, I'm going to sprinkle the cheese I grated over the top and turn the stove off. 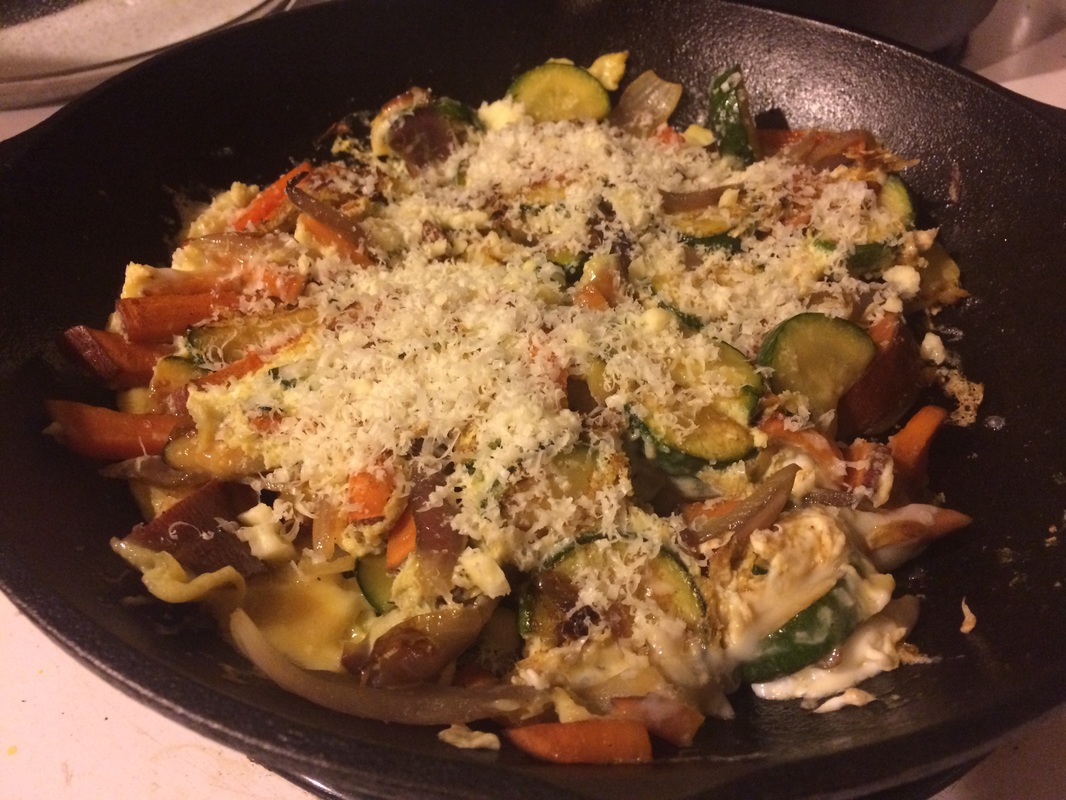 And that's it! Cooking for one can be easy, healthy, and cheap. Stay tuned for parts 3-5 of my go-to meals!
This is part 1 of my 5-part series, "Go to Meals". These are recipes I do on a weekly basis that I find easy, quick, cheap, and healthy. Click for part 2 This roasted veggies recipe is not a whole meal in itself, but I have found it a perfect side dish to almost any meat , packed cold in a salad the next day, or made into an omelette. Once cooked, it keeps several days in the fridge and can be heated up or served cold Ingredients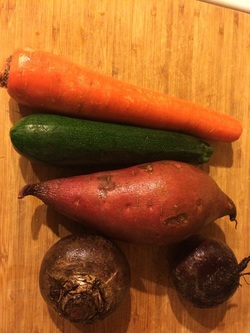
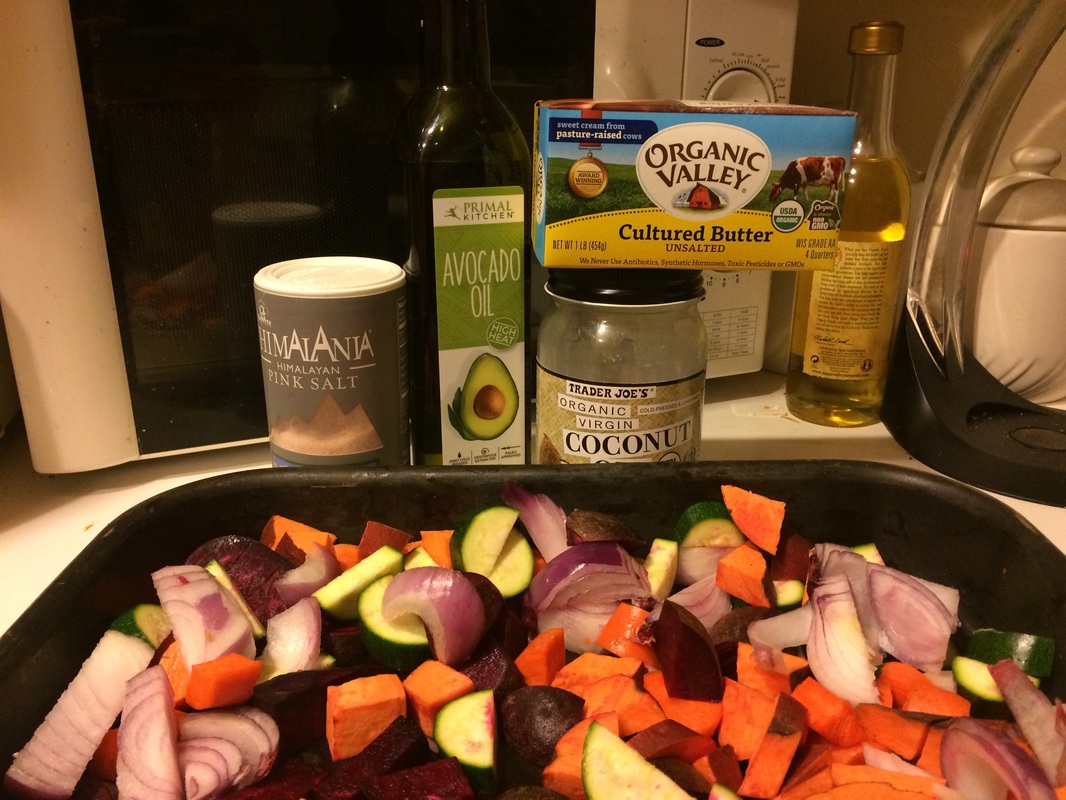 I usually use one kind of cooking oil out of the 3 pictured here: avocado oil, melted grass-fed butter, or coconut oil. Instructions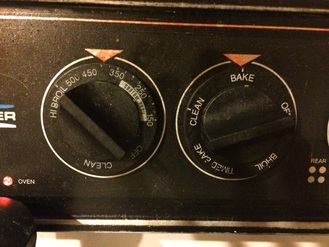 preheat oven to 375. If you are using a cooking fat that is a solid like butter or coconut oil, make sure you melt it Cut them up like in the picture below and spread them out on the baking tray. It should be only one layer. If you stack them up too high, they will not all be roasted. Then put enough oil on them until they are all covered. If you have spray oil, that would work too. Try to stay away from canola or soybean oil if you want this to be a healthy dish. No, "PAM" isn't healthy even though it claims to have "less fat". 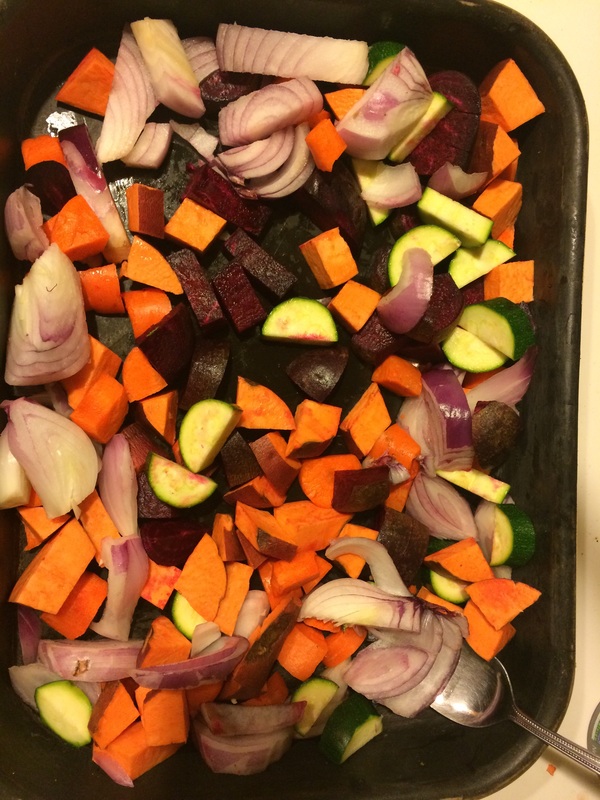 Then all you have to do is put it in the oven and leave it for 45 mins to an hour. these veggies were chosen because they all take the same time to cook, making this an easy recipe. This recipe is one of my favorites because you can literally forget about it for an hour. You can even leave the house if you're feeling daring ;) They should look like the picture below when finished. 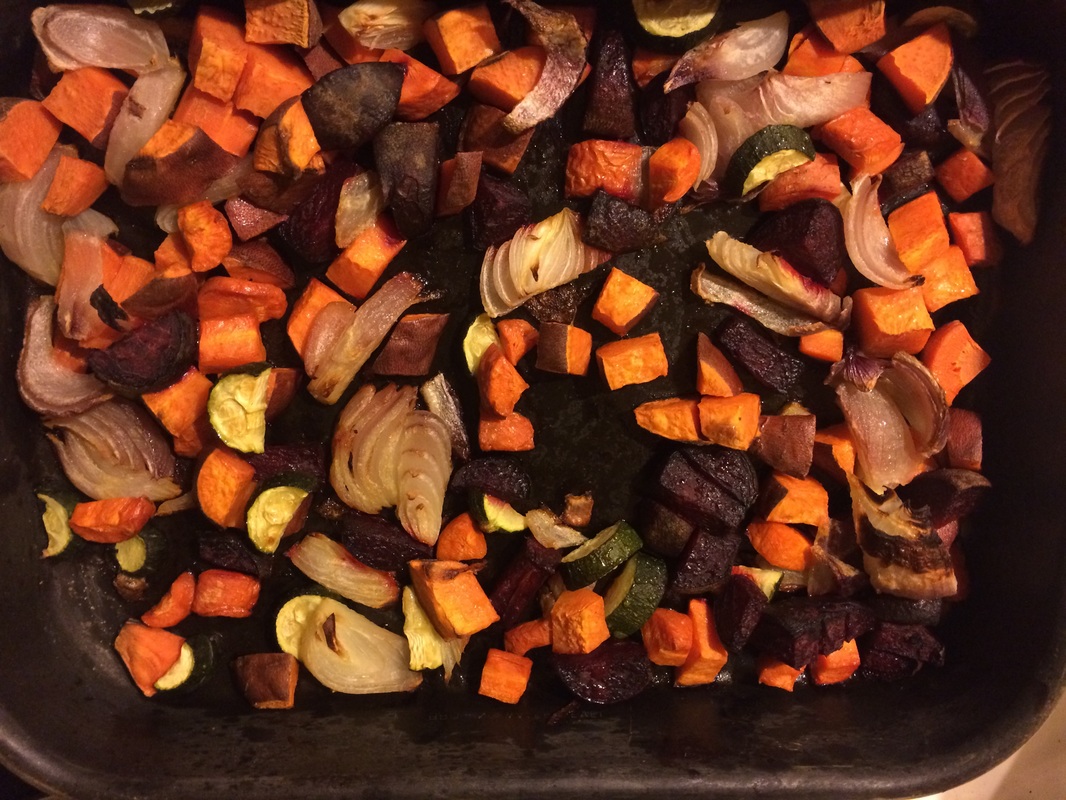 enjoy!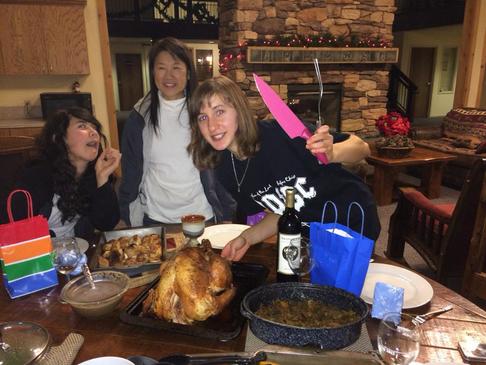 When I was thirteen years old, I took over the task of cooking Christmas dinner for my family, and I have been in charge ever since. Not only do I enjoy preparing the meal itself, but I think the best part about Christmas dinner is the people you spend it with. Christmas dinner is probably my favorite meal to make because of all the different parts, each being its own masterpiece: The turkey, the homemade cranberry sauce, the roasted vegetables. There was also the Christmas Pudding, which until recently, I did not know was strictly a British thing that other cultures did not know about. I love deciding which dishes to make, adapting them to be healthy, and shopping for all the ingredients. For many years before snowboarding became my life, and before I wanted to go to the mountains every day in the winter, my parents, brother, and I would fly to England to stay at my grandma’s house a few weeks around Christmas. She liked to watch British soap operas, and I would sometimes join in and watch an episode or two. Around the holidays, every episode of every show was the same: people screaming at each other while cooking Christmas dinner, stressed to the point of tears. To me, instead of feeling pressure while trying to get every dish together on time and at top quality, I feel freedom; freedom to do my own thing and to tackle the challenge. 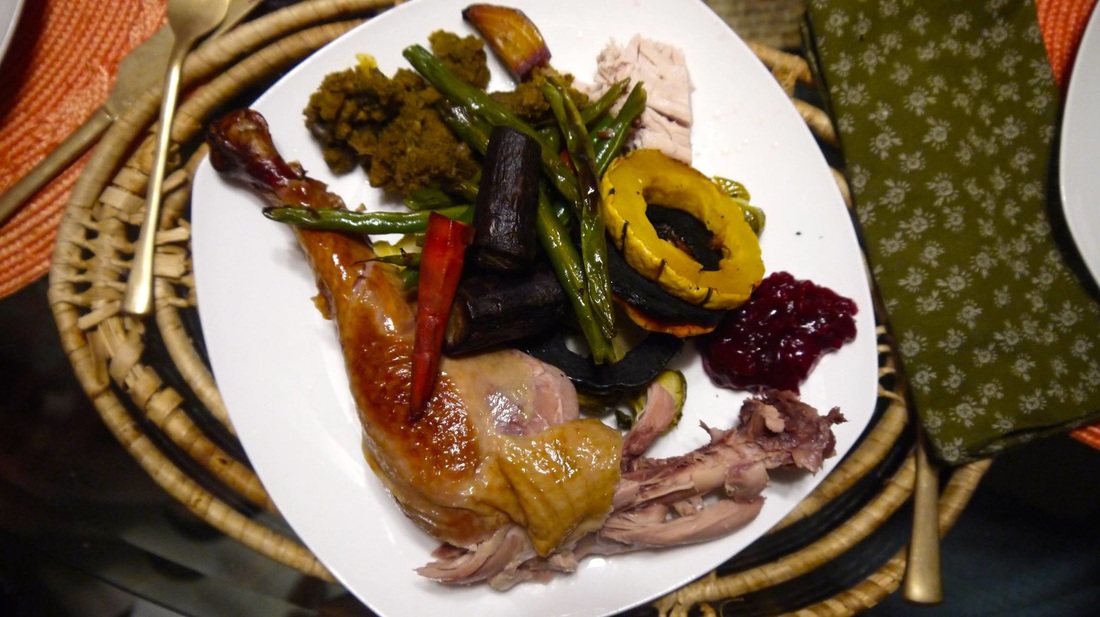 the full christmas dinner plate  The snow in December 2012 The snow in December 2012 2012 was the first Christmas that my family did not spend back in England, since we had planned a trip to the mountains instead to ski with the Peters, another family who often went on ski trips with us. We rented a cabin in Kirkwood, a ski resort in California south of Lake Tahoe and usually only three and a half hours away from our house. However, that time it took us over twelve because of the conditions. I remember driving up there two days before Christmas, with ski equipment, four people, a dog, and twelve days worth of food packed in our car since there were no grocery stores in this remote location. It was complete snowmageddon. Between December 23rd and 25th that year, it probably snowed about eight feet. This made for one of the best days of my life that I can remember. Not only was the pow-riding so good that Christmas day, but we had a wonderful evening with amazing people and delicious food. Before going out and shredding powder that day, I put the turkey in the oven on timer so that it would be cooked by the evening. It was a tiny, old kitchen that I was not familiar with, but it was all I needed. I had prepared a few of the dishes before hand such as the liver and sausage stuffing that was my own adaptation of my grandma’s recipe. I figured I could pull of a full day of snowboarding and still have Christmas dinner on the table by six. Challenge accepted.  After 12 hours, we made it to Kirkwood!  The conditions that day The conditions that day I came in at four when the lifts closed and started my Christmas dinner adventure. That’s how I see cooking big meals like this — as a journey that I am excited to embark on. I chopped the vegetables for roasting — carrots, sweet potato, butternut squash, parsnips, beets, and brussel sprouts still on their branch. I put the stuffing in the oven to warm up. I checked on the turkey I had put in earlier. It was difficult because this kitchen was not designed to create banquets. I’m very strict on serving food piping hot, and that can be difficult when there are so many dishes and so little oven and stove space. Somehow, with magic perhaps, it was all ready at the same time and served hot. It sounds like I’m doing all the work, but Christmas dinner is always a family effort. My mom would help me chop and wash vegetables, and would help me clean up as I cooked. My dad would entertain the guests while the chef was busy. Everyone pitched in to laying the table. We would put out knives and forks, nice, square, paper napkins, and Christmas crackers, yet another thing that I thought everyone knew about besides the pudding that was actually just a British thing. Christmas crackers are like a cardboard tube that you have to pull open with another person, and they make a loud “bang”, like a party popper. They look like a big piece of candy, and are usually the size of a water bottle. Inside are a collection of small gifts, usually including a corny joke written on a piece of paper and colorful, paper hats. What comes to my mind thinking back to Christmases in the past is a rainbow of those hats all around the table, and everyone telling bad jokes. 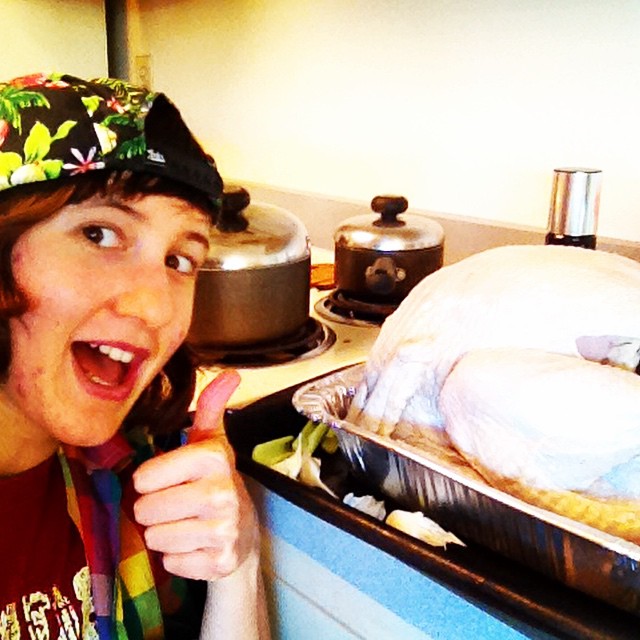 embarking on my cooking adventure! After starting to cook the meal, we found out that four more people would be joining us, so I was cooking for twelve. They were friends of the family that was originally planning on joining us, and they had no plans for Christmas evening. We invited them in because that is what the holidays are about — opening your doors to people and spending time with family and friends. And besides, who cooks “just enough food” on Christmas day? I sure didn’t. What else was memorable about this evening was the sharing of cultures from around the world. The dessert I made was the aforementioned Christmas pudding. The Christmas pudding is like a fruitcake that I made from scratch out of dried fruit, carrots, coconut, eggs, cinnamon, and walnuts. What you then do is douse it in rum and light it on fire. The fire burns up all the alcohol and caramelizes the outside of the cake before extinguishing itself. Here we were, in America with a Taiwanese family, watching the beautiful blue flames swirl around the traditional British Christmas pudding. After a full day of the twelve of us skiing together in some of the best conditions I’ve experienced, it was truly magical. 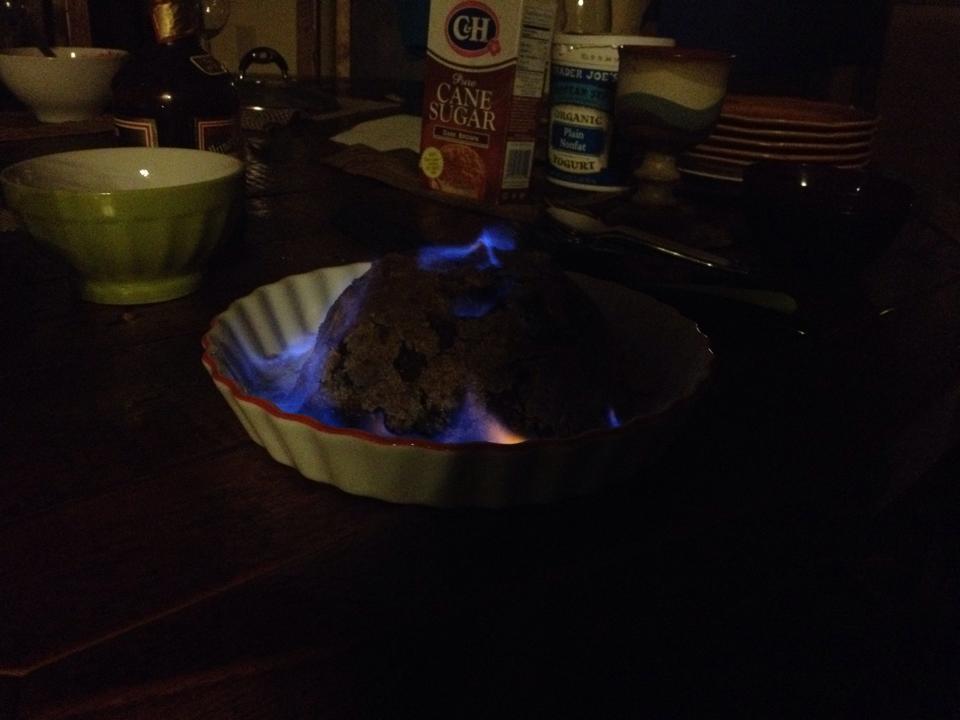 The christmas pudding |
Food blogGood food that happens to be healthy! Recipes, reviews, and other food related topics! Archives
September 2018
Categories
All
Instagram: @Matthewsixcafe
|


 RSS Feed